It all started when I was gifted some Ash boards from the family farm, that were rough sawn, and stored in a shed for twenty plus years. I gladly took them home after sawing the sixteen footers in half by hand, and tossing those heavy suckers in my van.
I planed them for what felt like hours, and then had to man handle them across my jointer. Which took forever to do. This was back when I had my tiny 10″ Ryobi table saw, which kicked on full tilt, and scared me to death. Cutting 2 inch thick ash boards that were 80 plus inches in length took some doing, and set my heart to pounding. I settled on four inch wide boards by roughly eighty inches long, and two inches thick.
I then cut down four cross members, two in Ash, and two in a douglas fir that was pretty heavily knotted. It was at this point that I began to run out of warm season, and all my flat, square milled lumber got shut away in the garage for seven months.
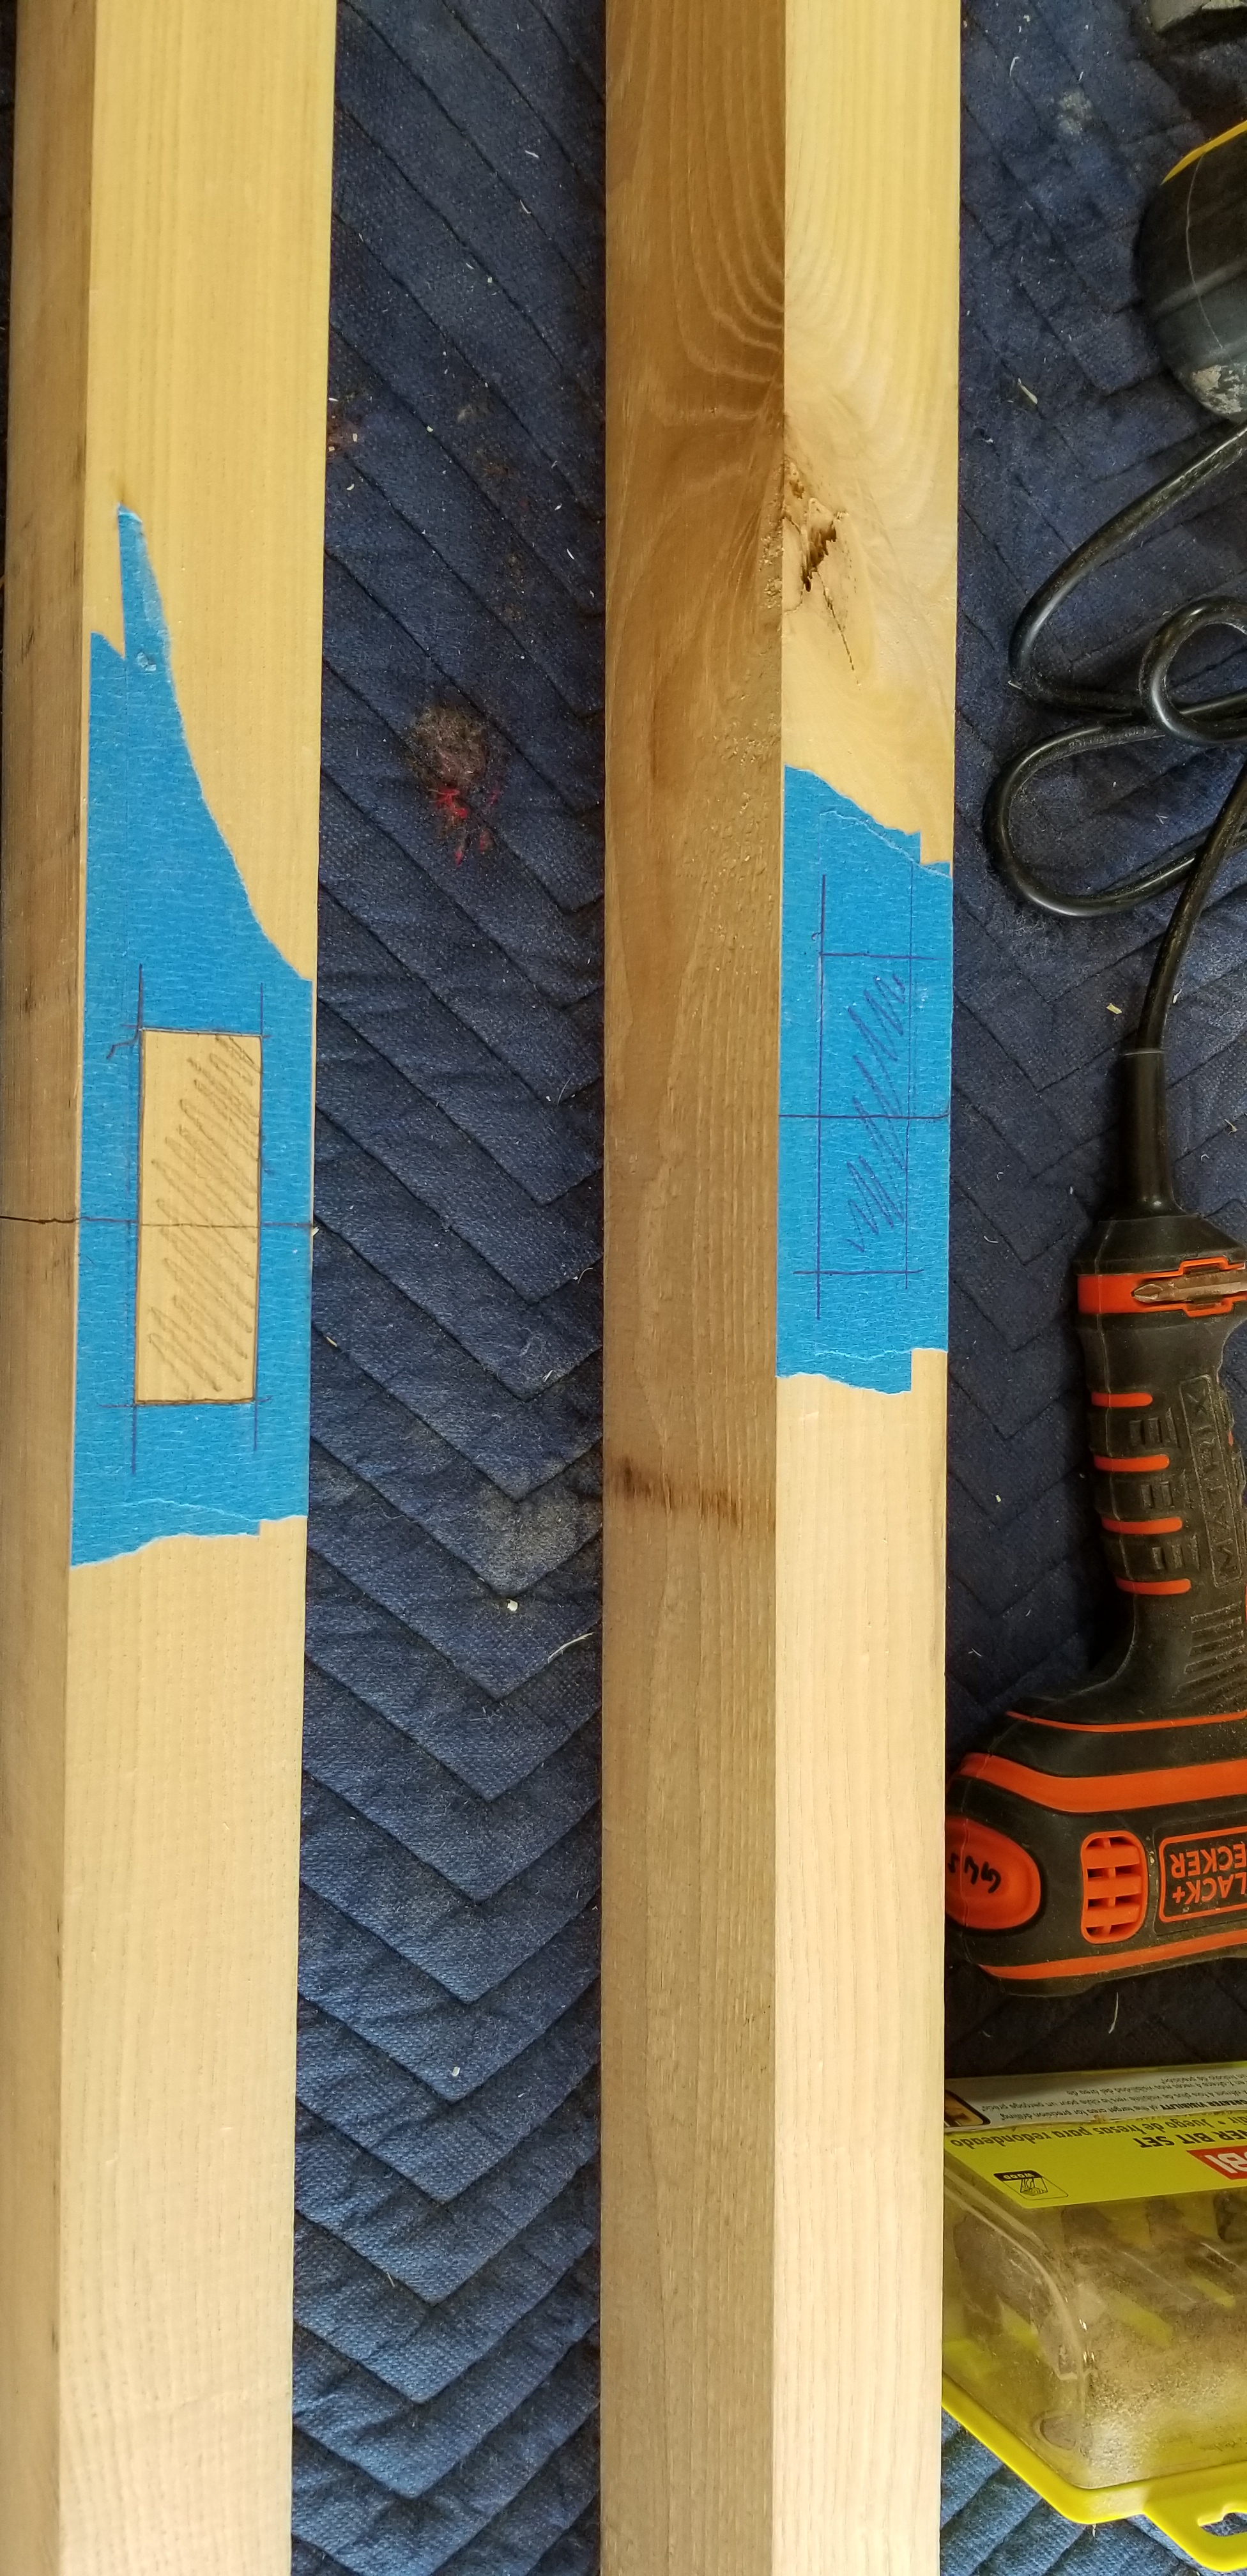
The following spring I dug out my lumber, which was still square and decided to hand cut some mortises for the top and bottom of the door uprights. I first used a circular saw to cut two slices through the end grain about four inches deep. This was super sketchy, and my super old school, under powered Kawasaki circular saw died after a cut & a half – twice. So I finished it off with a Stanley hand saw. You know the old kind that weirdos play with a violin bow to make high pitched whiney muzak. I had to climb up on my work bench in order to get this to work.
I gathered up my chisels and a hammer and got dug in cutting away the channel where the cross members would rest. This would prove a difficult and arduous task. It took several days, and my channel was not straight, nor were they even. I took a file to them, and worked that for a few days too. It was at this point that I started to refinish a rocking chair for my very pregnant sister in law, and that took my whole season.
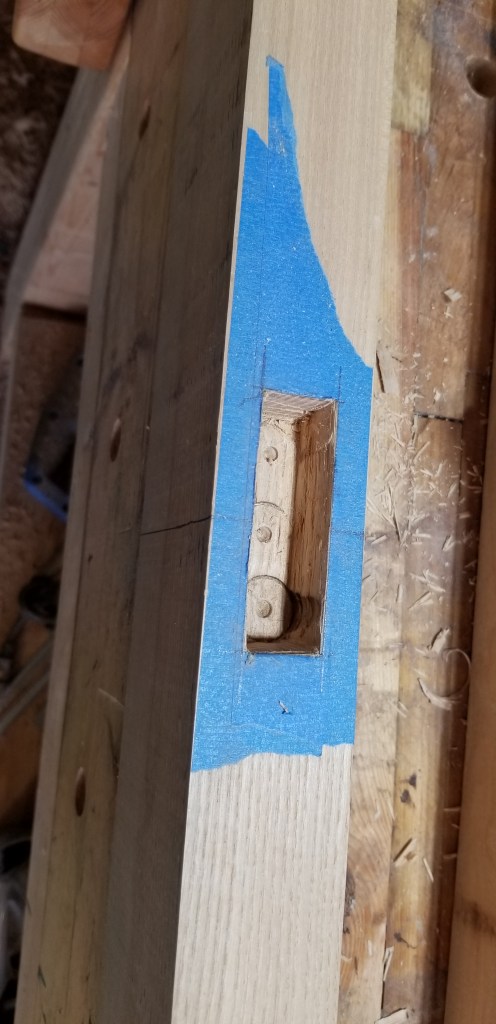
The following year ( this year 2022) I took some rasps to my channels, and evened them out a fair bit. I then used a brand new Dado blade to cut some even tenons for the cross members. It was an endless cycle of dry fit testing, rasping, filing, and planing until I had a suitable snug fit. Then I measured out my center line, and cut out two mortises for the third, and final center cross member. I hugged it out with a forstner bit, then used a multi tool to cut through the rest, and then hand chiseled it to a clear rectangular hole. It worked quite well. After assembling it all as a dry fit, I noticed my angles were all wonky, and then realized my flat, square lumber, was now bowed, and twisting ever so noticeably. But as I was about to begin sanding I hit the most egregious spots with a hand plane, and sort of made the best of it.
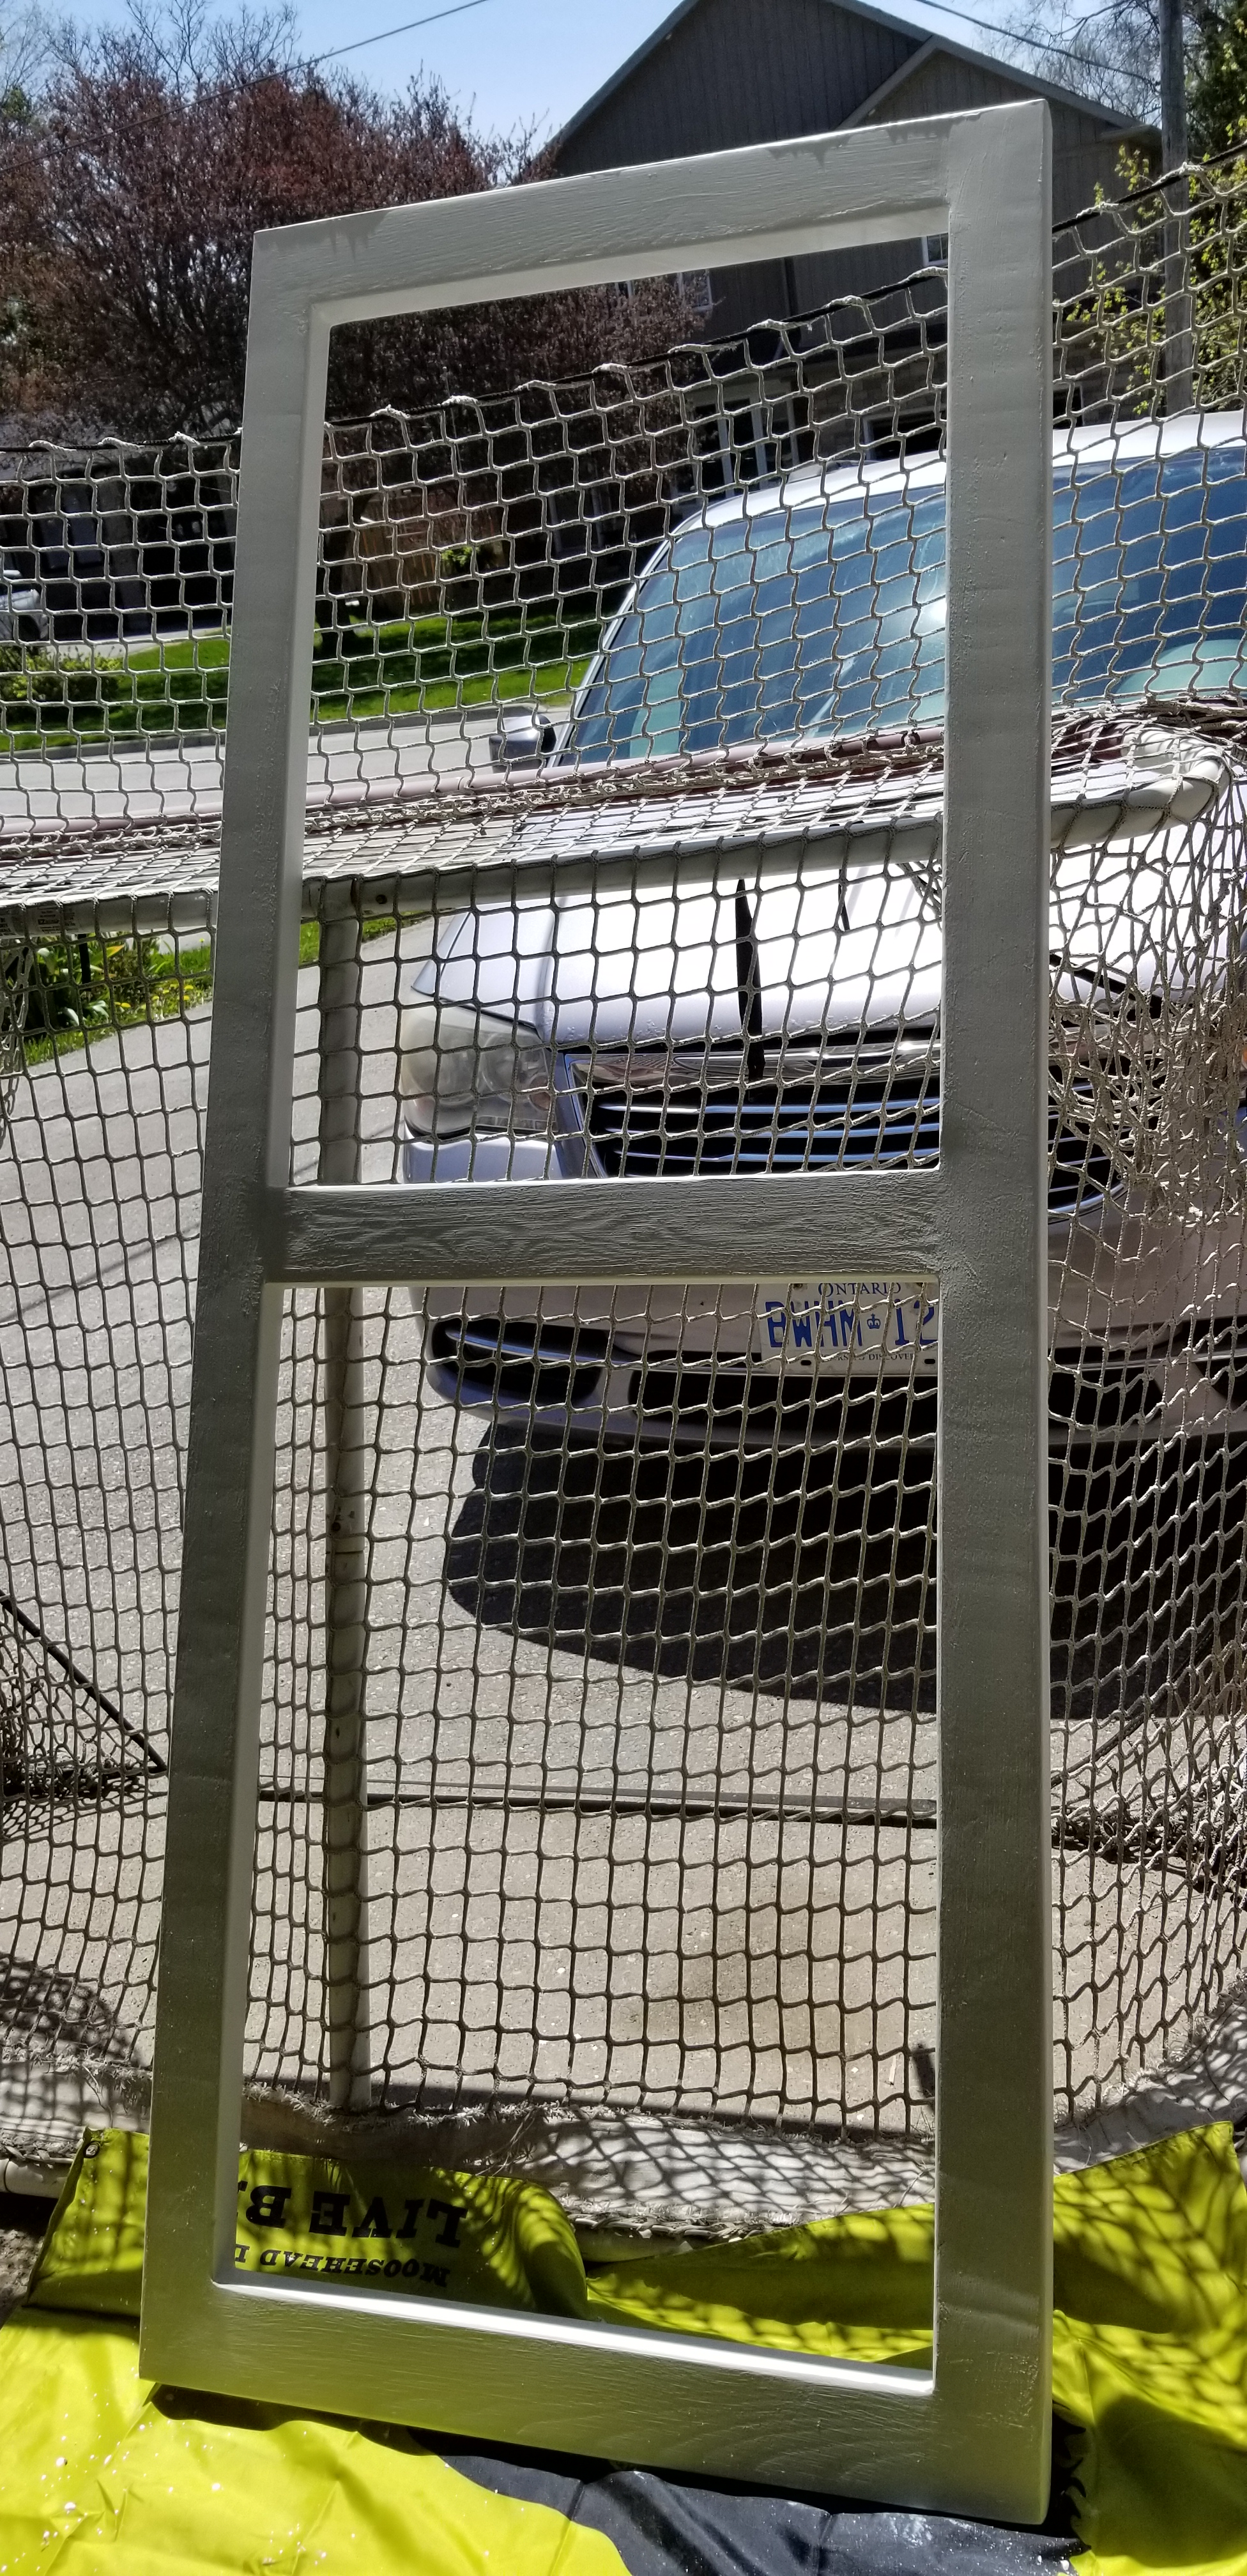
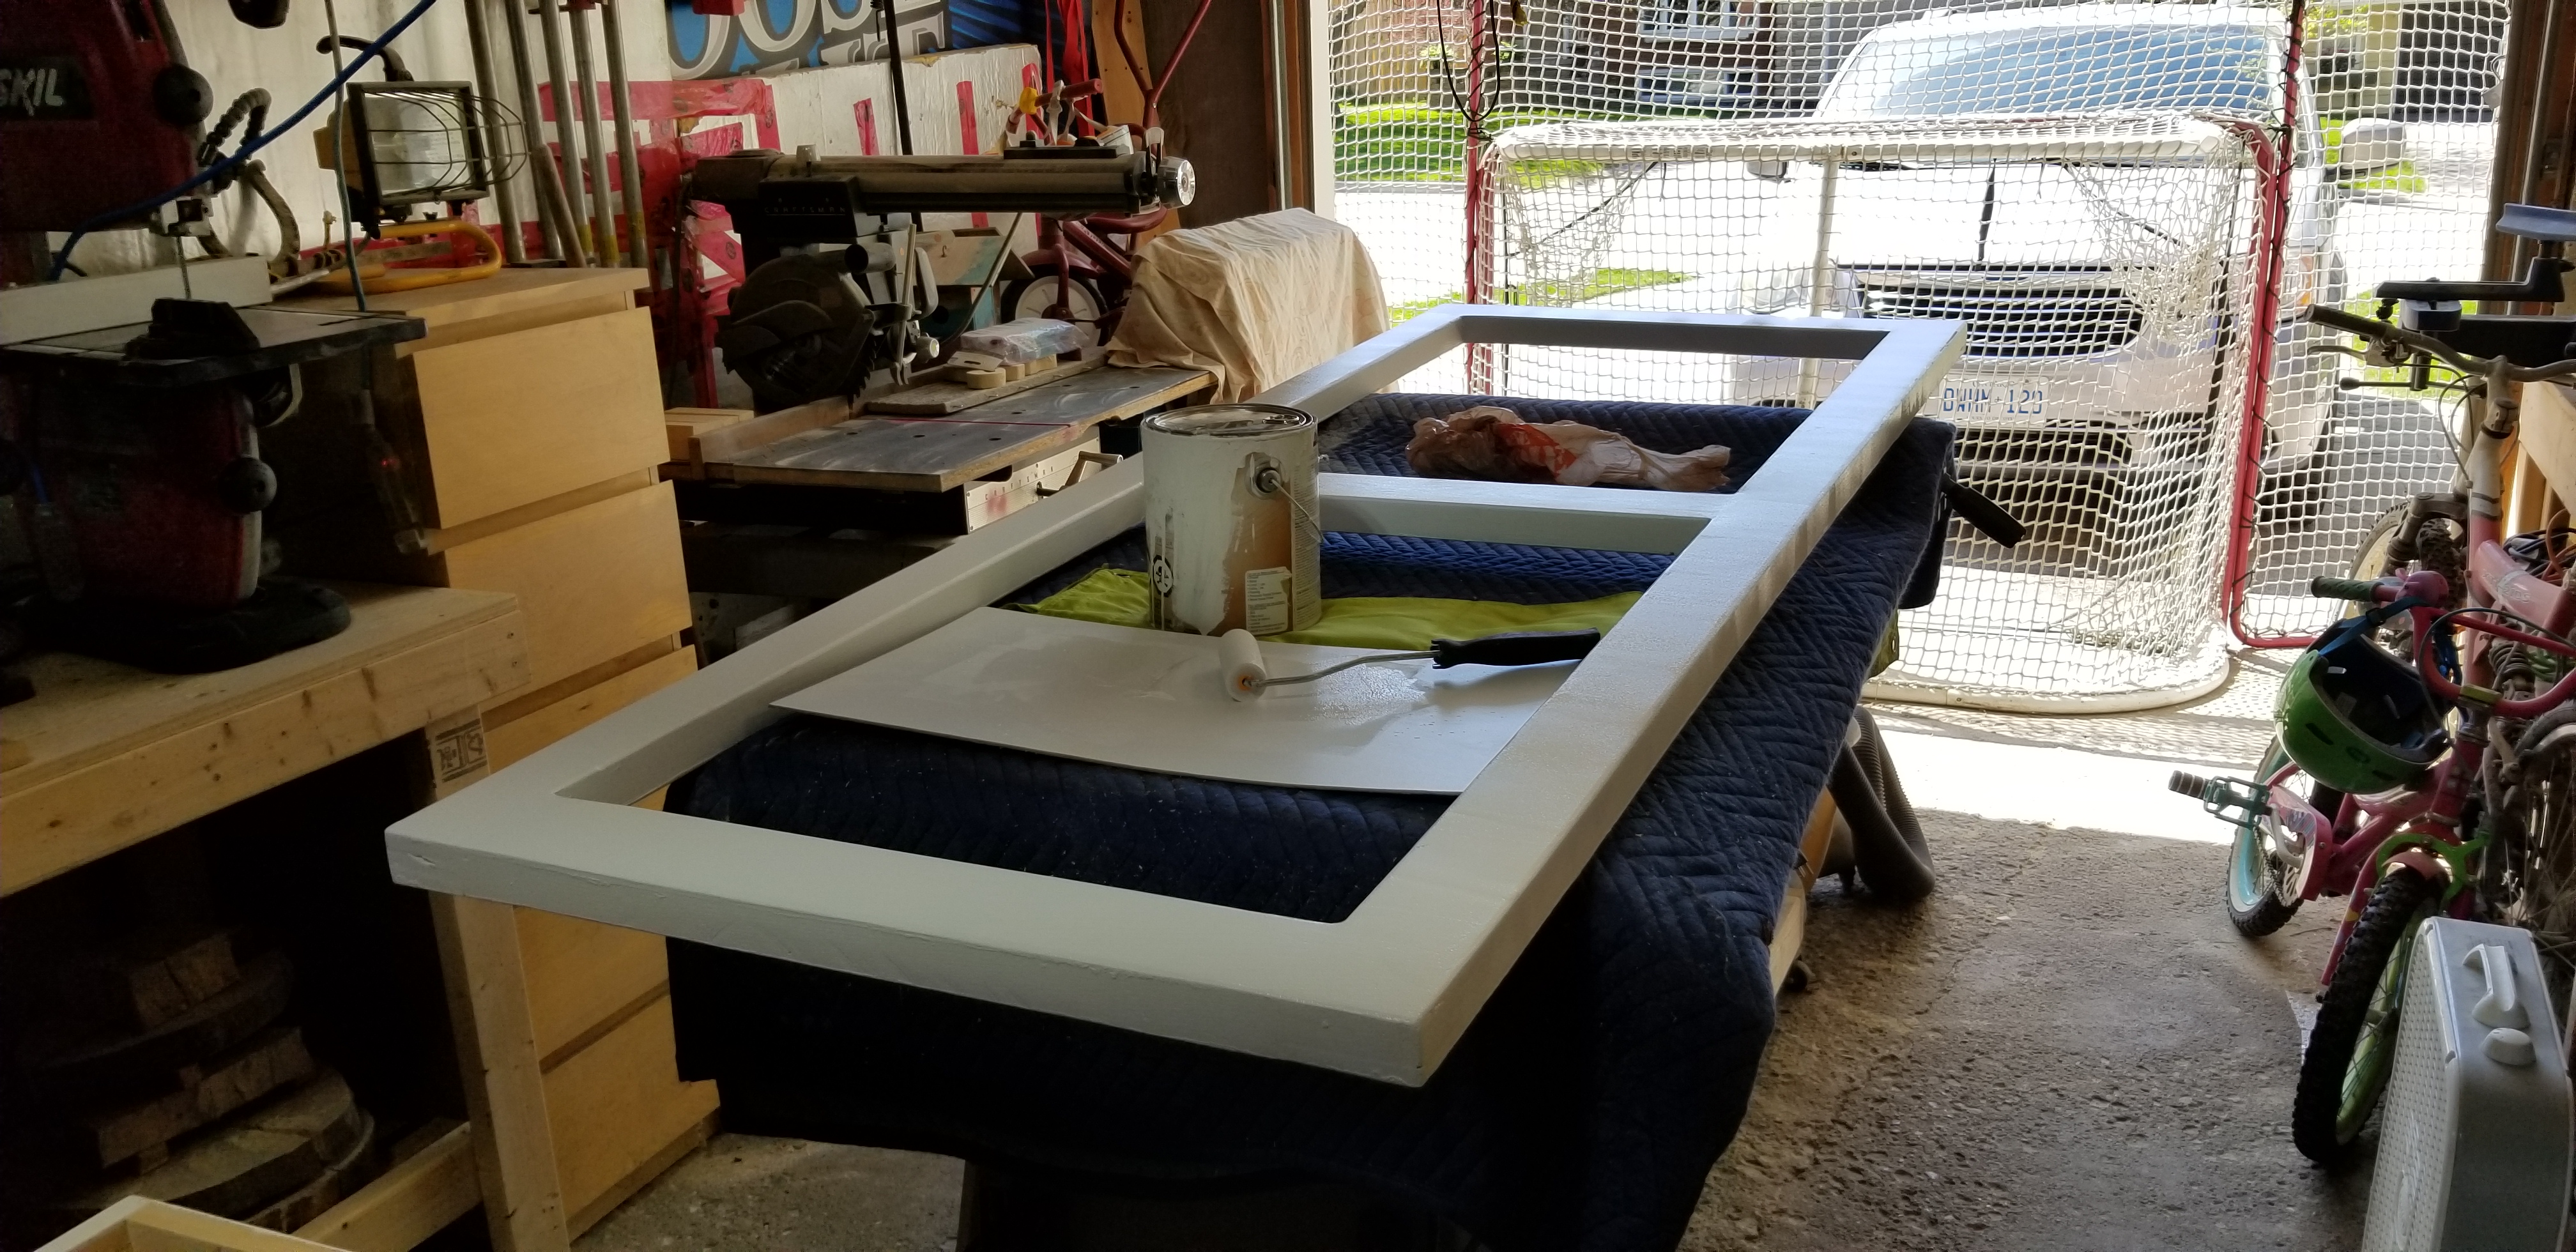
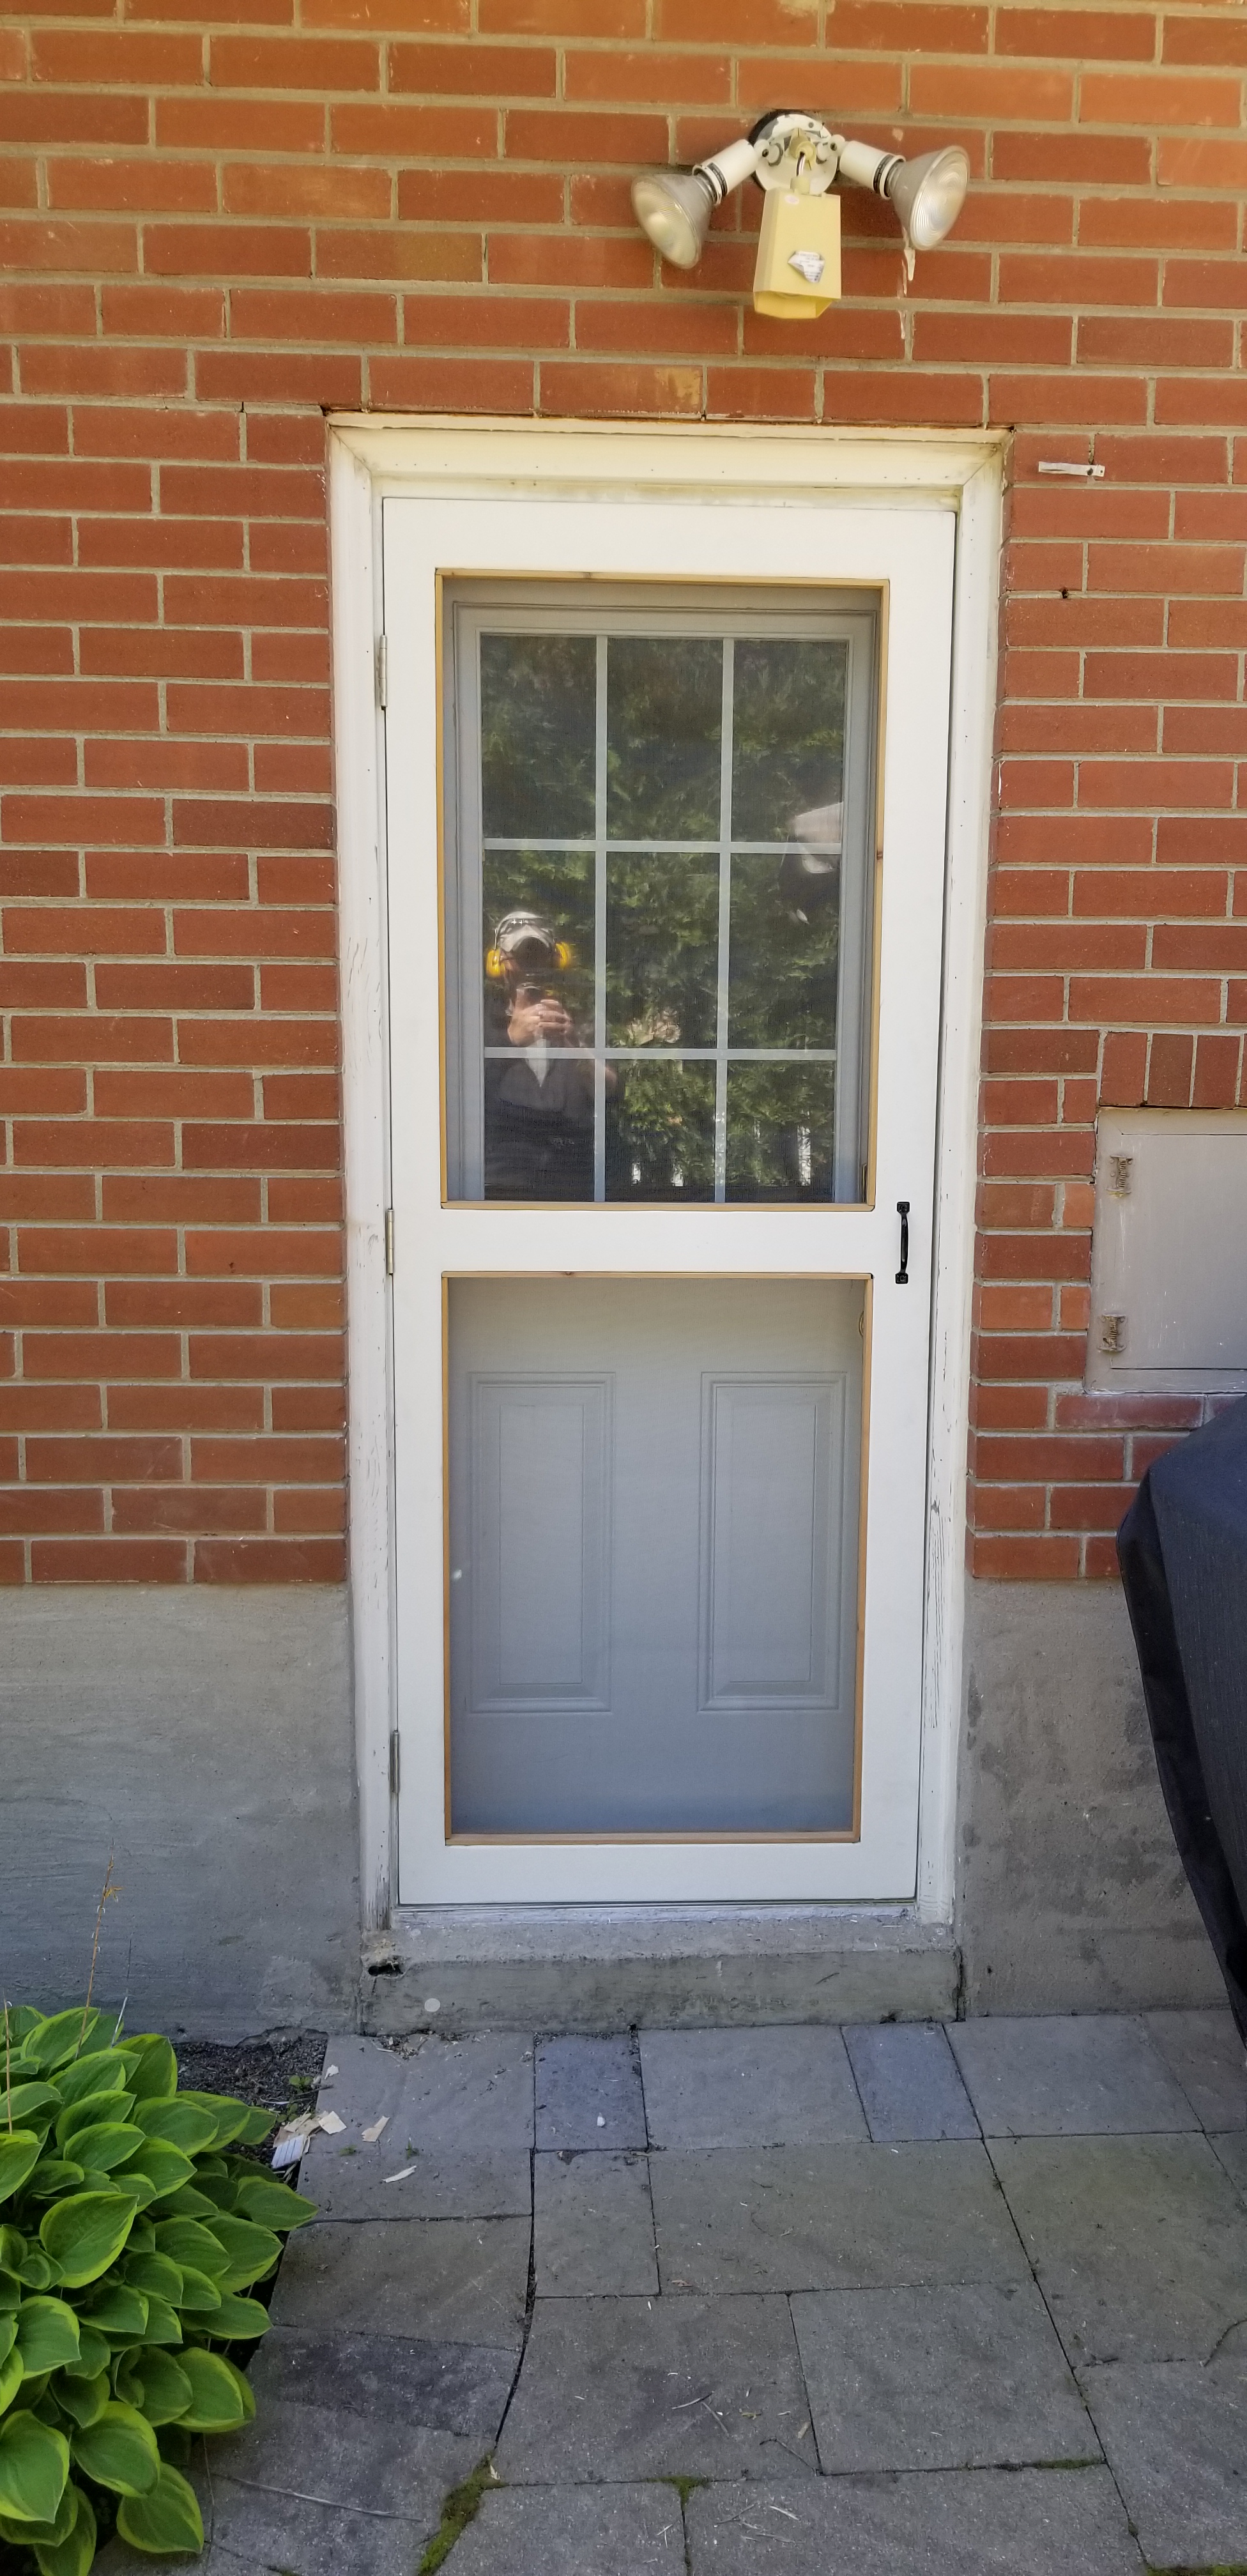
I took the time to glue the frame together. Then in each corner I drilled out a 3/8ths hole and glued some dowels through the joints. Flush cut those, and then did endless rounds up through the grits on every single surface of the door. I stopped to add copious amounts of filler, which meant no more natural wood look, but I was now going to have to paint it all white, to match the house trim.
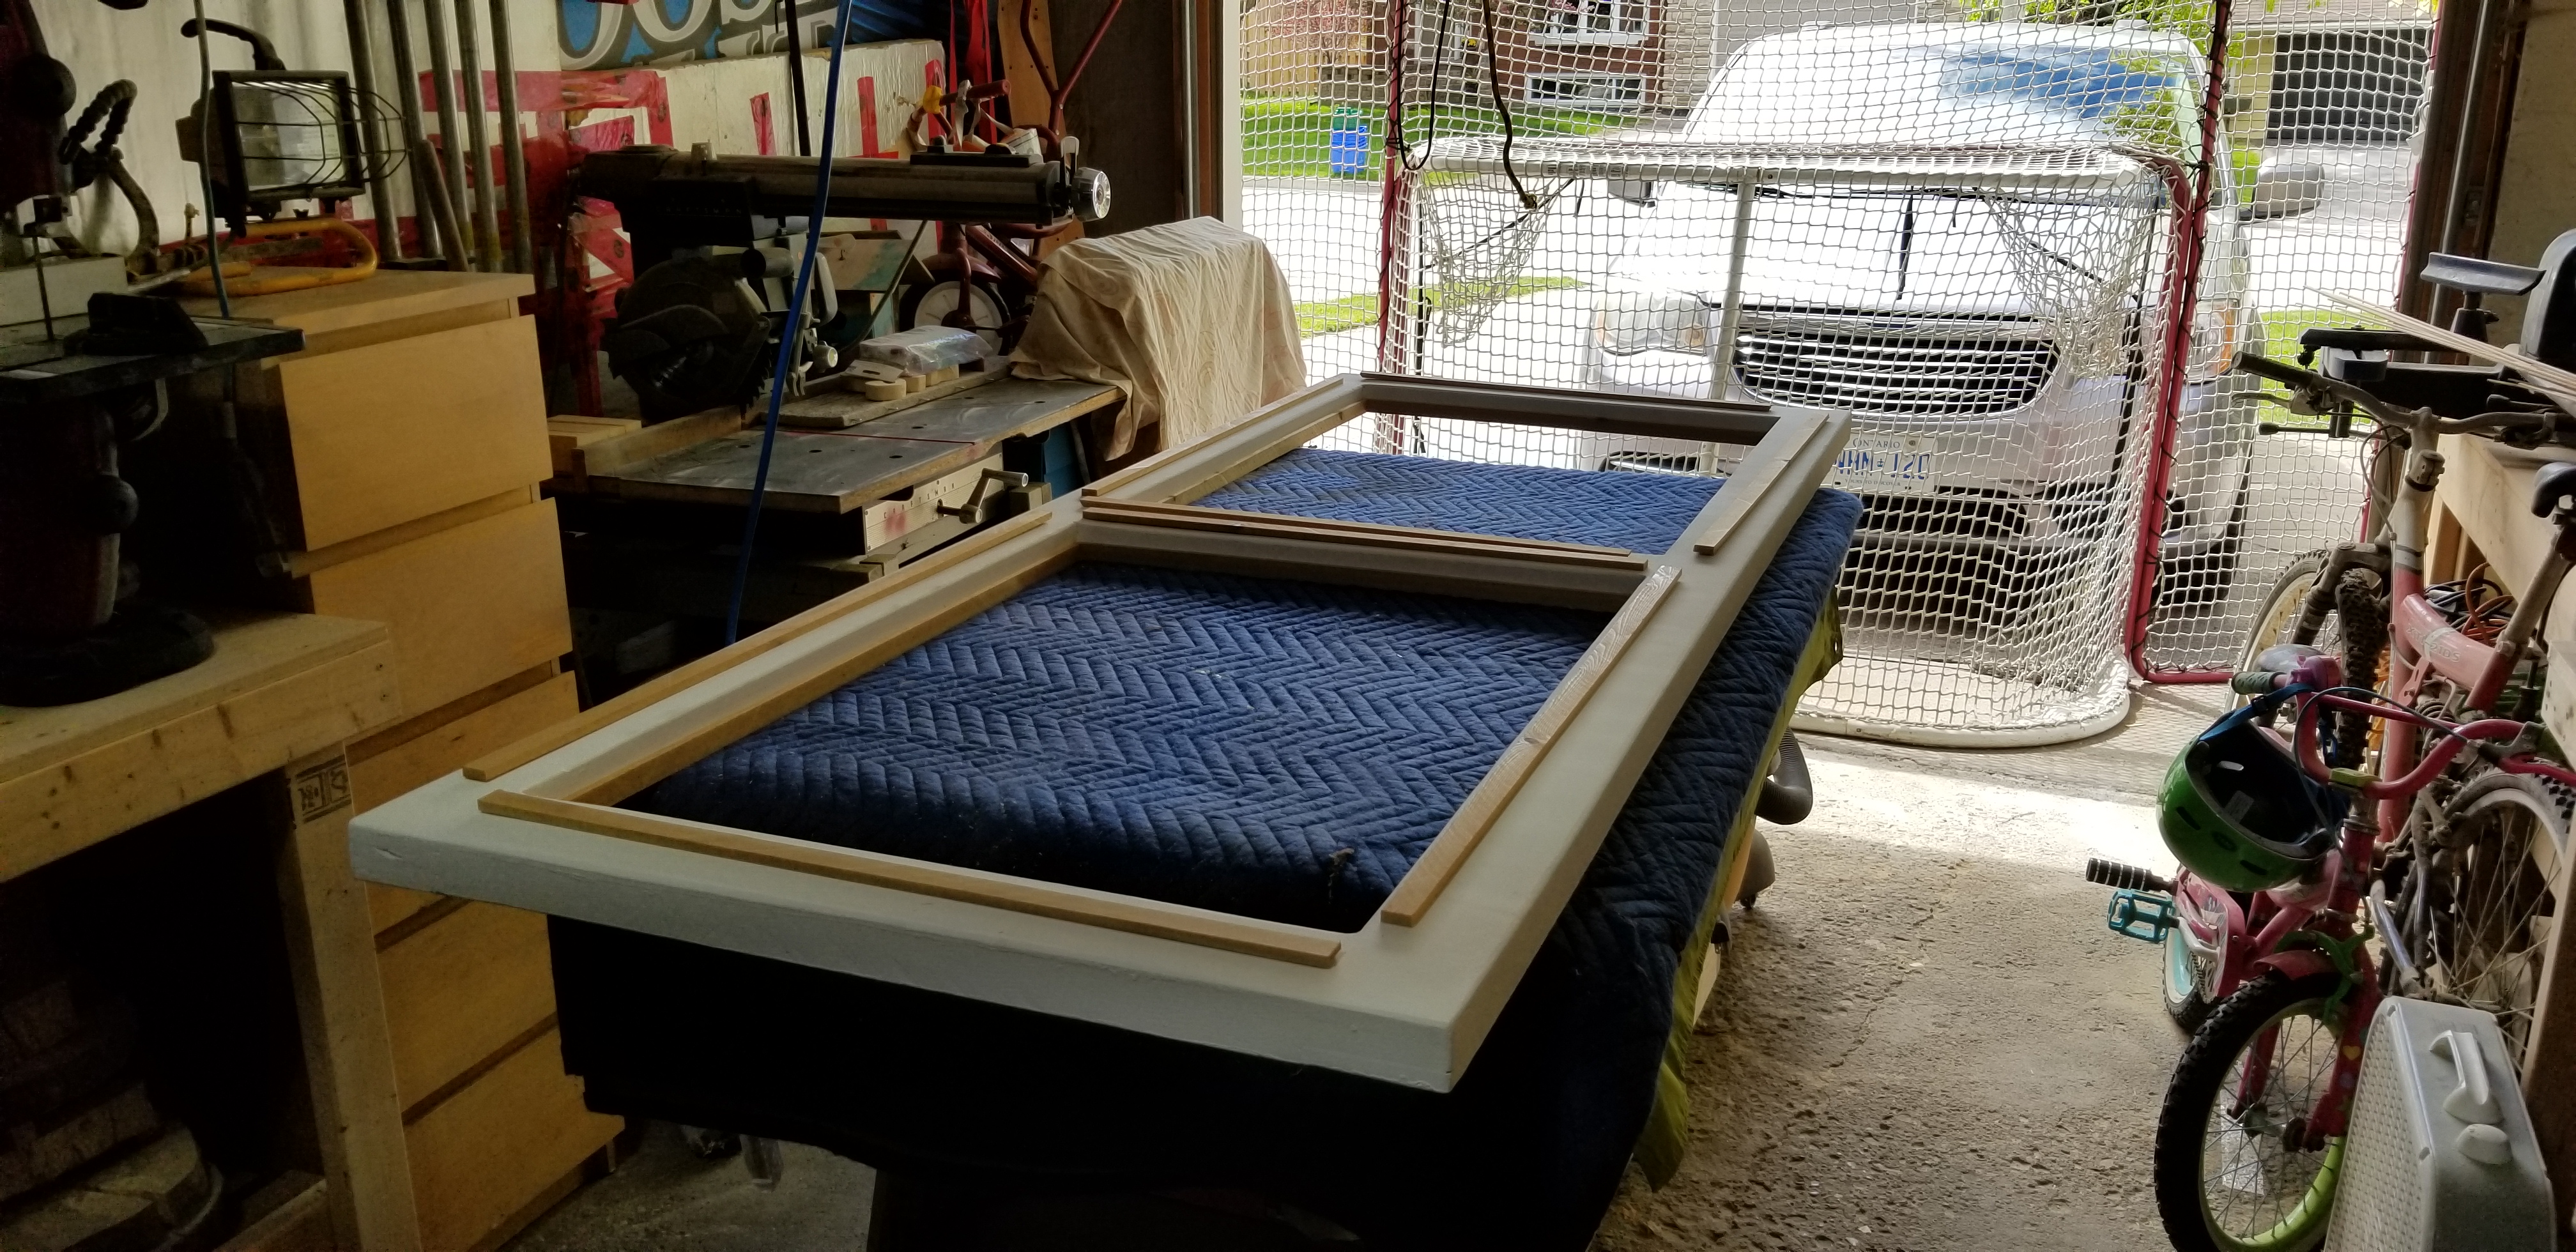
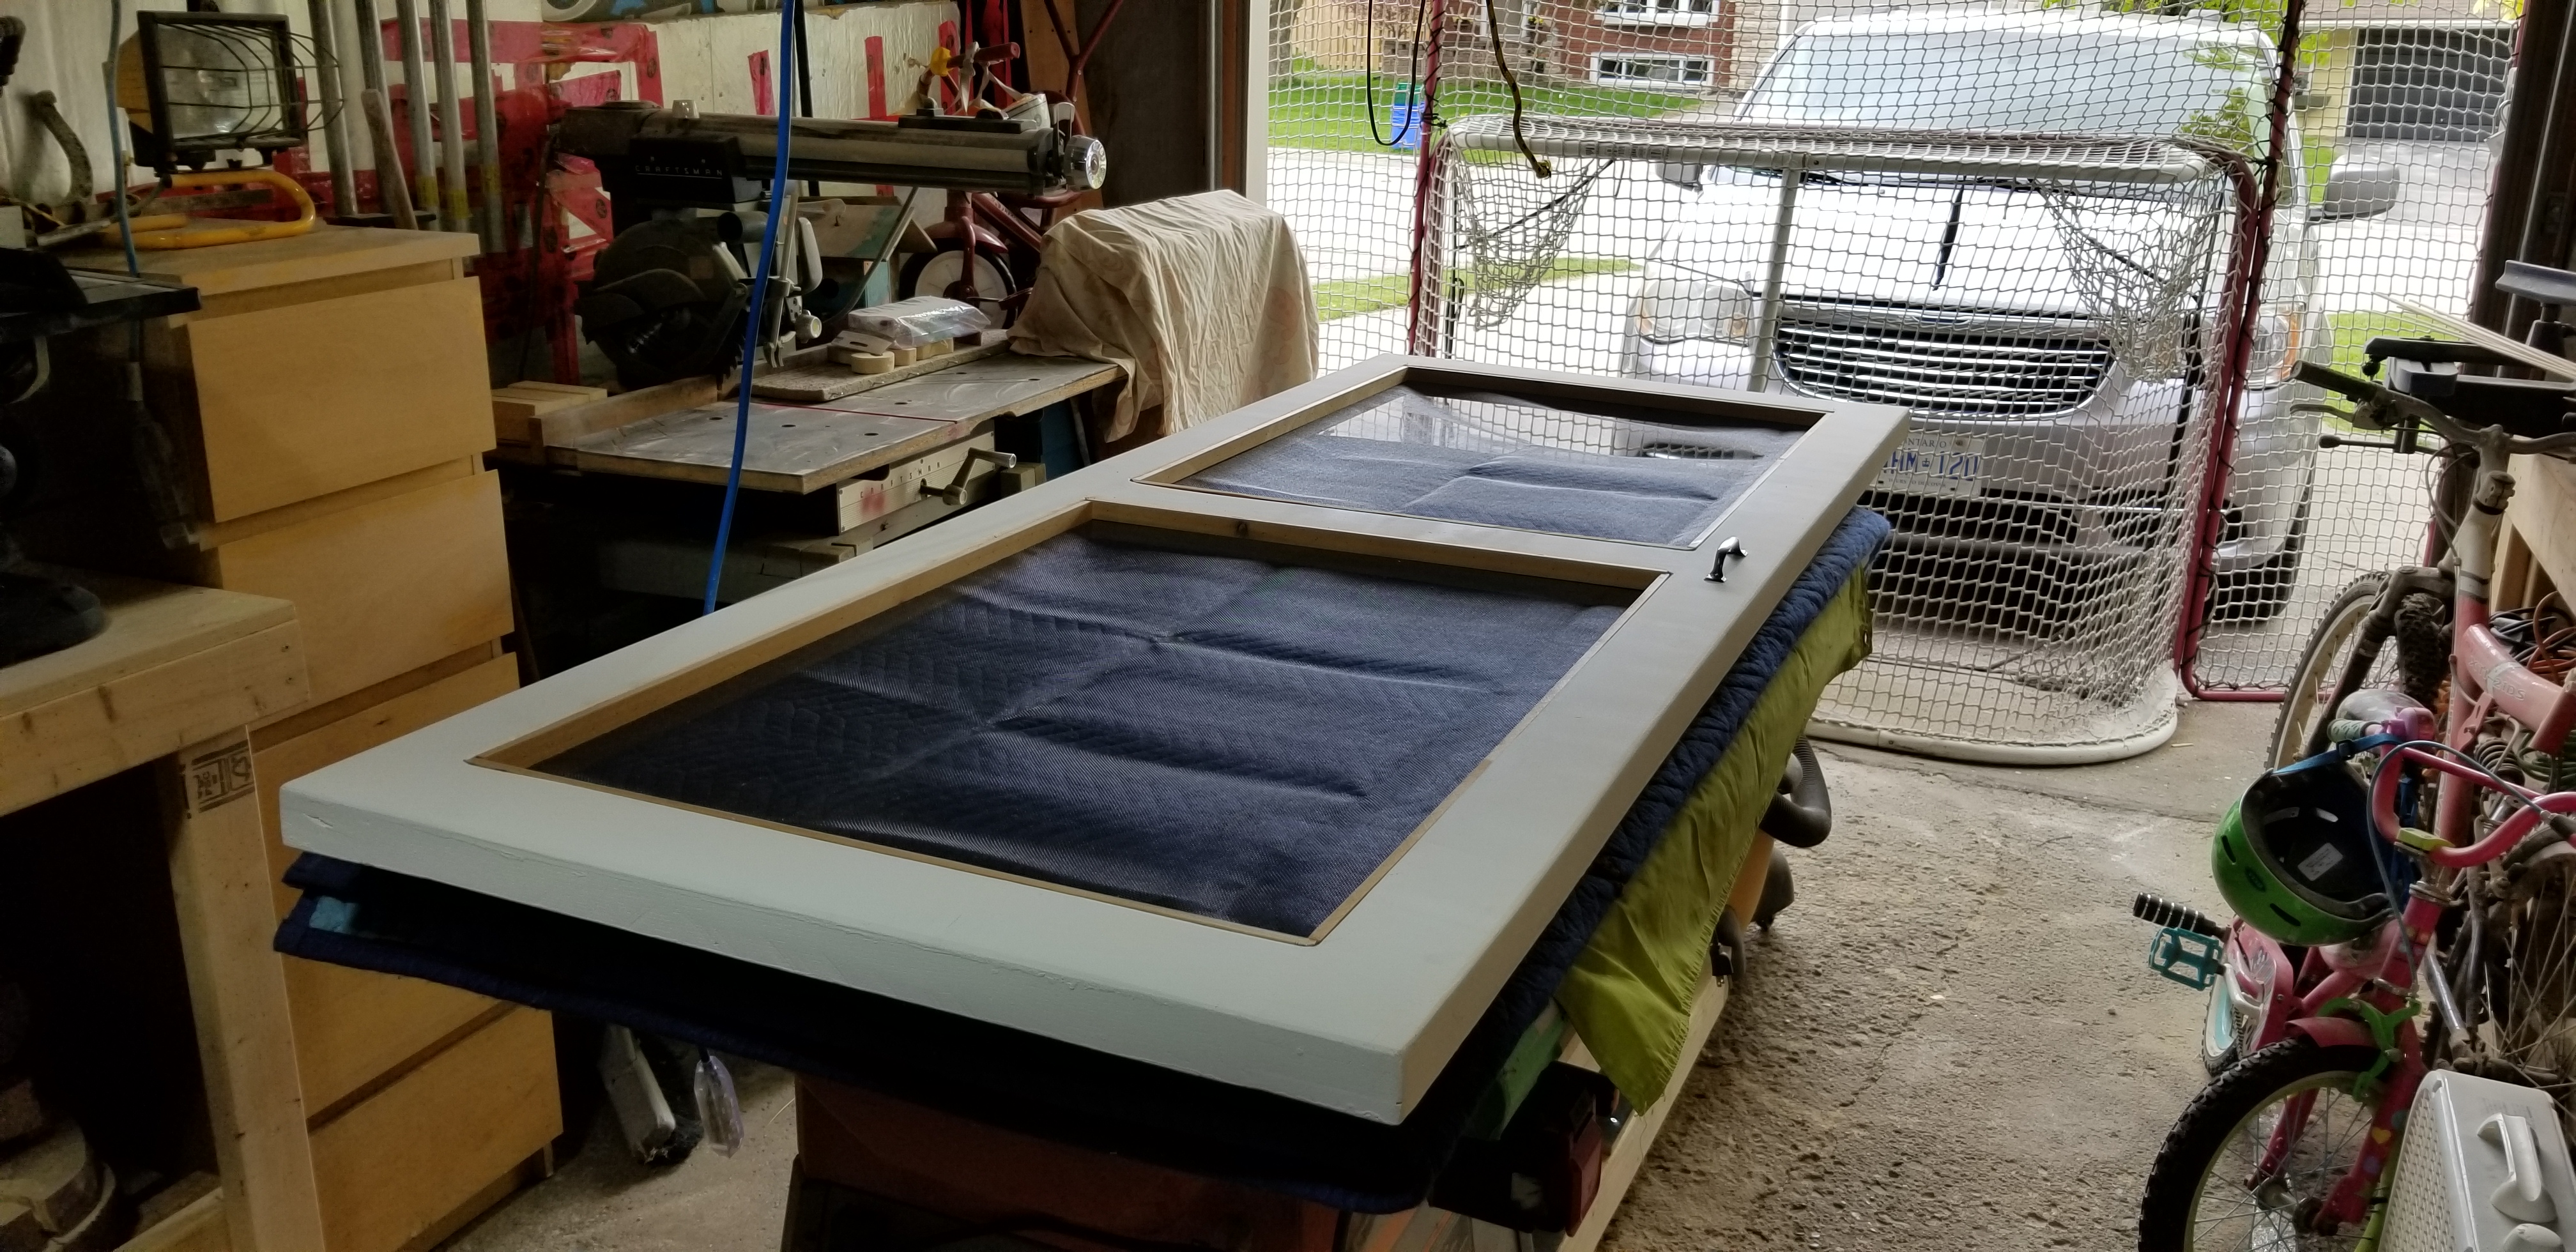
I used an oil based primer to paint on four coats of pristine paint. Then I cut down some Cedar strips, 16 lengths in all, which would sandwich my screen mesh in place, for the two openings on my screen door. After much cutting and sanding i put the first layer in place. Cutting the mesh material was far simpler than i was imagining it would be. So i put those in place, and pin nailed my last strips on, holding the mesh as tight as i could get it.
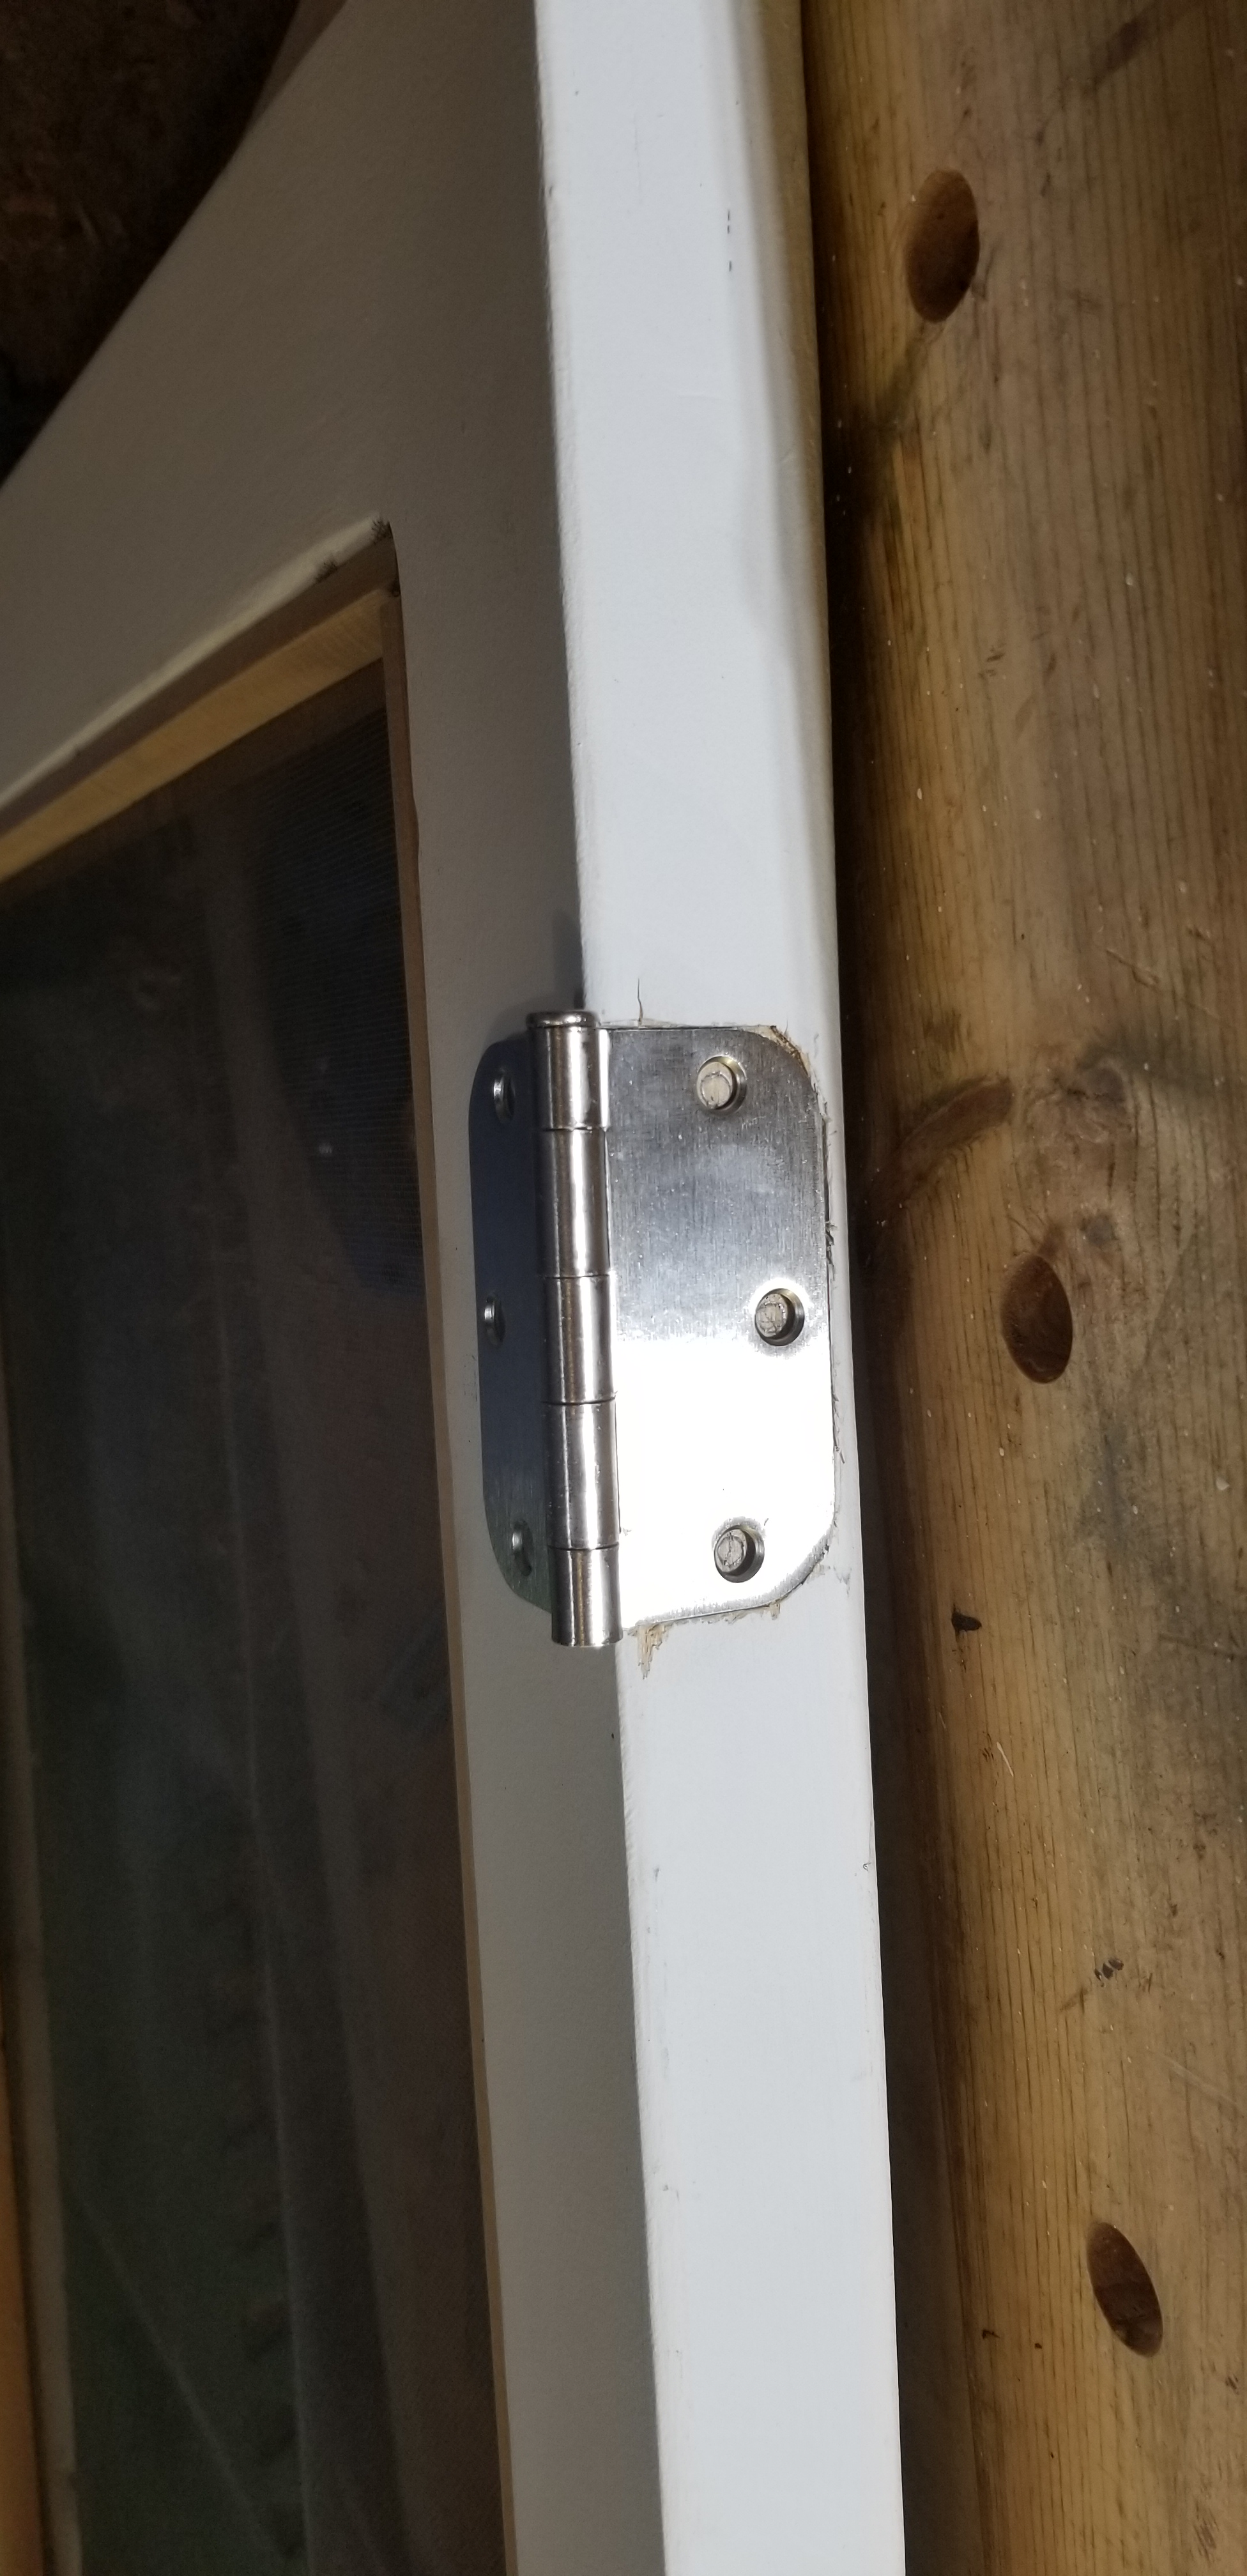
It was at this point I placed my hardware on the door. Pilot drilling holes for the handle and a push plate. I also then hand cut in my hinge recesses. Drilled and attached those. Fought with the door for an afternoon to cut in the receiving hinge slots on the house, and hung the door single handedly (do not reccomend). I then added backing trim to stop the door swinging too far inwards and binding. Added a latch, and an extra handle, and Bob’s your uncle. Done like dinner.


I didn’t take any photos while cutting the cross member tenons, but they’re there, and I did them myself.


You must be logged in to post a comment.