Slapping some stain on the old girl.

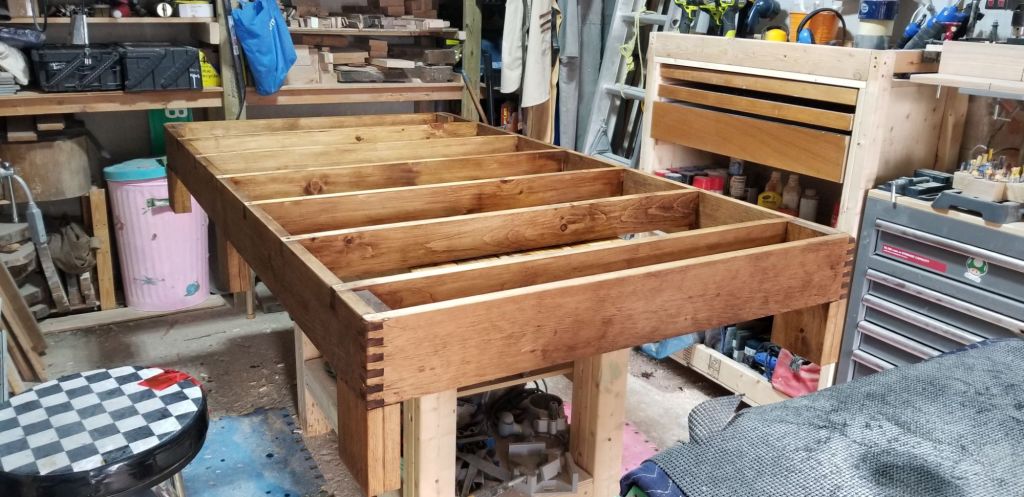
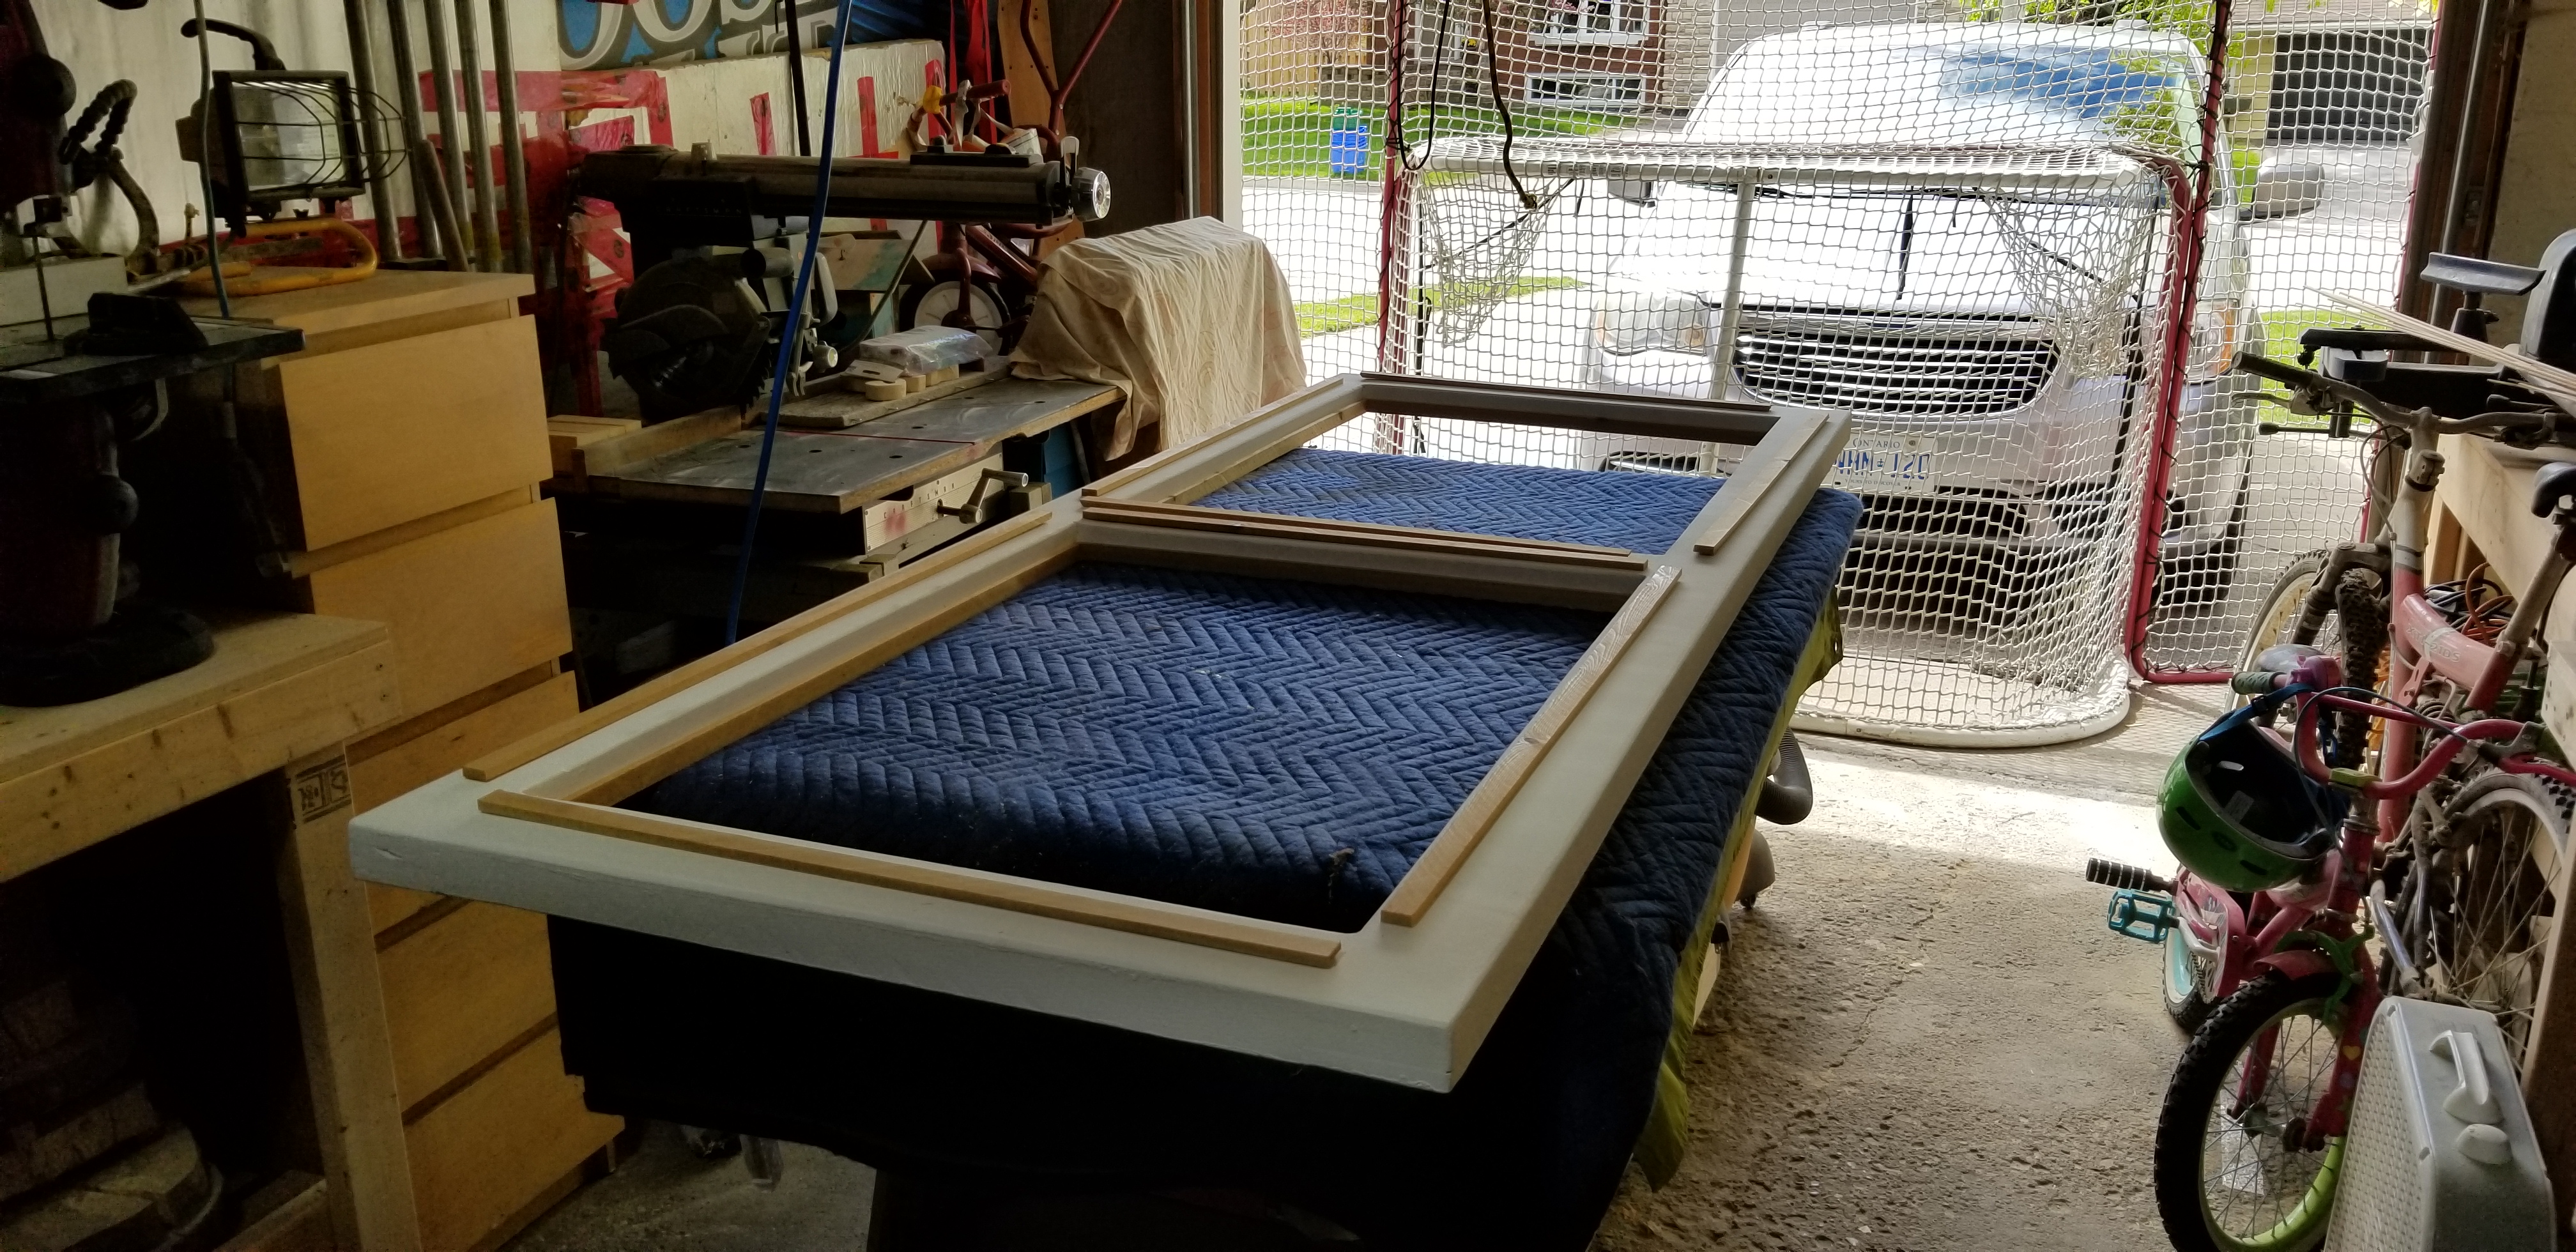
It was sunny and plus thirteen for about 90 minutes earlier today, so I popped out to the wood shop and dashed some Walnut coloured Danish Oil Stain onto my youngest daughters new single bed frame for the cottage.

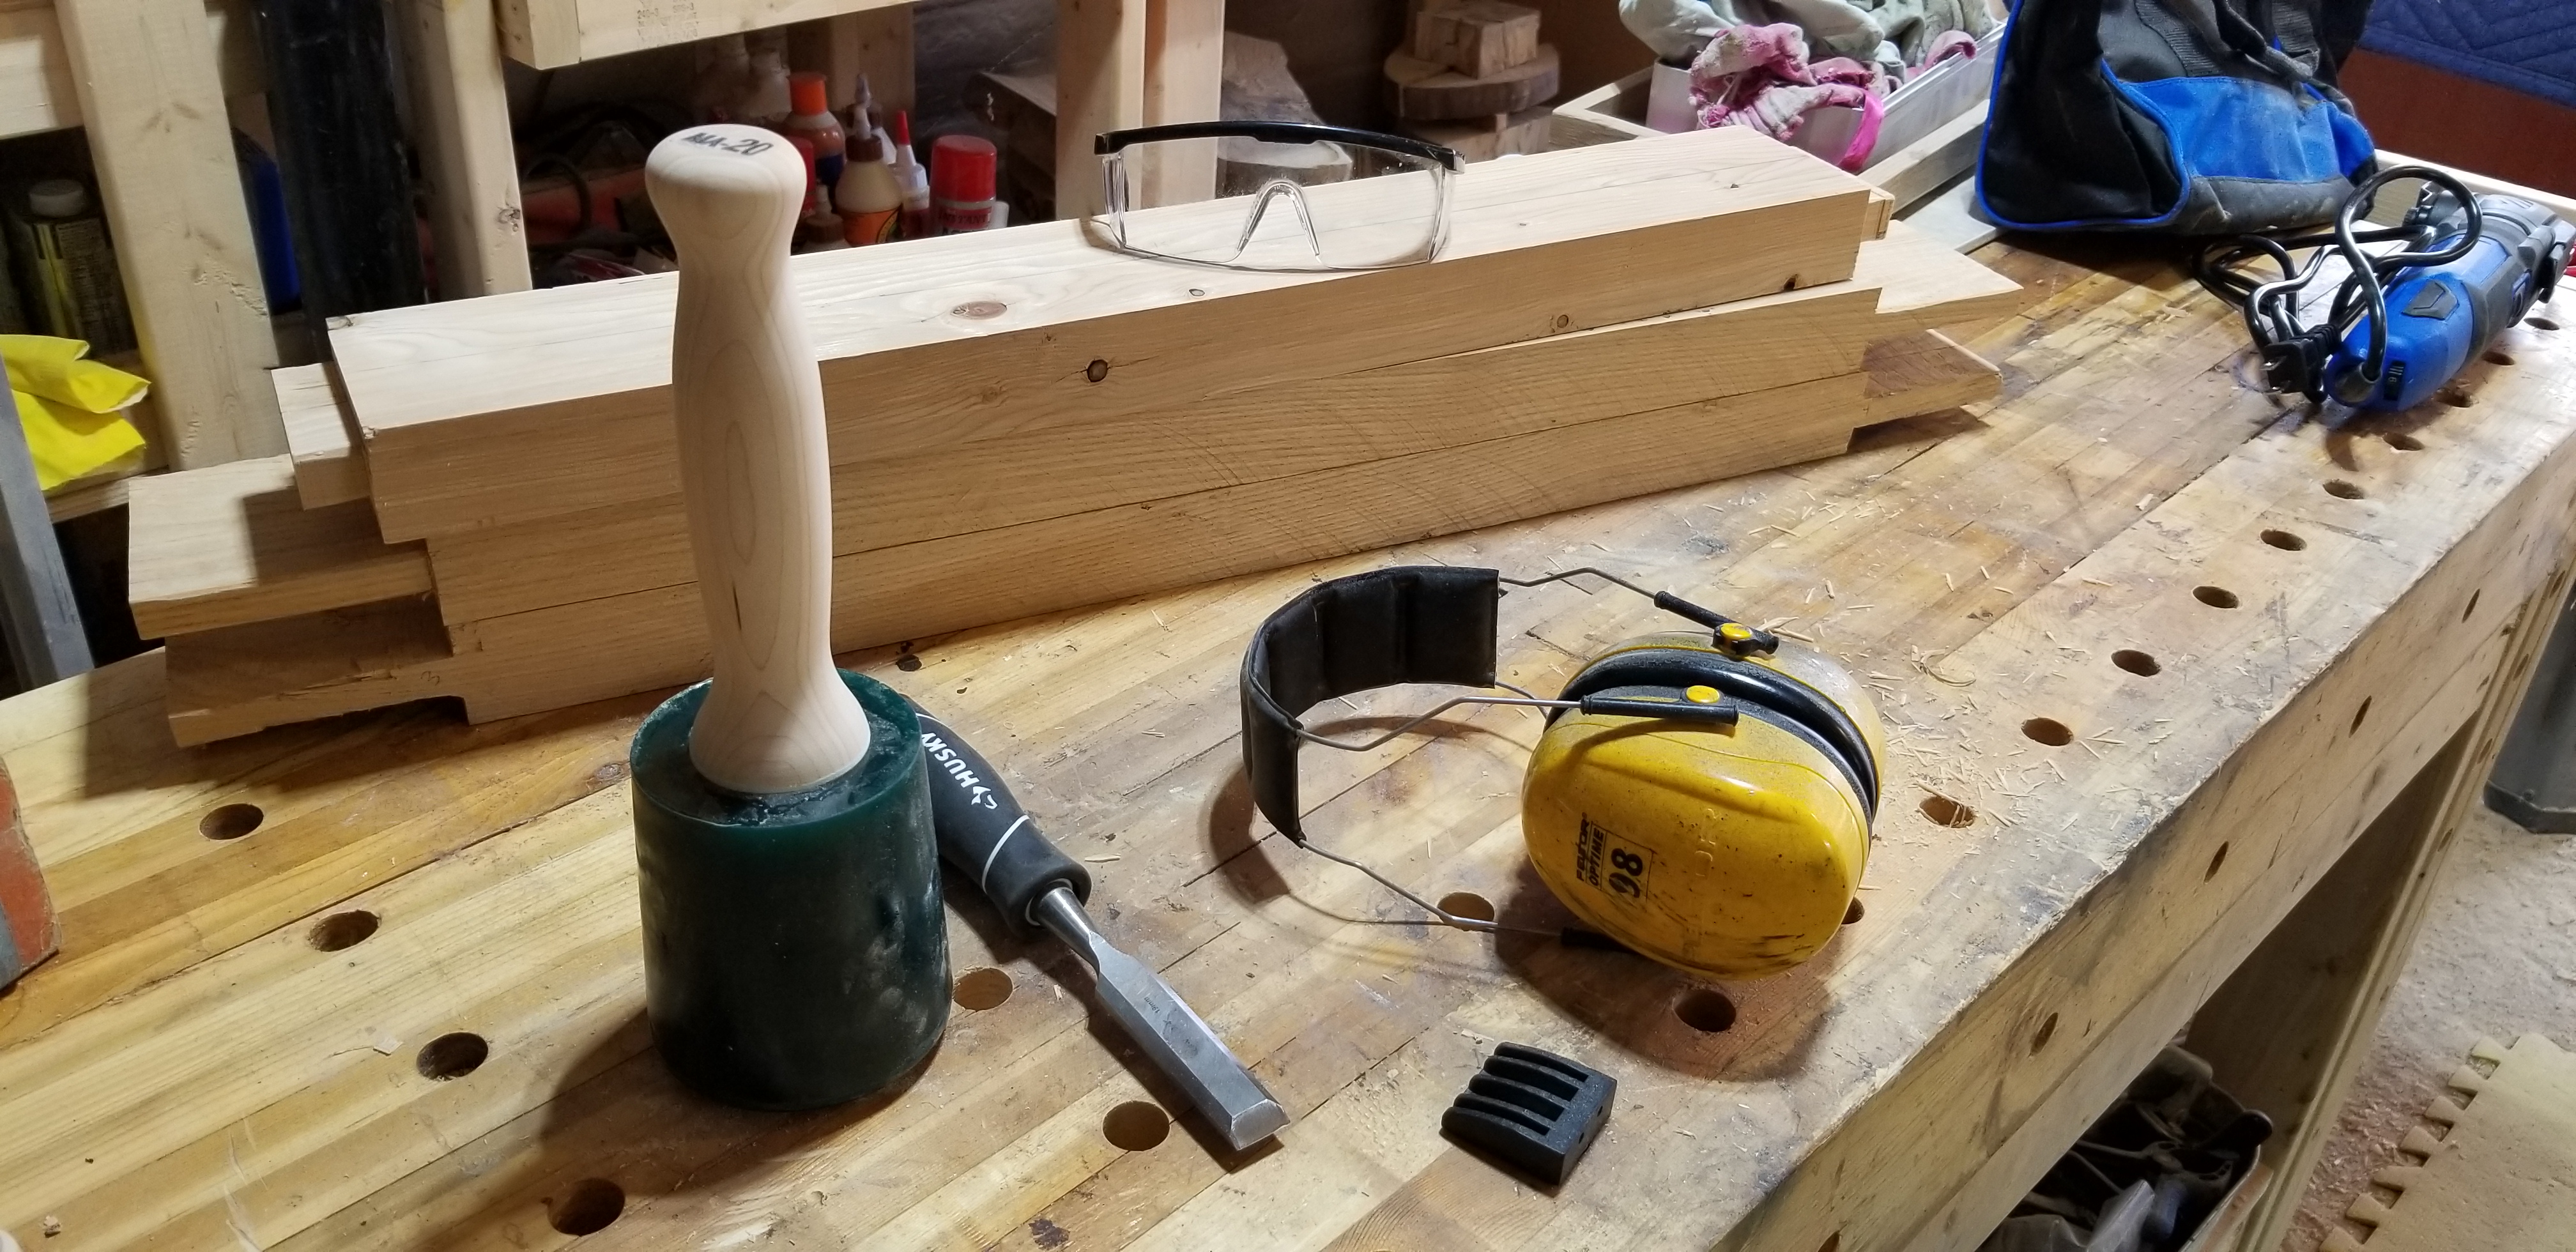
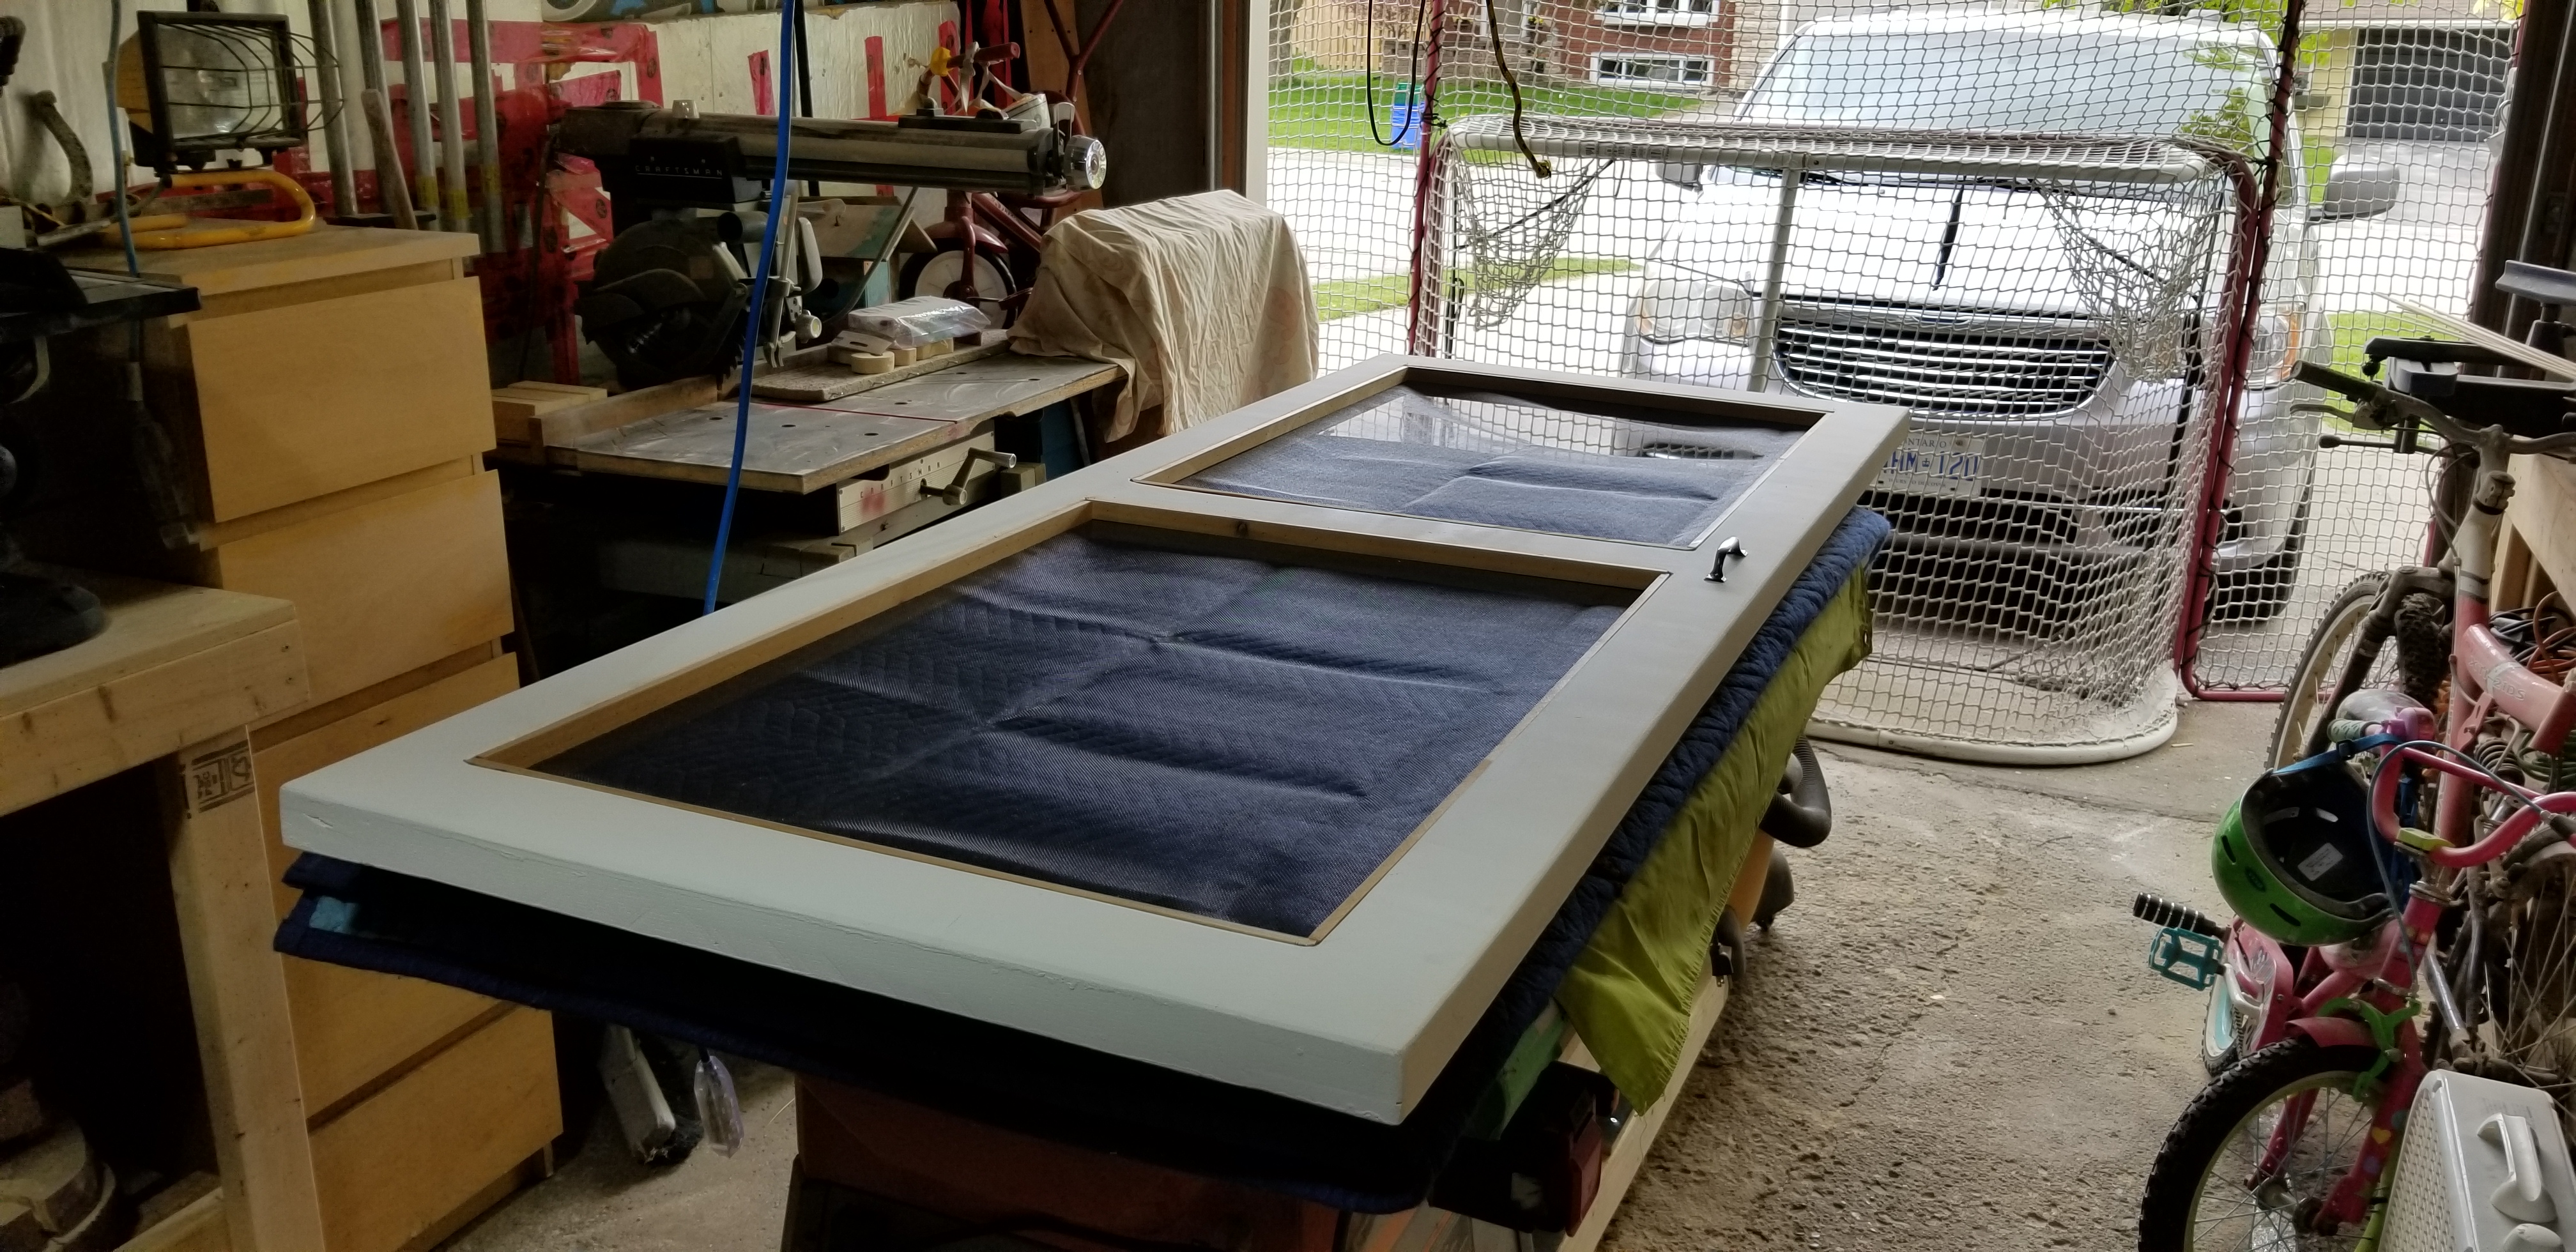
I started by spot sanding a few bits that didn’t get all the love they needed the first couple of go rounds, and then spent a few minutes dusting it off with the air compressor. Then I splish-splashed the Danish Oil rub on it with a very wet foam brush, and ran through a few clean rags wiping it off. I think I managed to avoid runs in the finish, but I’m sure there’s one someplace very visible that I couldn’t see while I was bustling away this AM.

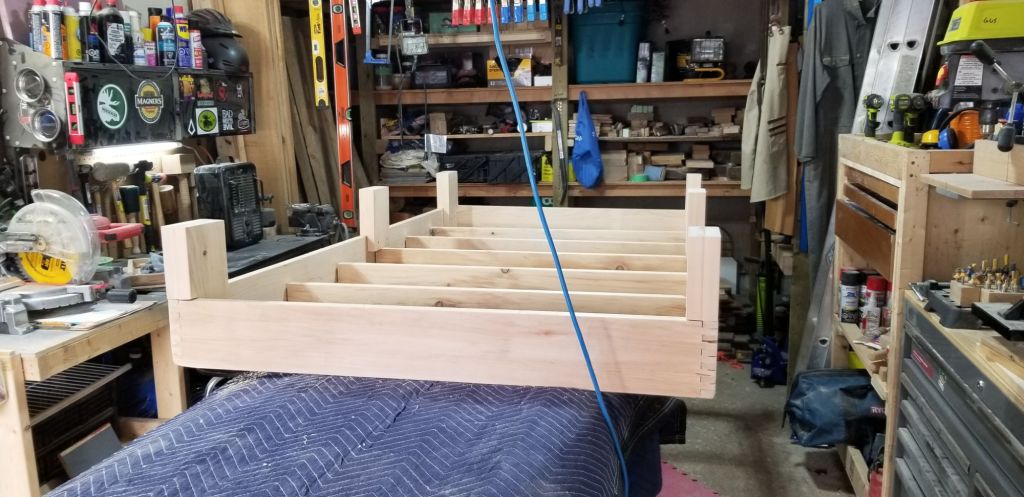
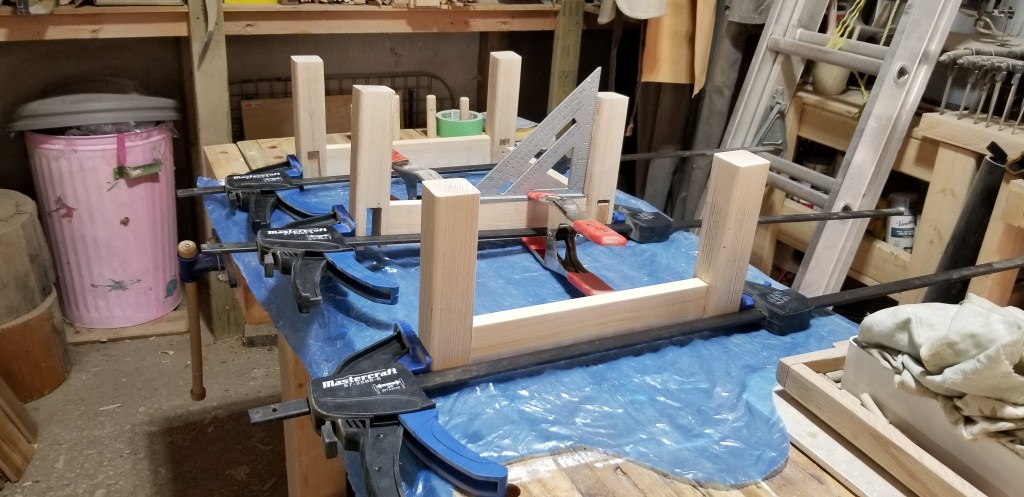
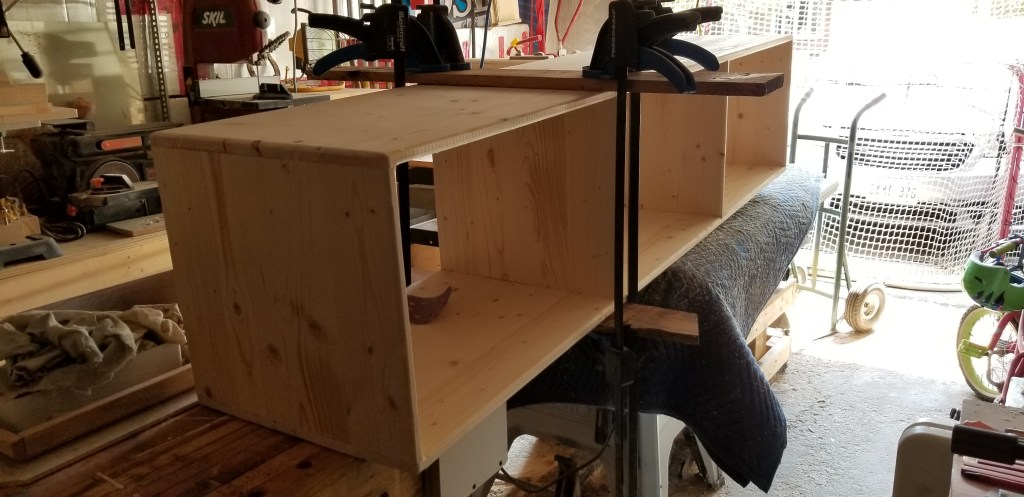
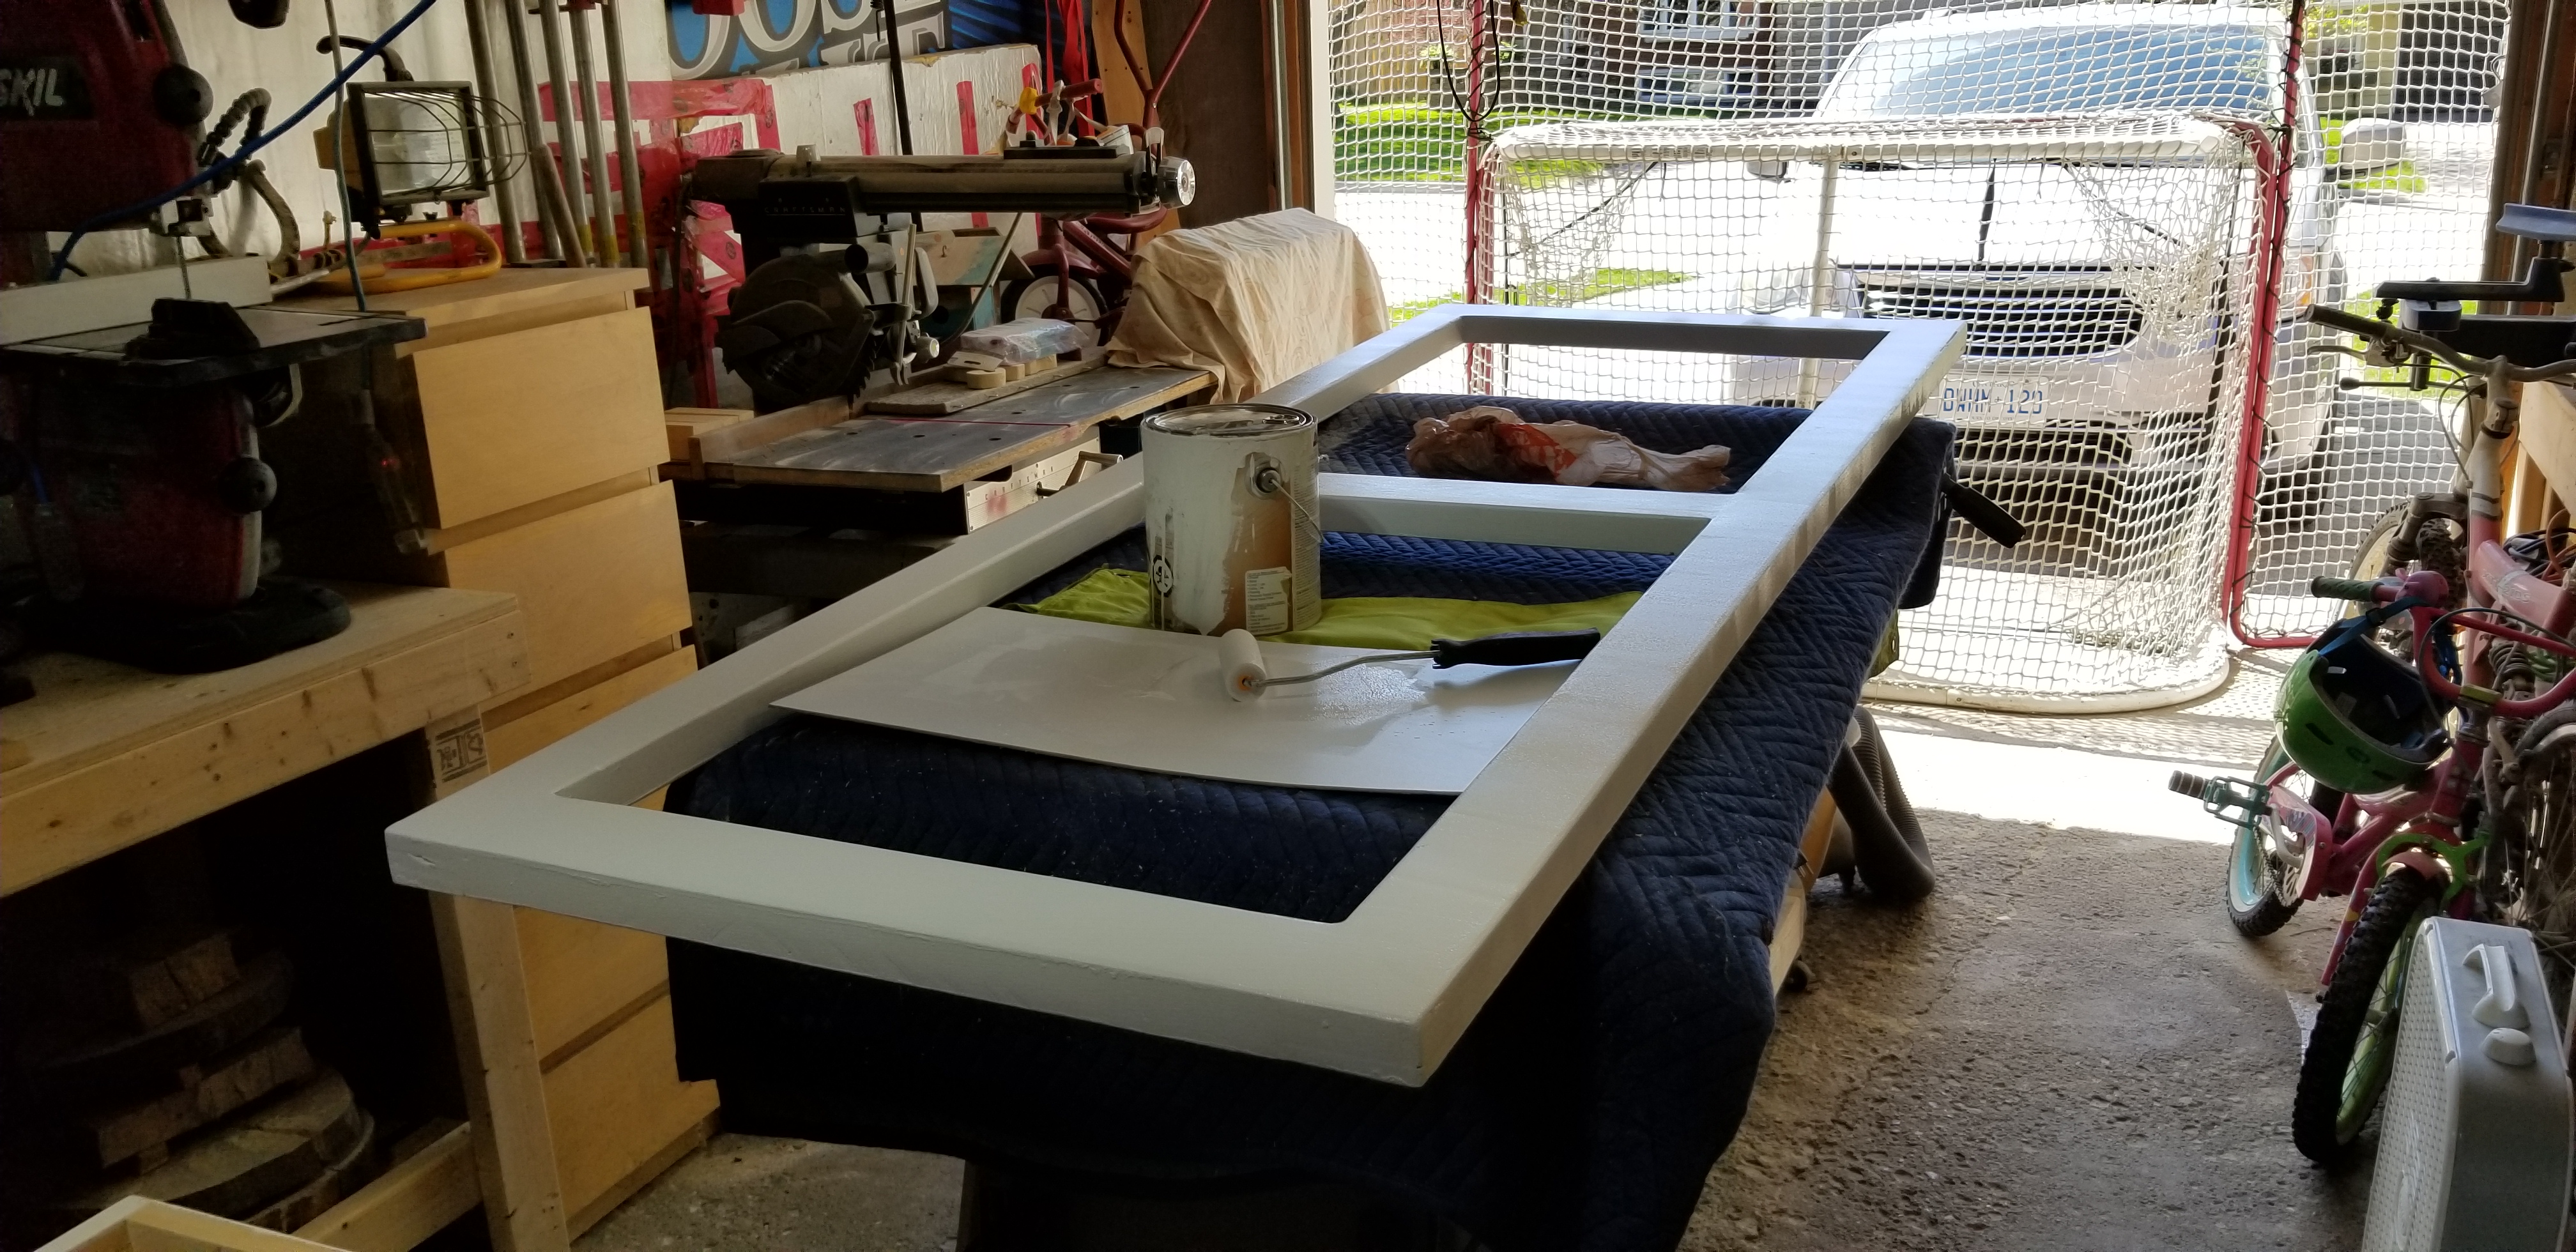
Good thing it’s so light weight, I didn’t need to call for help to move the whole thing around while I worked. Rests on my bench easily enough. It’s times like these that I am thankful for all the space saving theatrics I’ve had to undertake recently. My old layout would never have been wide or clear enough for both the frame and me. No chance I could have freely walked all 360 degrees around it before. I could still do with the whole shop being a good 36 inches wider, but that’s a very expensive construction matter. Also not going to happen. No way I tear down walls, and add roof for just three feet. Plus the property line is right there and no municipal office would ever grant me permits to get closer than eight feet to the line. So I’ll do what I can with what I’ve got.

Side bar: I am toying with the idea of taking down the pre-built racking that looks kinda shifty, in favour of metal racks, and reclaiming higher up wall space, but I need to get rid of several stored doors, and car seats, strollers, and household junk before I do that. It needs careful planning. I could benefit a great deal from doing so, but it’ll cost me both time & money, and a fair bit of aggravation to boot. I’m thinking it over. But I digress.

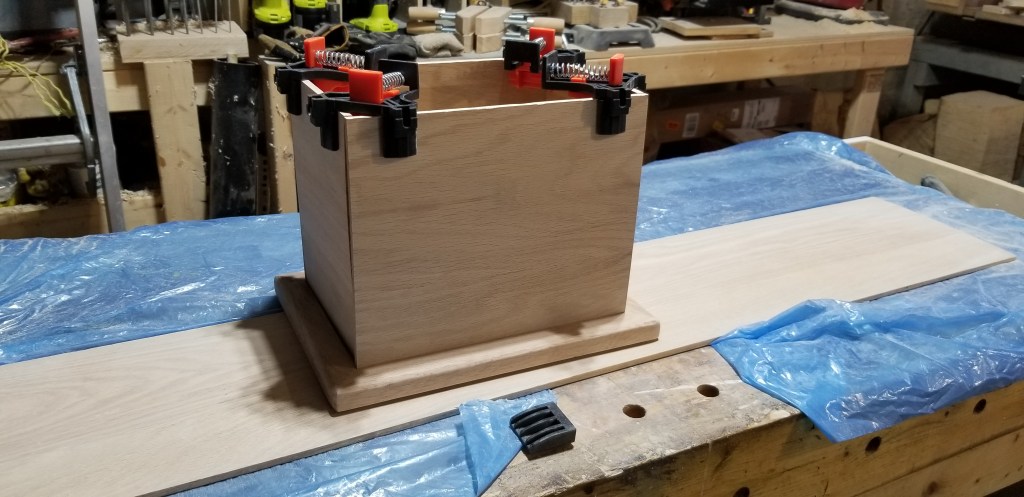
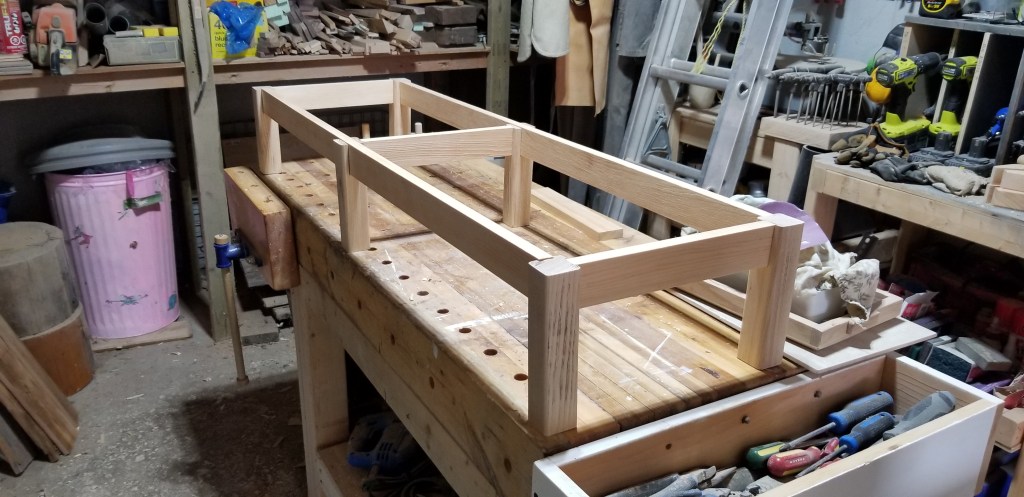
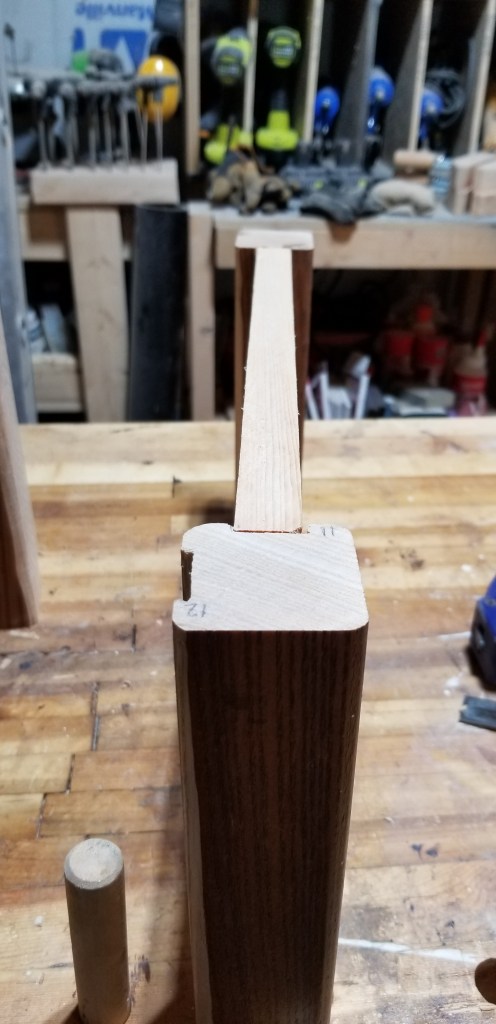
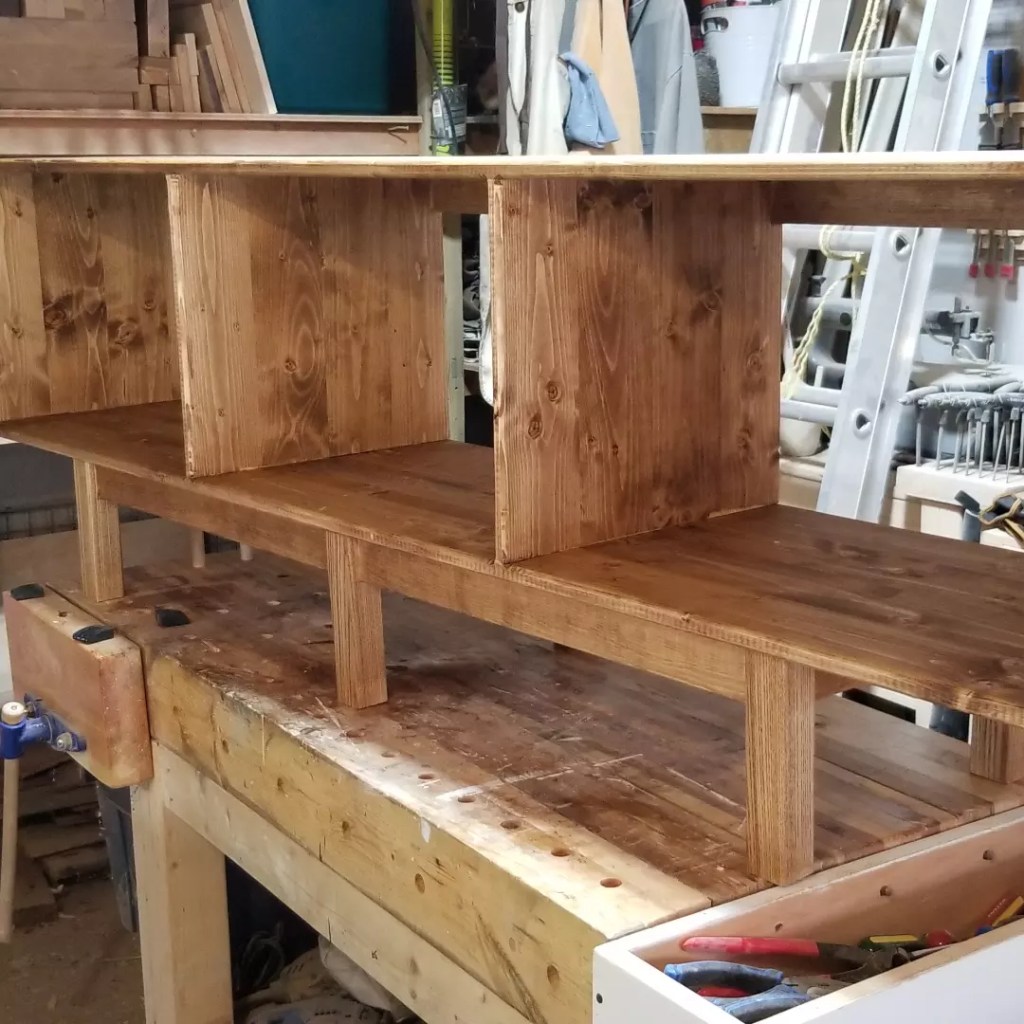
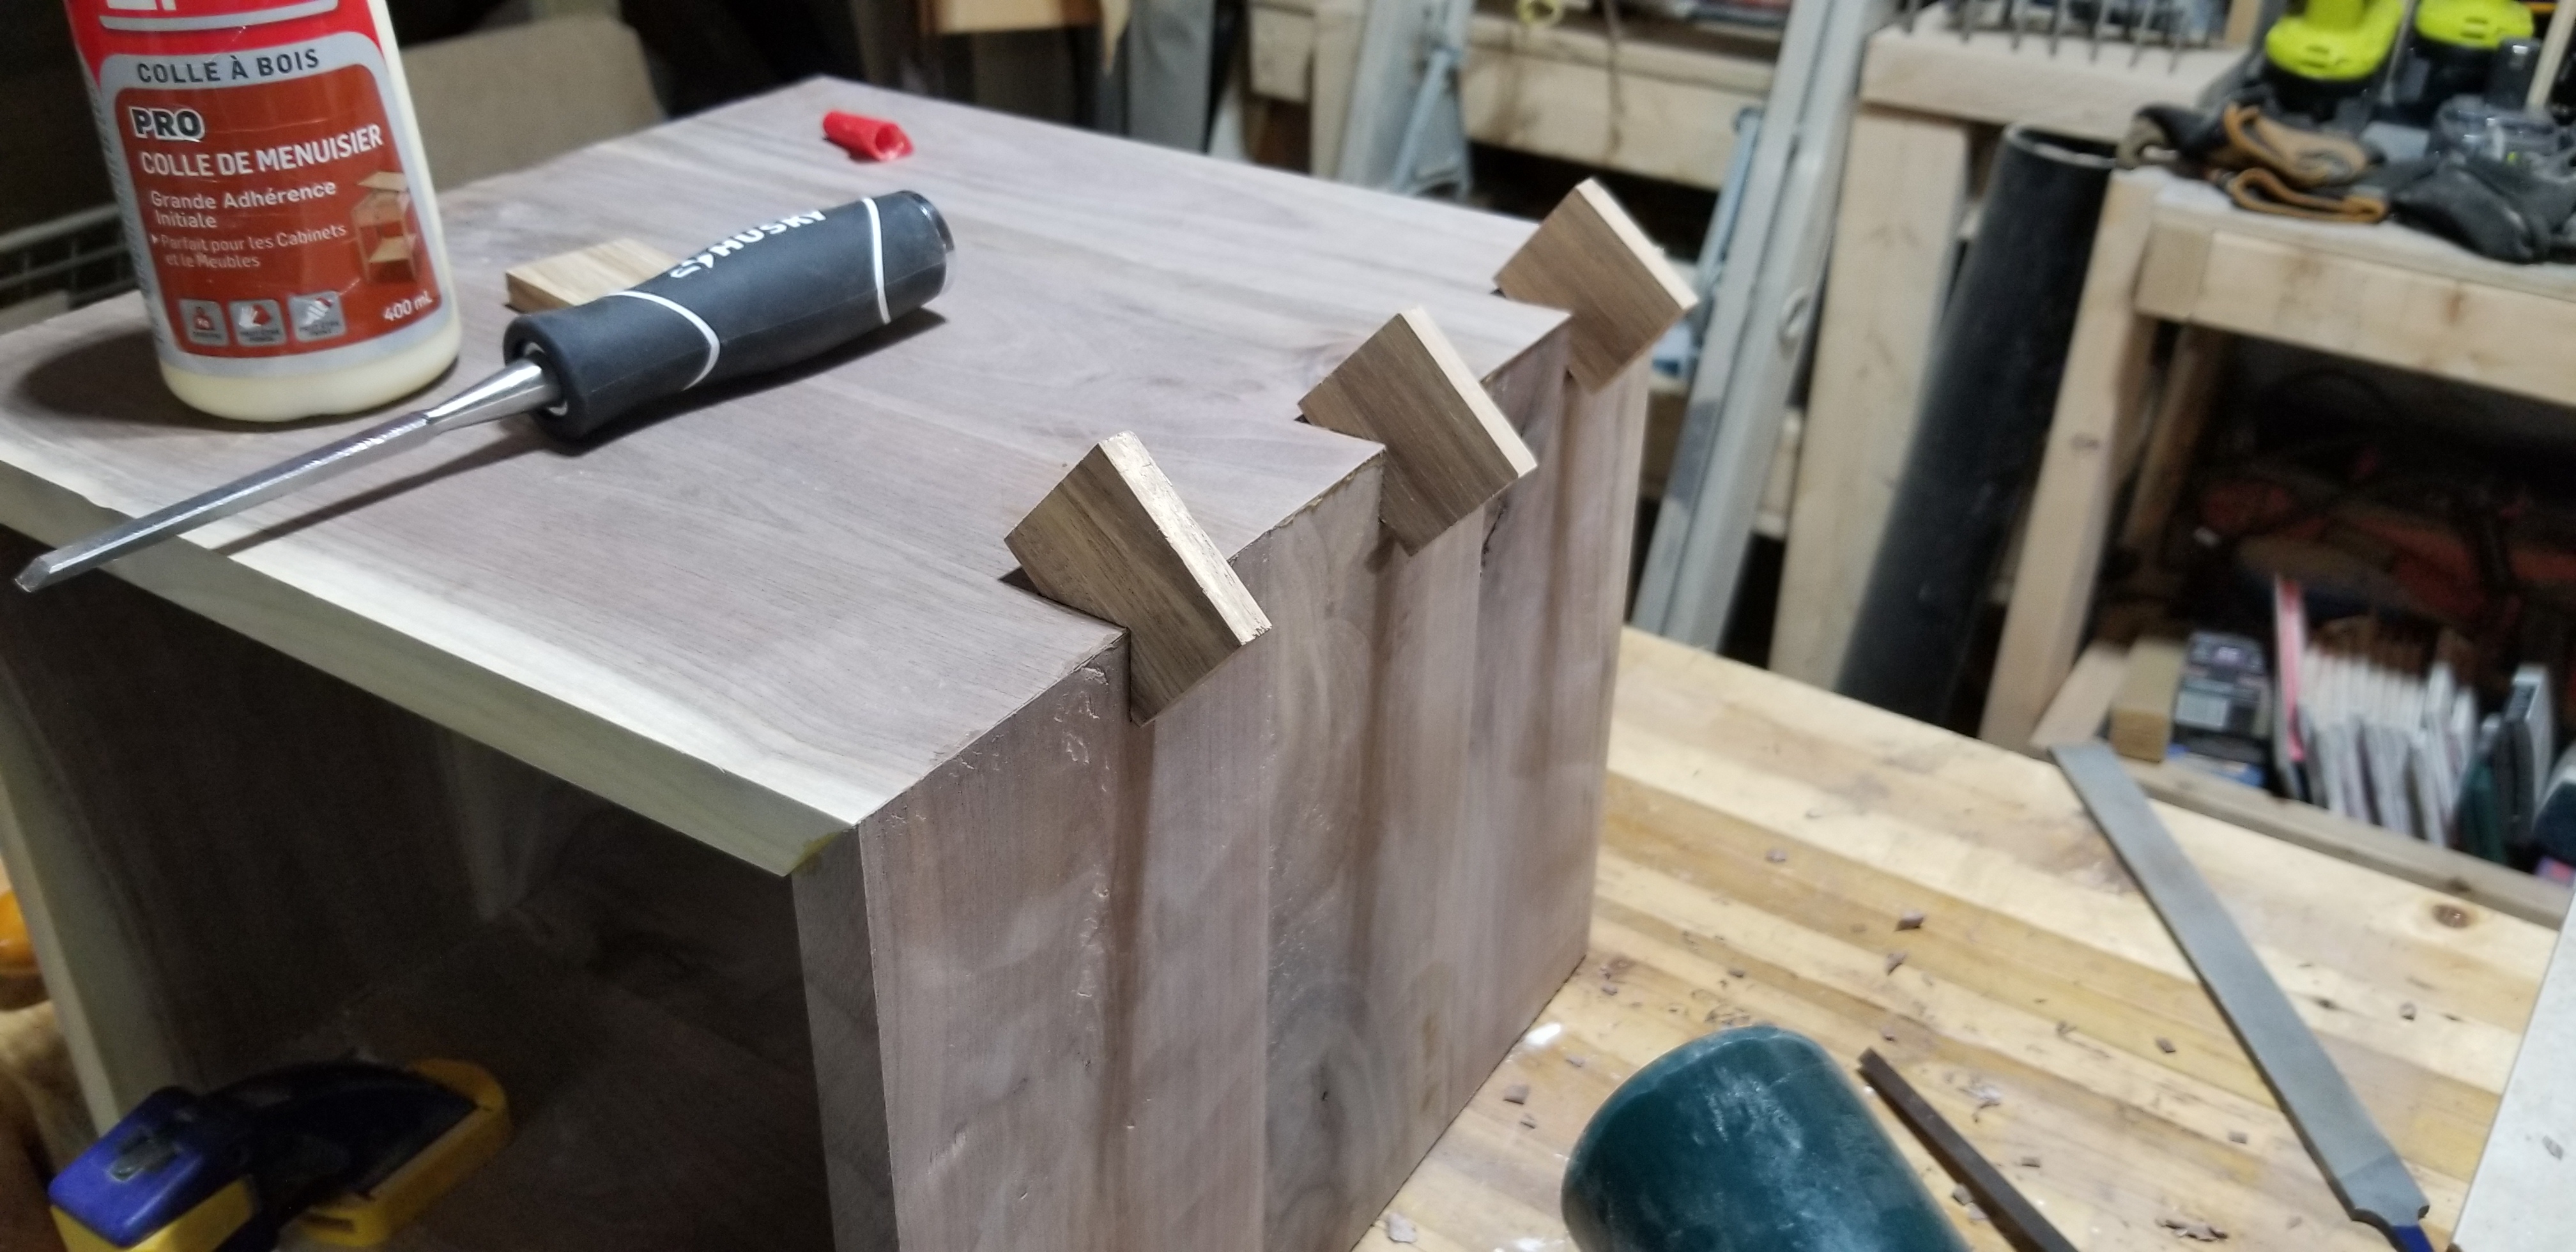
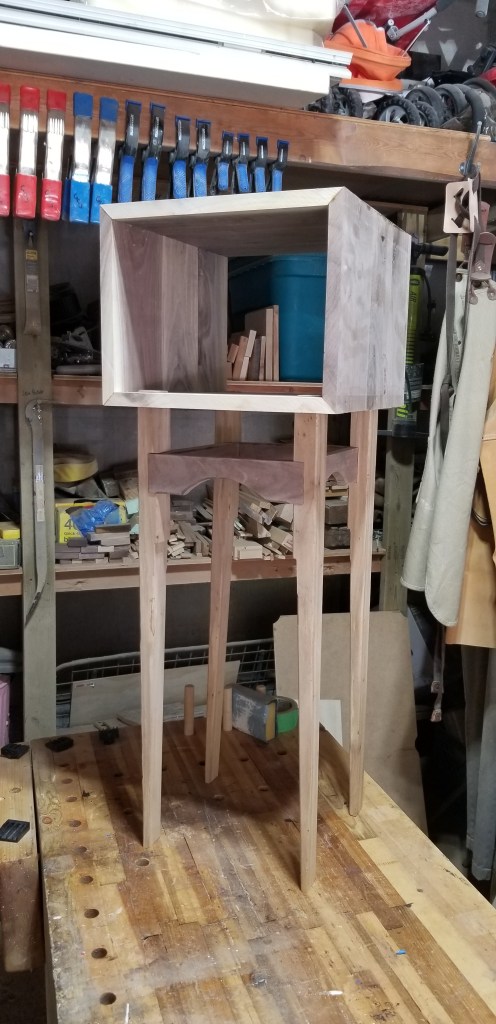
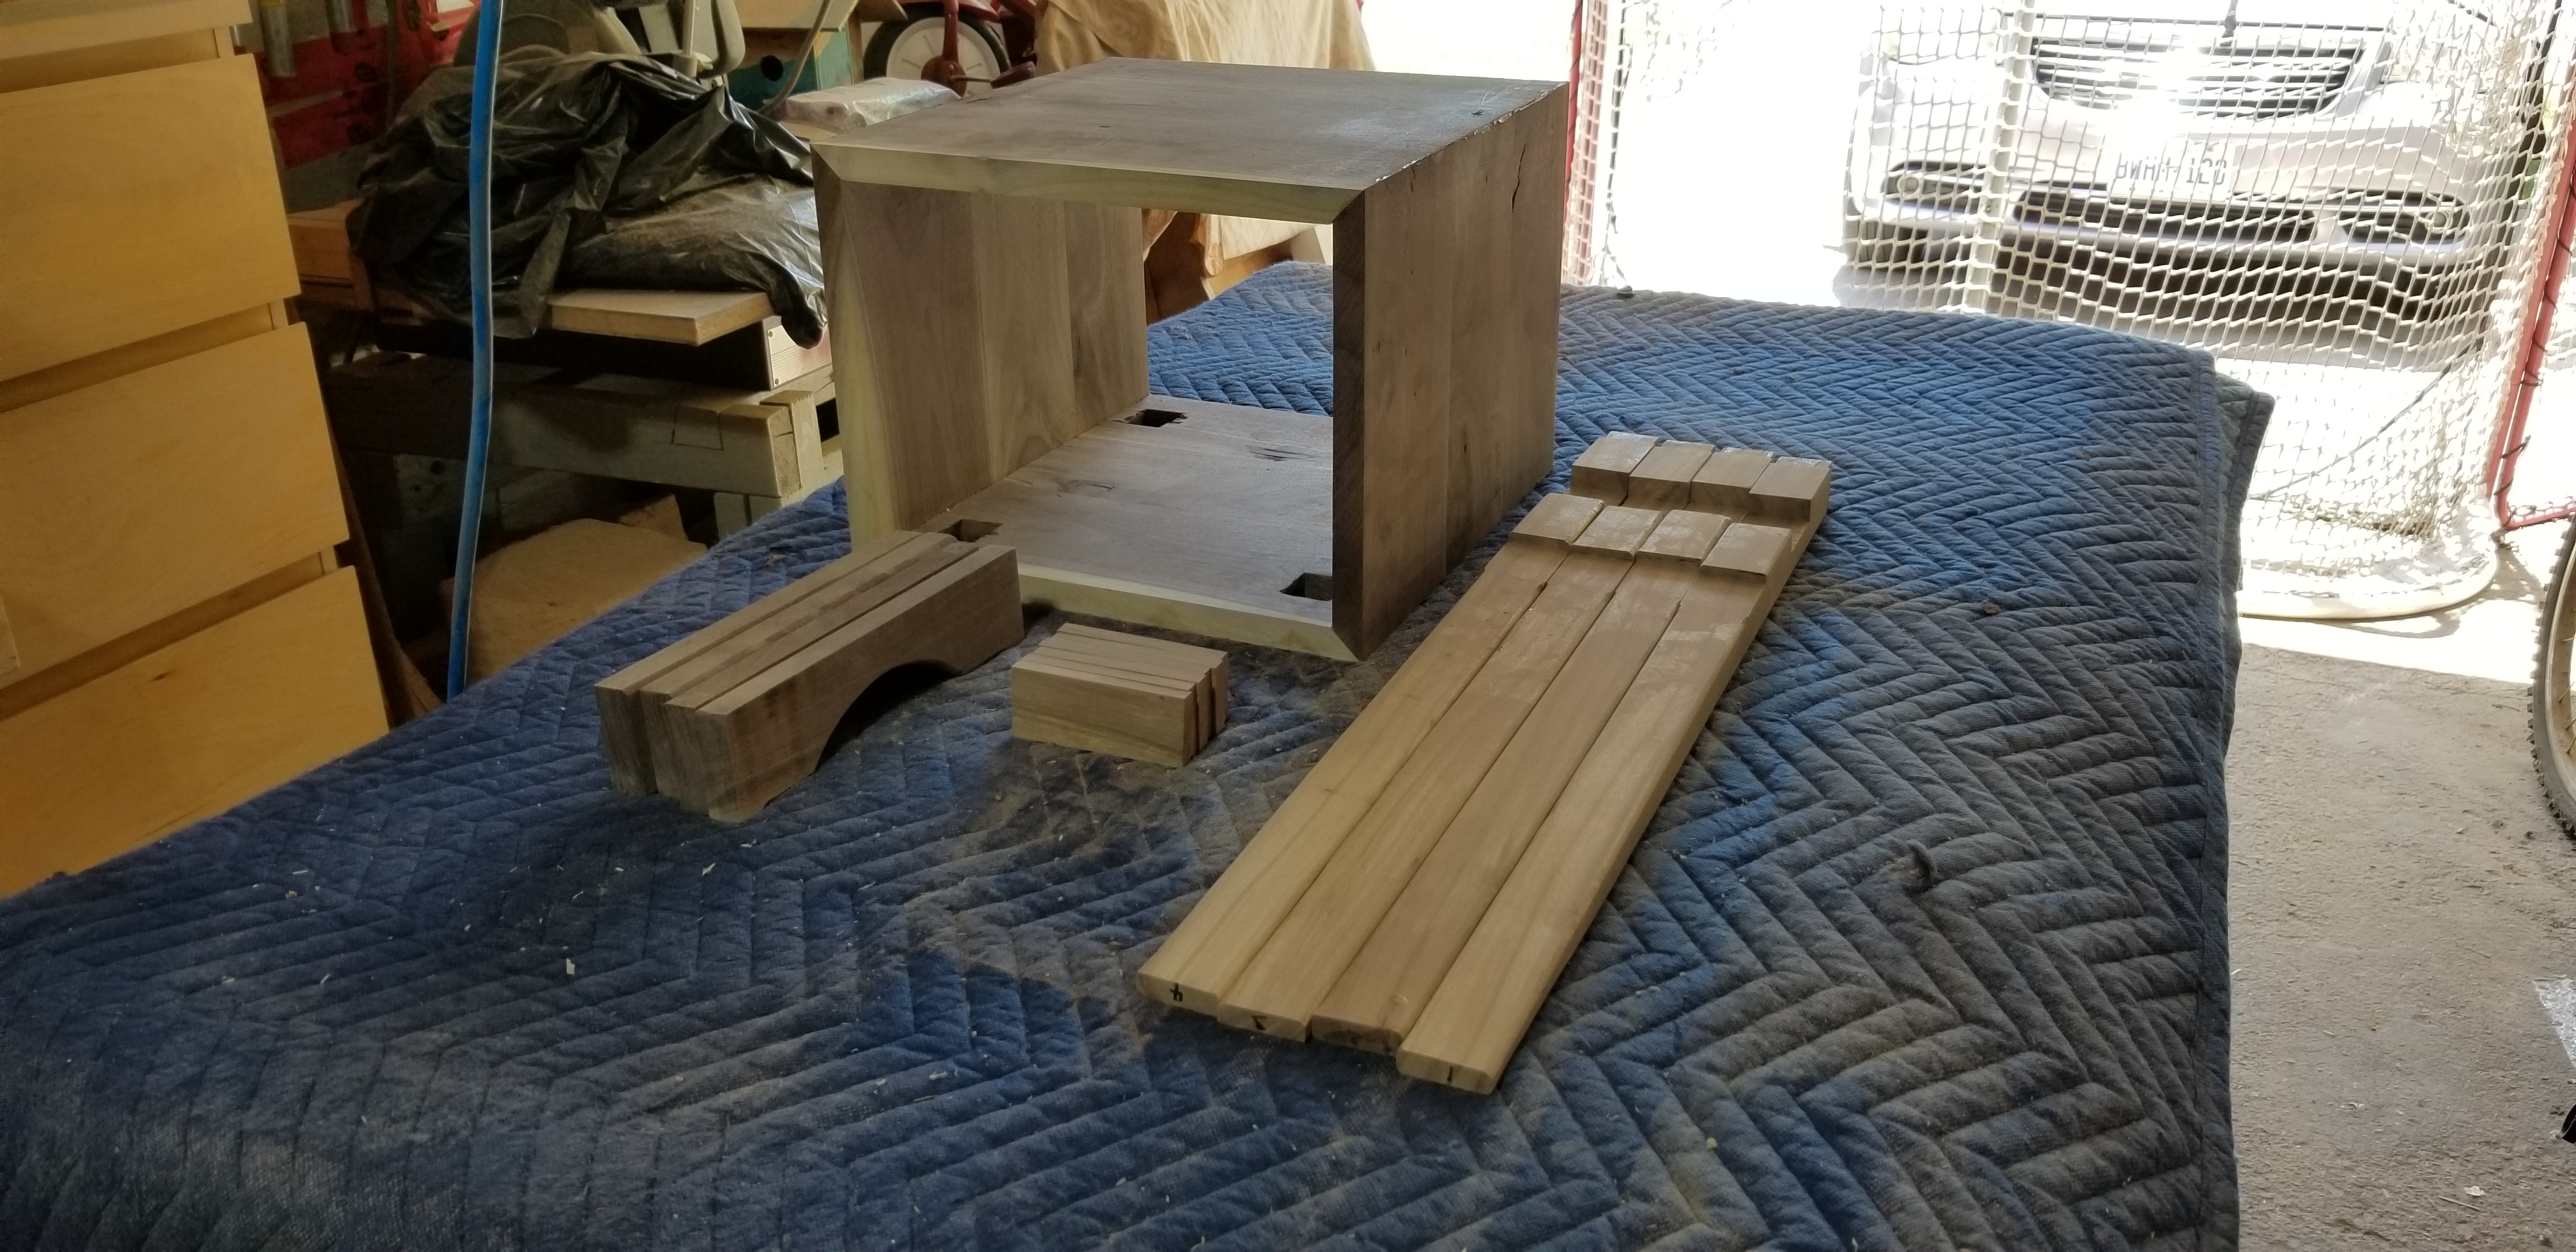
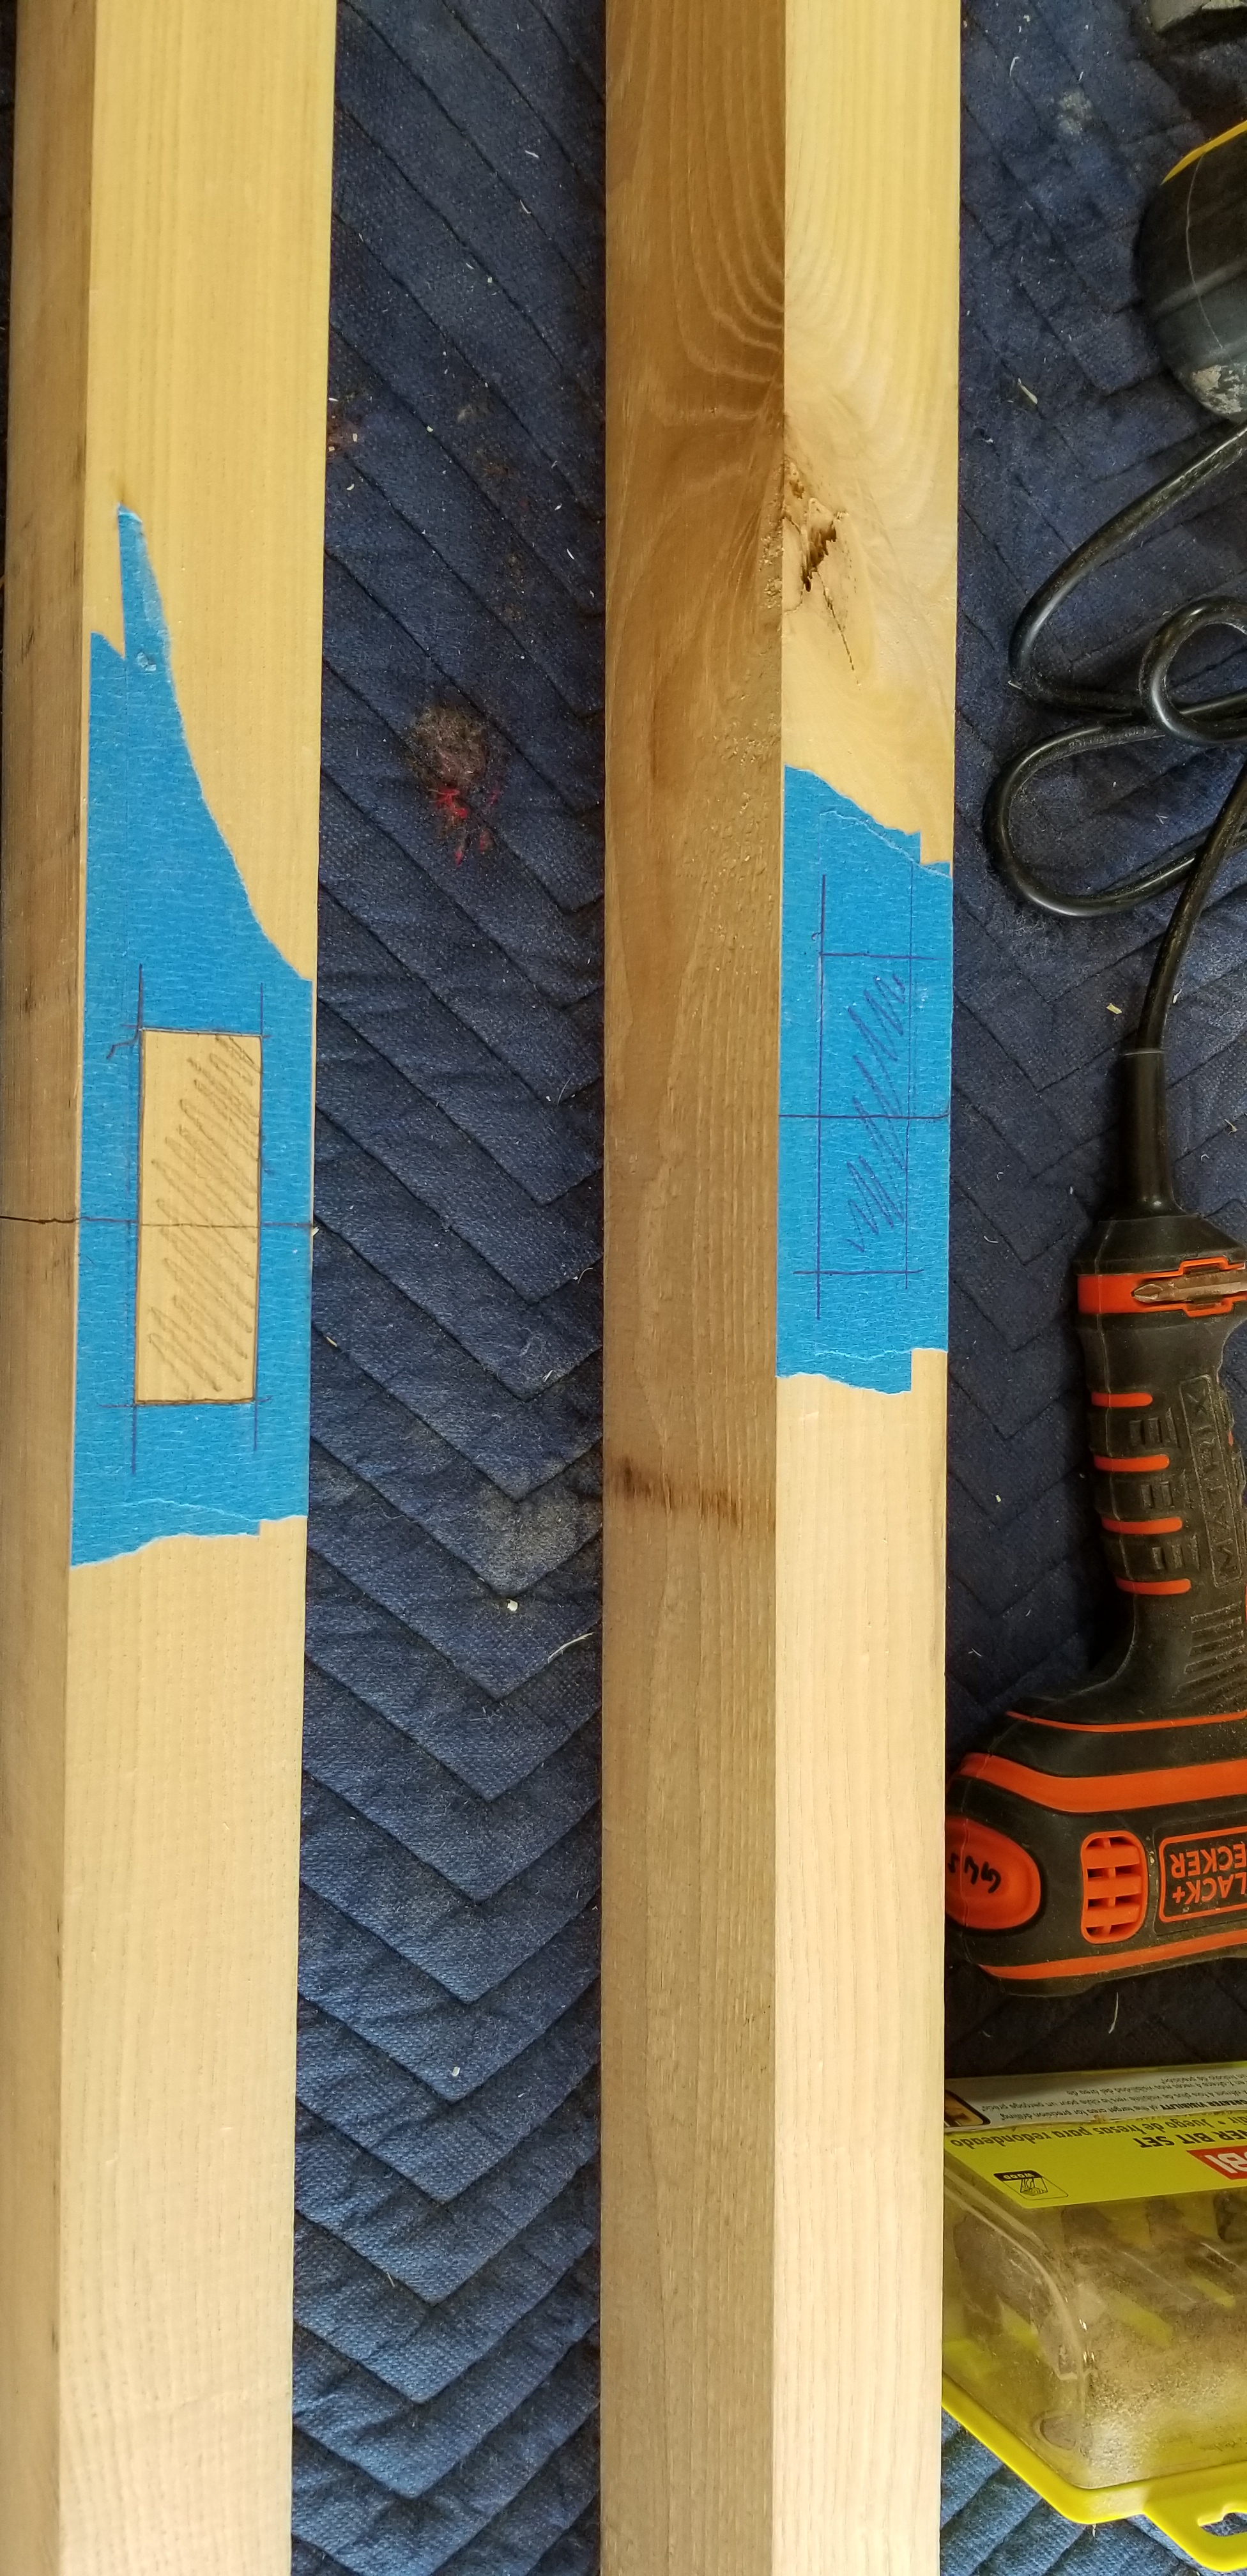
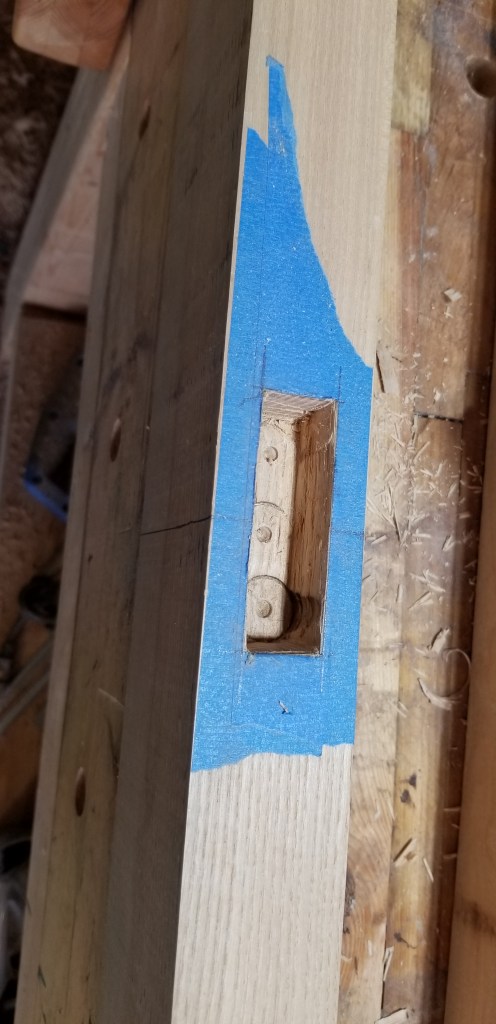
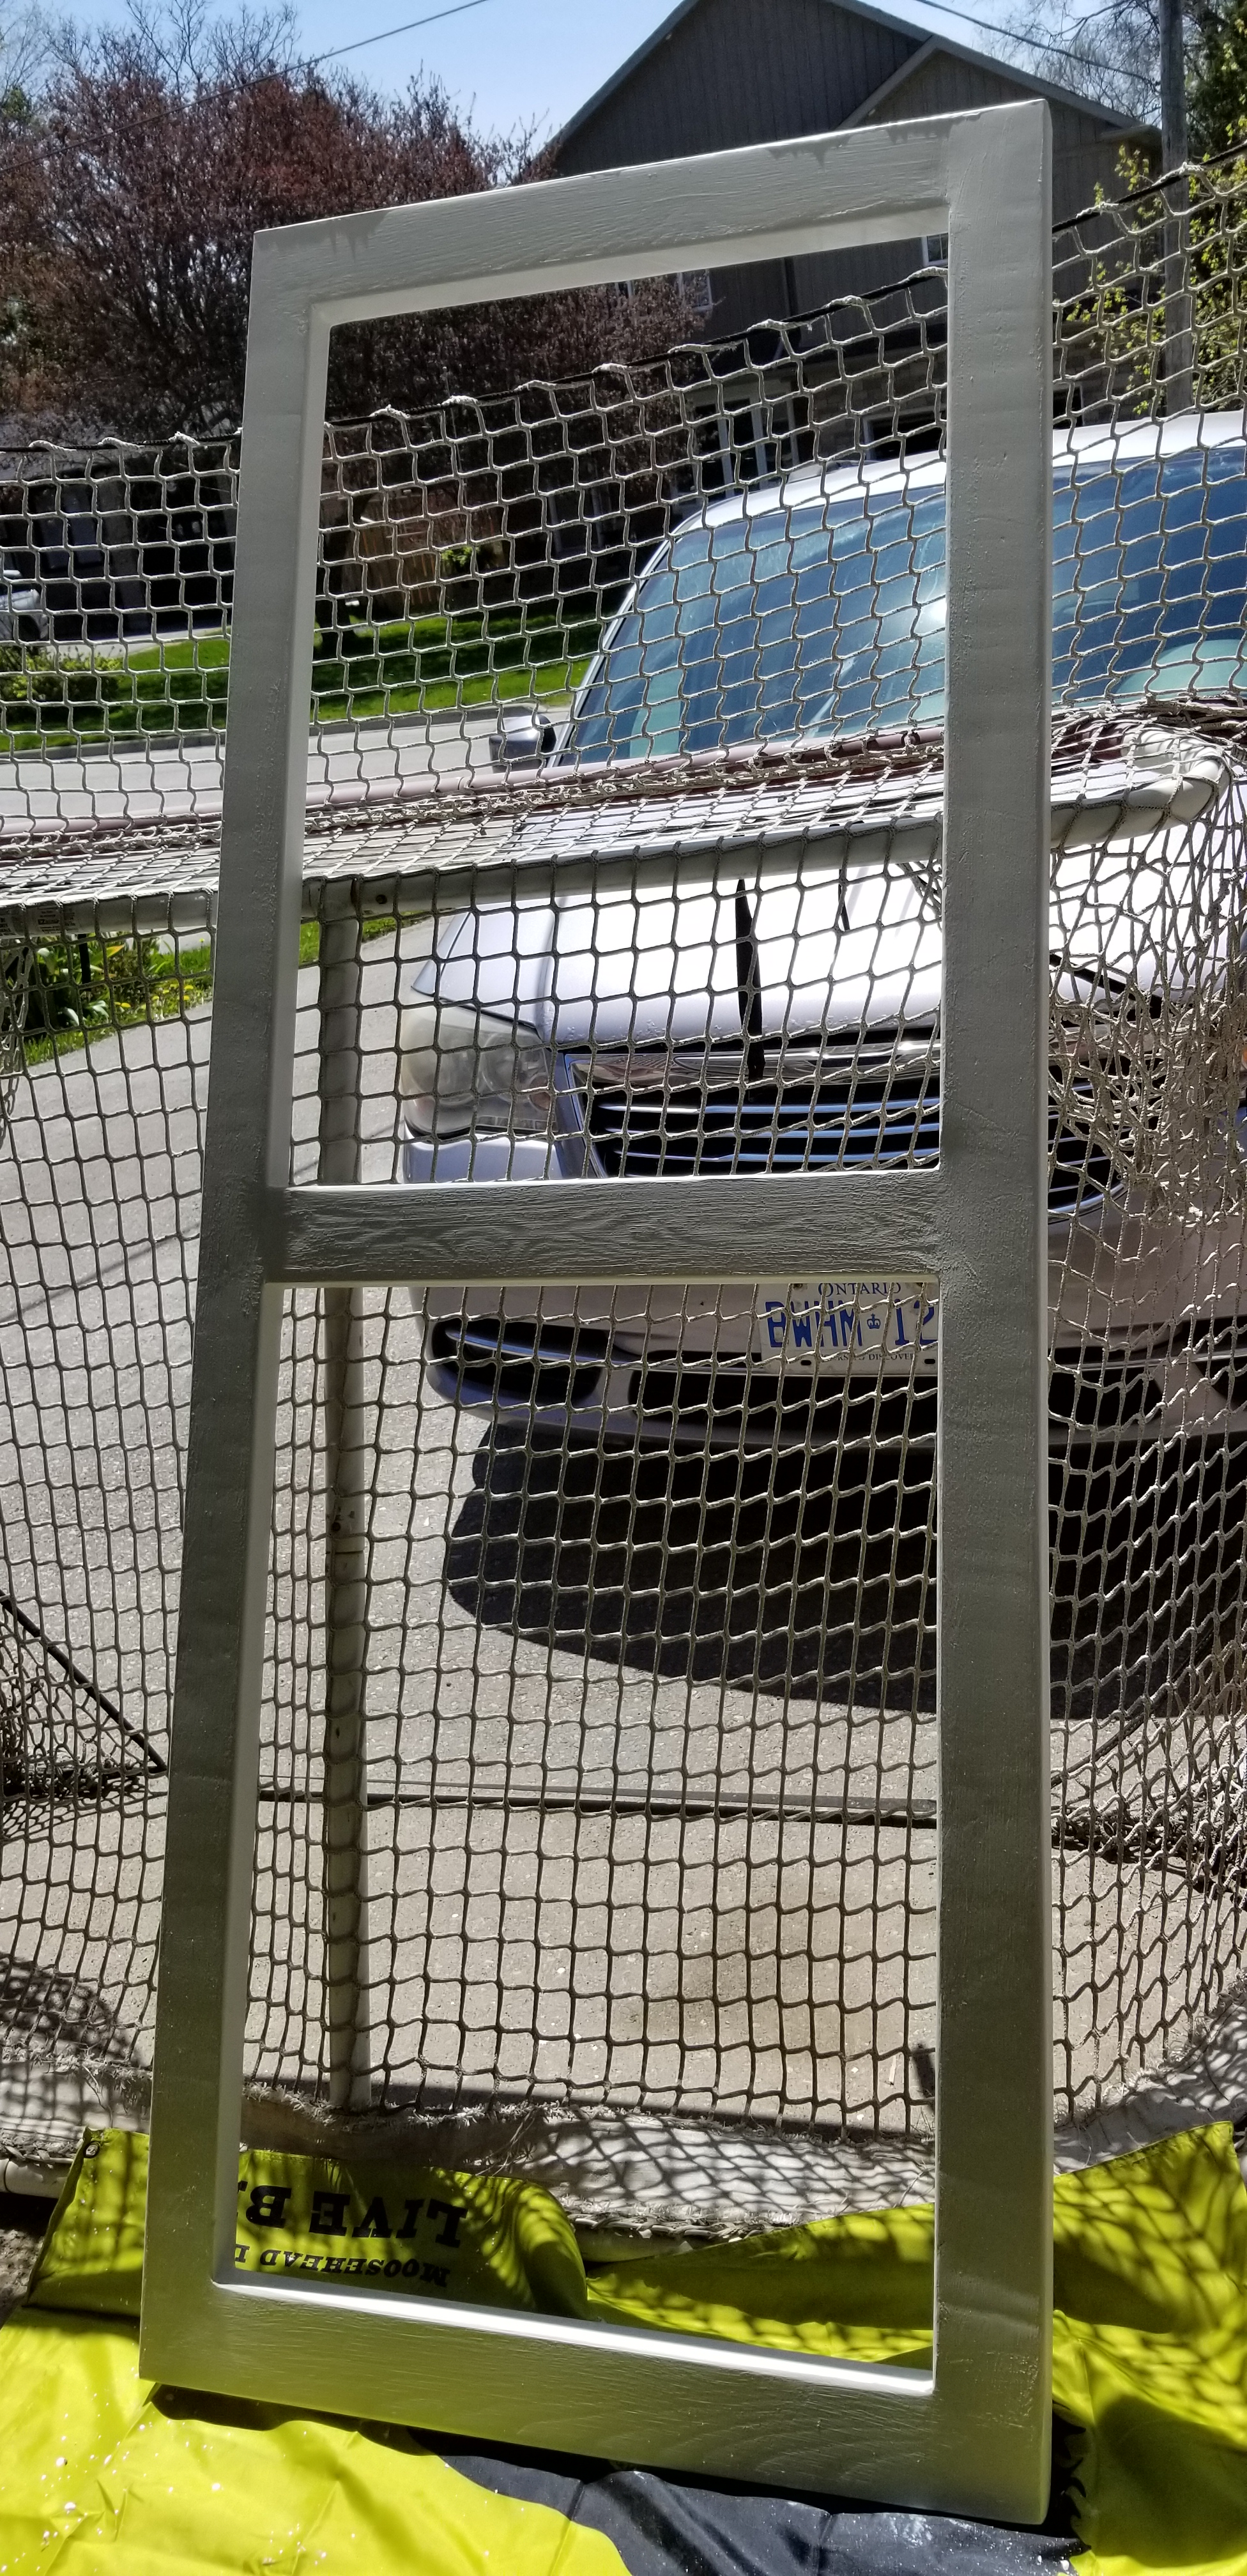
The Pine bed frame is one inch thick, with box joints, and a slatted cross member design. The feet all screw on, and the slats screw down into their mortises for extra peace of mind. It’s light weight, and has been stained to a Walnut brownish tone. One single pass. I’m told with Danish Oil I could do multiples, but I find one wetly soaked coat works fine for me. It ain’t no heirloom quality piece but it should last a few years. I hope.

(Fig 1.) Pieces break down. 6 feet / 6 slats / 2 rails & 2 ends.
(Fig 2.) Hand scraped finish, but sanded to 100 grit. Very rustic appearance.
(Fig 3.) Assembled upside down. Original Pine colour showing.
(Fig 4.) Starting to Stain with it still upside down. Notice how much room I now have to get all the way around it! Ohh- Aah.
(Fig 5.) All stained up, drying & off gassing that nose prickling oil finish smell. Could stay in here for a few days getting that smell to dissipate.

Finishing isn’t exactly my favourite thing to do. It’s sticky, and smelly, and finicky too. My shop doesn’t have an air cleaner, nor do I use anything better than a shop vac to control the dust I make. Not good for high end, ultra high quality finishing. But I get it done regardless. Although now the temperature has plummeted down to minus one, and will go even lower and bring in some snow too. So I don’t know how anybody can plan around this type of thing. Well… a temperature controlled working space would alleviate those stressors, but I ain’t got that kinda dough just lying around for a quirk of mine.

So maybe a single spray on layer of Diamond Coat will go on next, or not. This piece may not be worth the additional effort. It will get scratched & marred. I’m none too concerned about that. If I can get a shot of it in situ up north I’ll update about the bed frame one last time. Take care out there. Ciao Bella.

The Pine Bed Episode. The one where I learn, again, not to leave projects for months on end and expect everything to fit as well as the day I made all the joinery in the first place.

The story up till now goes as follows; My youngest was in a crib at the cottage for a long time. Then I transformed said crib into a day bed, which she used until she was too long for it and spent all night kicking the end and side panels waking everyone up. I took the crib down and we pulled a single mattress into the room and set her up on the floor. With the intention of putting up a bed shortly there after. Things happened over the summer and the bed was forgotten about. Travel, funerals, anguish, and work took a front seat. Come to September and I milled down a few pine boards, cut them to size, made lots of tight fitting joinery, and then let it sit because I had other things to do and it wasn’t a priority. Fast forward from September to February and a warm spell and I finally had the time to sand it all down, and then I went ahead and began assembly and fitting it all together. Wood movement is a thing, and I continuously don’t pay enough attention to that fact and leave projects for months on end. Good news is, we are assembled. I need to do a few gap fill touch ups, and then a final sand in a few spots, and then stain it all. Let is stand & off gas for a few days then schlep it to the cottage in the back of a truck. It’s pine so it’s pretty light. Easy to move around, and lift up several sets of stairs.

Unsanded pieces.
Freshly sanded pieces.
Assembled while upside down. Waiting for box joint fixes, sanding and wipe on, wipe off stain.

It’s not the prettiest thing, certainly not heirloom quality, but one inch thick pine should hold up for a few years at least. Slatted to hold a box spring, or go straight over with a firm mattress. Would I have preferred to build it with Walnut or a hardwood, certainly I would, but it would be 10X the weight, and who knows how much extra in cost.

I put in an order for 20BF of Walnut last night from a company that delivers. Rough cut, one inch thick. Should come some time next week. I can then plan some narrow book shelves for my kids, and a new Urn. I’m going to try hand cut dove tails this time. I want to book match the outside so I’ll also need to cut some boards down the middle too. That will take some time. Sounds like fun!

I just can’t seem to find the time to get over to the mill to view lumber, so getting some delivered is really helpful. If the wood quality is a bust then I will have to do so myself, shop in person that is. I didn’t spend crazy money on it, so I’m not expecting glowingly perfect boards. A touch rustic perhaps, definitely straight with no cupping, or twist would suit me just fine.

I recently had the chance to use my wood moisture meter. Works great. Reminds me I need to charge and format my endoscope for the car. Has lights on it too! He-he.

We have the funeral today, so I need to fetch the kids from school, change, and head over to the visitation, and then the service proper, and then hang around after to take all of the decorations, flowers, and photos down. Hug your loved ones. Ciao Bella.

Day #675: Out in the Weeds

For the life of me I can not recall a reason as to why I kept this writing streak going, other than compulsion, and daily habit. Even so, I’m awfully close to going a whole year without writing any short stories. I have written copious amounts of nonsense, and silliness though. Funny to think I felt my numbers of views were down in the year to year review, so I tried to write every day for a few weeks before I hit New Years Eve and was going to stop. Then the next calendar year had the best showing ever, and then dropped off again. Not as low as in years I posted almost nothing, but I failed to gain enough traction to warrant making the writing streak a compulsion. So what do I do now?

Did a few other things as of late too. I finished my sixteenth book this year, by John Scalzi, called “Starter Villain”. It was a fun little jaunt in a mixed up James Bondesque world of mischief and mayhem. Finished it in just a day or two. Very pleasant read. I’m back to the Adrian Tchaikovsky novel I tried to start several weeks ago. Hopefully now I’ll have the available concentration to read five or six hundred pages of science fiction. I’m still halfway through “American Prometheus “, so I should either finish that or hang up that particular book mark, and call it a day. It’s good, and thorough to say the least. A bit like reading a textbook. Something I haven’t needed to do in close to twenty years. I feel as though I should read it at a desk with a highlighter in hand. Gives off those kinds of vibes. Still a good read. Just more dense than I care for right this minute.

I got into the shop this week to work on my pine framed bed. I have some work to do on the box joints, as I didn’t go deep enough, and I need to square off the bottom of each joint, as I left them rounded over. But on the bright side I did some bandsaw work, some hand saw work, and got the project just a little closer to finished. I’ll take it!

We have a PA Day today, so the kids are up early, of course, not that we have to shake them and roll them around their beds to wake them up on a regular school day. Where they cry and moan about wanting to sleep in, but on the days they can do so, they are up earlier than usual without a problem. I can’t tell you what a surprise it will be once either, or both start to sleep in on weekends, summer days, and holidays. I imagine they’ll be up late making a racket around the house so not much of a win there anyway.

The other day I went out and picked all of the remaining apples off of our two fruit trees to send to my friends horses. I had a fair amount of quality sized apples this year. The red ones all fell off earlier, and the wasps terrorized those for weeks. Once the temp dropped enough to drive them away I came to claim what was left. A half a grain bags worth. No where near what was on both trees, but I don’t fancy getting swarmed and stung for apples. I thought we were going to get a bunch last year with all the blooms the trees had, but then no fruit was produced. This year however, whoo boy! If I had a bee suit and a cider press I could have picked all 2-300 apples between the two trees and made some cider or fresh apple juice!

Apple picking on the side yard.

Funnily enough I recently saw that an old acquaintance of mine was coming to the end of a contract position, and i saw a job posting that i thought could be right up their alley, and they complained to me about it. So don’t be alarmed should i not do things of that nature for other people. This year has really reiterated how bad of an idea it is to do anything nice for other people. Yet i keep on doing it. Going to learn my lesson at some point. Or become a jaded prick about it. Either way – we all win!

It is currently raining. It started to rain several hours ahead of schedule so I am happy we decided not to go back to Canada’s Wonderland for another Halloween Haunt adventure. Was supposed to start between eleven and midnight, but was softly pattering on the ground by eight o’clock. We’d have been there for little more than an hour and it would totally kill the vibe. Mist is one thing, but a full on rain would end the night. Precious few available days left this season. I think we might be finished, but perhaps we can get one last visit under our belts this year. I’d very much like to ride Yukon Striker one more time. It’s such a smooth ride. I like the articulated carriages. Plus I feel as though they weren’t concerned about the footprint so they were able to make softer transitions between tricks/gimmicks, and your neck and back are all the better for it. Five stars, do reccomend! Try it at night in the dark.

Love those decorations!

If there’s one thing I know, it’s that…

I am going to drastically underestimate how much time it will take me to break down wood boards into something usable for a specific project. Now I’ve had these 12″ wide, by 1″ thick by 8′ long pine boards since the spring of 2020, at the height of our flatten the curve, stay home whenever possible portion of the current dark time line. I had intended this wood purchase for making larger Harry Potter trunks, but after making four of them, plus a few tool boxes, trays, drawers and such it fell off my radar. Now I need a single bed for my youngest child at the cottage, I think now is as good a time as any to try to make some plain, but classy simple furniture.

Which brings us back to my original statement. Just how long it took me to break down three 12x1x8ft pine boards into the needed pieces on my improvised cut list. After all is said and done (assume all lengths as 8ft long and 1 inch thick here, I don’t want to have to repeat that part over, and over again) I have four outside members at 5.75″ wide, and three that are 3.75″ wide. I have not planed them as of yet, nor jointed them. I feel like I want to do these with a hand planer, and a card scraper. So smooth, but not an 800 grit buttery smoothness. Had I of chosen to use Cherry or Walnut I think I would go to those kinds of lengths when finishing. But here, hand plane or card scraper smooth will be just fine. I’ll round over the edges with a router, as I don’t own any type of hand jig shaper to do profiles and things of that nature. I’ll get to my point, as I digress.

Just a few simple measurements and a handful of cuts took me 73 minutes. *Face palm*. Yeah – I was not rushing in the slightest. I’m not sure I could have gone any slower though. Setting up the fence, double and triple checking my measurements. Getting my roller stand to help me keep the 8ft long 12″ wide boards horizontal with the cutting plane was awkward. Helpful due to the weight, but cumbersome. My featherboard only worked on cuts below 10 inches. I knocked things over, and banged the fence a bunch, so I had to stop and reset. Glad I don’t charge by the hour for this hobby of mine.

My main concern is doing a three prong box joint for my main bed frame. Some legs with pegs to keep them in place. And some hand cut channels to drop in six (or so) cross braces or slates, so that the mattress or box spring can’t fall through the center. If I get a bit overzealous I can give one end a headboard to stop pillows from falling off. In accordance to the room it’s going into, one side and one end will be up against the walls, so I don’t have to go crazy. I want it to be sturdy. Have no sharp edges, and try to inset the legs to avoid stubbed toes. I want the legs to be tall enough I can get a vacuum head under the bed, but not so high the mattress feels like it’s up in the air. Little kids and falling onto hard floors won’t make me anyone’s favourite human. If I can keep my cuts flush and not full of open gaps I’ll be a happy camper.

I have lots of dark stain. Walnut, smokey green, ebony even. I’ll have to ask my kid if they want it to still look like wood when completed. I really just want to get her mattress up off the floor now that the day bed slash crib is going to a very pregnant cousin for continued use.

I’ll take numerous photos if I manage to get any further into this over the coming days. I know I have six large projects coming between now and Christmas, so if I work smart I should be able to do this without too much of a problem. If I get the legs sorted out, and the slates cut down, I can pick away at the main frame box joints and have it ready for late November or by Christmas at least. I make no promises.

Follow along as I shoddily remake other people’s famous designs like a hillbilly gone blind on moon shine. You like cupped boards, with twists and knots? Have I got the perfect project for you to follow. Adios muchachos.

The Partial Urn Building Episode: Vol 1.

It started with a quick trip to pick up some pre-cut bits of Red Oak wood, hopefully eight (8″) inches in width, a quarter inch thick and around four feet long. Couldn’t find any, so I bought additional five and a half inch (5.5″) boards so I could join them to get the height I was after. I chose the straightest boards I could find after digging through a pile of about twenty or so pieces. I then grabbed a two inch wide, by three quarter inch thick piece to become the trim for my plywood core base. And then I also grabbed some two inch by quarter inch, by four foot strips that will eventually become a tray that sits inside the top of the urn’s central column.

So first off, I rounded over one edge of my two inch wide by three quarter Red Oak strip. Then I cut it down the middle to be one inch wide. Two inches, after further reflection was just too much. Too over powering. Too chunky. Then I flipped that strip rounded edge up against the fence of my table saw and cut out a quarter inch channel for the plywood core to Nestle into. I then spent a considerable about of time measuring and cutting and sneaking up on the mitred corners for my base. I got three that were perfect and one that was off. Seems as though, when I cut the two inch strip down to one inch I released a bunch of tension in the board and it went catywompus on me right from the get go. Not enough to be visible, but enough that with matching lengths and cuts, one corner was out by nearly an eighth of an inch. Very frustrating. Once I had this cut and roughed together I was able to cut down the plywood core that will be ensconced within the red oak chunky trim pieces. After gluing it up, and then spot patching the one sides gap (I managed to get it down below a 16th, but just barely. I was able to sand it, and clean it up to look as though I know what I’m doing.

The Red Oak Urn, loosely held together with clamps so I can measure & fit what’s in front of me, and not what I had on the plans I mocked up.

With the base glued up, I can begin to cut down one of my 5.5″ boards and do a couple glue ups to get my eight linear feet of 8.25″ wide boards for the inner column of the Urn. After the glue up, I extracted them from the assembly table, and the myriad sets of clamps I had used. I used a paint scraper, and then a card scraper to clean off the surface, and then tackled what was left of a visible glue seam with some higher grit sand papers to make it mostly disappear. Next, using the hard measurements from my newly constructed base I began to cut down the outer walls of the urn. At this juncture I decided against more mitred, and went for butt joints. Simple, yes, but effective. I had, at this point, decided that I wanted two layers of wall for the column. The exterior being the full 8.25″h, and the interior two inches shorter, all the way around, so that my tray, once built, would have a partial shelf to sit on, and thus, not potentially fall all the way through into the ashes below. You know, because it’s an urn.

Next steps are the glue up the outer, and inner walls of the central column, pin them in place discretely, but not fully attach it to the base just yet, so that I can sand more unencumbered. Then I can build the tray itself, which will get lined in a 2mm thick felt (Green, Yellow, Burgundy or Blue), i haven’t decided yet. The red oak will dictate what looks best at this point. And once all that is done i can build the decorative outer display cap. This i want to sand and polish up to a very high sheen. It will require hours of sanding, up to about 600 or 800 grit. Then the use of my polisher and wood polish to get that majestic final finished look to it.

The weather is cold and miserable once more, it is February in southern Ontario, so no surprise there. This is the middle of winter, and we’re having the strangest winter I can ever recall. So it might need to wait a bit until I can go back to do more. I have it all documented, and labeled, so I can go back at any time and not be lost. I have no heat, nor moisture control in the garage shop, so let us hope it doesn’t all go ape shit if left for a week. Fingers crossed.

Some of you may know that I had intended to build this out of Walnut, Ash or Spalted Maple which I had lying around the shop. After a good think about how long it would take to mill all of that up into useable lumber pieces, and given the (potential) time constraints of the Urns requester, I felt starting from wood that was already 4s was a smarter choice. My planer, and bandsaw hate to work in the freezing cold. And they make a nasty racket too at the best of times. Oh well. Now I can make one for me with my own materials later on, and it won’t cost me much beyond my time.

The plan, the plan. What!?! Is the plan…

I think I’m going to aim for 400 days of blogging, creative writing, and a general sense of nonsense and then reassess. I didn’t really have a plan beyond wanting to do a little writing every day for a year, and well…. now I am beyond that by a slight margin. I don’t have any goals for writing beyond the mere act of doing it. I try to get more concise. To limit run on sentences. To be more coherent in general. I’d actually need to reread a portion of last years posts to see if I managed to achieve any of those things. So, I’ll go out on a limb and I will say, sorta, kinda, maybe?

I do use this medium to moan, and lament about daily struggles and annoyances. But believe you me, I don’t have it too bad. I’m doing just fine. I could do with slightly better gut health, but otherwise, we’re all good. I just love to narrate a good gripe, every now and again. For those at home keeping score, I have Domestic Duties Monday’s, which sometimes gets bumped to Tuesday. I occasionally do movie reviews. Mostly if they are awful, or evoke some type of emotional response from me. Rage being a perfectly reasonable response to write about.

Rarely, I will cover retro gaming with my kids. As I have access to a Sega Master System, PS1, Nintendo 64, Super NES, Atari game system, Xbox , and an Xbox 360. So for older games we got you covered! I had kids so the PS4 & PS5 sailed right by me without waving. So nothing more recent than late stage 360 games get reviewed here.

I sometimes cover wood working projects, home DIY items, and my own spin on sculpting monster/creature busts and figures. I don’t recall ever discussing my music tastes, or instruments, but I can if I felt like it. I have taken to assembling an instrument stock pile, so that my kids have access should the mood take them. Key board, guitars, possibly drums, a violin, and a clarinet. Maybe we’ll form a family band just for kicks to keep ourselves occupied in the future. Who knows.

I just feel like I want to quit dreaming about things, and just go do them, regardless of being an awful noob and all. I don’t need to be any good, I just want to do the things, and experience them first hand, instead of watching others do the thing on YouTube. Perhaps building a new skill, or just preparing the way for my kids to learn, and do new things too. No point being miserable doing only what others expect of you. That way lies madness, depression and misery.

So in short, I don’t know how much longer I plan to keep going on a daily basis, but whatever I do, it’ll be more of the same. With the caveat that I might stumble upon a good short story theme or character, and then light up this phone with new installments. Fingers crossed. Ciao Bella!

The Shelf Unit Episode: A Tale Told in 275 parts.

The unit is finally taking shape after a few weeks of lingering on the bench, languishing in stoppage after stoppage. I still have quite a ways to go on it, but progress has been made over the last week.

I hand cut all twelve mortises. Well two of which, the through and throughs, were done on the table saw once I had build a quick & nasty jig to clamp the legs to so as to not put my hands near the blades. But all of the .25″ deep mortises were chiseled out by hand over two or three days. I am currently busy with paid design work. So I’m slow moving with home infrastructure projects.

Hand cut chisel mortises.

Then I completed a dry test fit which lead me to do some last minute rasp work for better fitment. Nothing major. I put the whole base together to test things out which was tricky to do single handed, as my pressure fit mortises are shallow, and I knocked it down a half dozen times tugging on corners that weren’t square. But I got it to stand freely of it’s own accord.

Test fit of first two hand chiseled mortises.
After considerable wrangling I did manage to get the whole base dry fitted together and it stood by itself for 24 hrs without collapsing. A good sign!
You can see here how shallow I cut those mortises. Just a tiny pocket to rest in. So delicate.

Then as of yesterday I began to glue up the cross braces for the base, three pairs of them. Glued and clamped for assembly. No real hassles here. I glue up on my bench over blue plastic garbage bags. Only need to glue a vital piece to your wooden bench once to know never to do it again.

The braces in glue up. One tricky leg needed a set square clamped in place in order to remain 90 degrees. Probably should have done them all like that. Next time!

The top box was formed several weeks ago. Measured, cut, built using a dowel construction method, sanded, glued up, and sanded again. Still needs more sanding and then I can stain both it and the base portion together. Then I will use dowel to connect the two pieces, apply finish and bring it inside.

Fixing a dowel burst on the display surface. Peeled back a strip of pine, chopped out over long dowel, glued and clamped pine strip. Seamless.
In need of about two more hours of focused sanding. Then it’ll be ready for stain & finishing.

I’m excited to see it all come together. I used three 72″L x 16″ W x .75″ H pine laminated boards for the top box. Plus 1.5 72″ x 5″ x .75″ pine boards that I cut down into 2.25″ H strips for stretchers and braces and used along the back of my box to strengthen it against any possible racking. The six legs are made of Ash, and are 1.75″ x 1.75″ x 8″h. That I had laying around from a new set of stairs that got put in at the cottage two years ago. I’ll post a photo once I get it all completed and set in it’s final resting place in our living room.

**UPDATE** I managed to get Walnut tinted Danish Oil stain on the base and shelf portion, as well as put in the dowels to join the top & bottom together. Waiting on the glue to dry as we speak. Last item is a 400 grit scuff followed by some Osmo poly clear wax to pick up the shine/gloss. So excited!

Walnut tinted Danish Oil on the base.
Walnut tinted Danish Oil applied to all of the shelf unit.
Test fit for base placement prior to drilling out and fitting the dowels to join the two pieces. Almost finished. Can see the finish line from here!

Staining on Day 196.

Last quiet days of school are upon us, and I have some hobby stuff to finish prior to my next report coming in. Decided to recut my cross braces, as I sanded them too vigorously and the snap fit became too loose. So I recut those four pieces and sanded the two faces only that don’t affect their fit. I have it all broken down and am just waiting for the danish oil to soak in and dry. Then a quick glue up and this project is done! The oil really makes it pop. The Osmo I ordered came in, so maybe I’ll polish this up with some later on? Not certain. I’ll be holding off on furniture building until September anyway. So now rush now it’s just about built, and I can keep it inside where it is temperature controlled and the humidity is under wraps.

Not even ten am yet. What a great day. Glad I had enough material laying around to recut those braces, as i was pretty mad at myself for the overzealous sanding. The Walnut stain really does bring it all together though. Love it.

I’m going to close down for a bit, give this a chance to dry without interference from me. Glue up next! Weeee!

Tear out, glue ups & cutting splines.

As much as I love the look of Walnut, it comes with a fair few issues to work through. Namely gouges and tear out during milling, and chunks coming loose when hand chiseling. I will have quite a few places to patch when it comes time to do a final sanding. I need to glue it all up first, then make a Walnut dust paste to patch all of the imperfections. I hope it doesn’t ruin the overall project.

I used packing tape on the outside mitered corners, and painter’s tape on the inside edges of each glue up. See fig 1. And fig 2.

Fig 1. & fig 2.

I used a good amount of LePage glue in the joints, which I spread with an acid brush. I folded it all up into a box, and added additional painter’s tape to the final corner. I used two box clamps and a set square to keep the hollow Walnut box as square as I can get it. See fig 3. And fig 4.

Fig 3. & fig 4.

I also clamped around the middle of the box to make sure it didn’t bulge or have the seams pop open or slide around.

After the box had dried in the 27°C heat of the day for several hours I unclamped the hollow Walnut box and began to cut in my Hickory splines. I chose to do three per corner edge on the top. And depending on how the experience goes, I might add two more on both bottom edges too. I started with a Crown Dovetail saw, cutting just inside my marked lines, and then used a .25″ chisel, cutting along a 45° angle from both the top & bottom to remove the gap where my Hickory splines will rest. If you’re legit, you’d take note of grain orientations and how your boards were sawn, and grain patterns, but I’m just trying to get something done here. Two of the three had good pressure fits, but a possible gap situation might have occured from a too deep of a run with the Dovetail saw. More Walnut dust paste will be needed. See Fig 5 & fig 6.

Fig 7 shows the glued in splines.

I only managed to cut in three splines on one side and glue them in yesterday evening. See fig 7. Once the top panel has three more glued in I can flush cut them off. I added them purely for visual interest and not for strength. Though, they may help in that respect.

I had managed to complete a dry fit test and have it all stand up on its own. I will take that as a win at this point. I know I have several hours of touch ups to do after the build up and assembly is done.

Parts layout. Still so much sanding left to do!

Once I complete the top portion I will shift focus back to the legs and skirting braces. Lots of sanding to do here. I think I will finish it off with some Danish Oil to tie the whole thing together. Ciao Bella!

Throw Back To: Episode of when I took two plus years to build a screen door.

It all started when I was gifted some Ash boards from the family farm, that were rough sawn, and stored in a shed for twenty plus years. I gladly took them home after sawing the sixteen footers in half by hand, and tossing those heavy suckers in my van.

I planed them for what felt like hours, and then had to man handle them across my jointer. Which took forever to do. This was back when I had my tiny 10″ Ryobi table saw, which kicked on full tilt, and scared me to death. Cutting 2 inch thick ash boards that were 80 plus inches in length took some doing, and set my heart to pounding. I settled on four inch wide boards by roughly eighty inches long, and two inches thick.

I then cut down four cross members, two in Ash, and two in a douglas fir that was pretty heavily knotted. It was at this point that I began to run out of warm season, and all my flat, square milled lumber got shut away in the garage for seven months.

The following spring I dug out my lumber, which was still square and decided to hand cut some mortises for the top and bottom of the door uprights. I first used a circular saw to cut two slices through the end grain about four inches deep. This was super sketchy, and my super old school, under powered Kawasaki circular saw died after a cut & a half – twice. So I finished it off with a Stanley hand saw. You know the old kind that weirdos play with a violin bow to make high pitched whiney muzak. I had to climb up on my work bench in order to get this to work.

I gathered up my chisels and a hammer and got dug in cutting away the channel where the cross members would rest. This would prove a difficult and arduous task. It took several days, and my channel was not straight, nor were they even. I took a file to them, and worked that for a few days too. It was at this point that I started to refinish a rocking chair for my very pregnant sister in law, and that took my whole season.

The following year ( this year 2022) I took some rasps to my channels, and evened them out a fair bit. I then used a brand new Dado blade to cut some even tenons for the cross members. It was an endless cycle of dry fit testing, rasping, filing, and planing until I had a suitable snug fit. Then I measured out my center line, and cut out two mortises for the third, and final center cross member. I hugged it out with a forstner bit, then used a multi tool to cut through the rest, and then hand chiseled it to a clear rectangular hole. It worked quite well. After assembling it all as a dry fit, I noticed my angles were all wonky, and then realized my flat, square lumber, was now bowed, and twisting ever so noticeably. But as I was about to begin sanding I hit the most egregious spots with a hand plane, and sort of made the best of it.

I took the time to glue the frame together. Then in each corner I drilled out a 3/8ths hole and glued some dowels through the joints. Flush cut those, and then did endless rounds up through the grits on every single surface of the door. I stopped to add copious amounts of filler, which meant no more natural wood look, but I was now going to have to paint it all white, to match the house trim.

I used an oil based primer to paint on four coats of pristine paint. Then I cut down some Cedar strips, 16 lengths in all, which would sandwich my screen mesh in place, for the two openings on my screen door. After much cutting and sanding i put the first layer in place. Cutting the mesh material was far simpler than i was imagining it would be. So i put those in place, and pin nailed my last strips on, holding the mesh as tight as i could get it.

It was at this point I placed my hardware on the door. Pilot drilling holes for the handle and a push plate. I also then hand cut in my hinge recesses. Drilled and attached those. Fought with the door for an afternoon to cut in the receiving hinge slots on the house, and hung the door single handedly (do not reccomend). I then added backing trim to stop the door swinging too far inwards and binding. Added a latch, and an extra handle, and Bob’s your uncle. Done like dinner.

I didn’t take any photos while cutting the cross member tenons, but they’re there, and I did them myself.