If there’s one thing I know, it’s that…

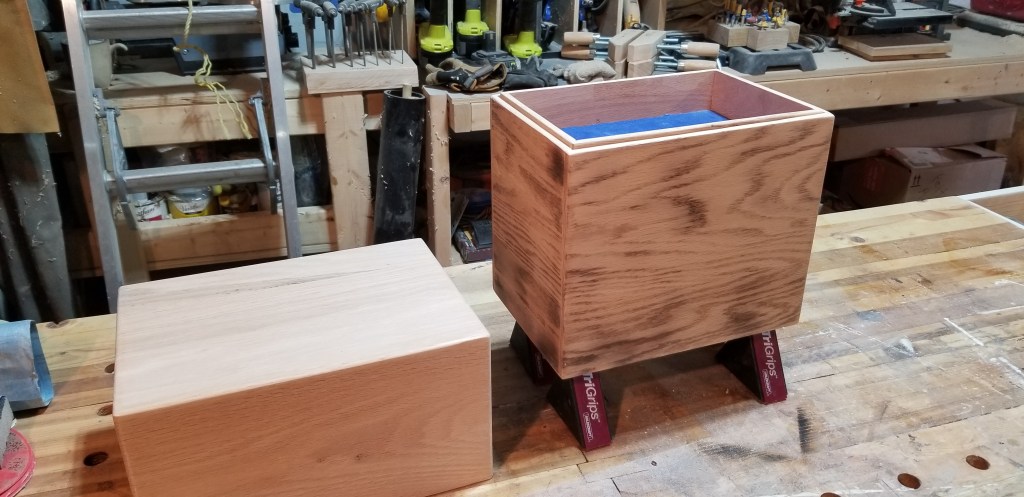
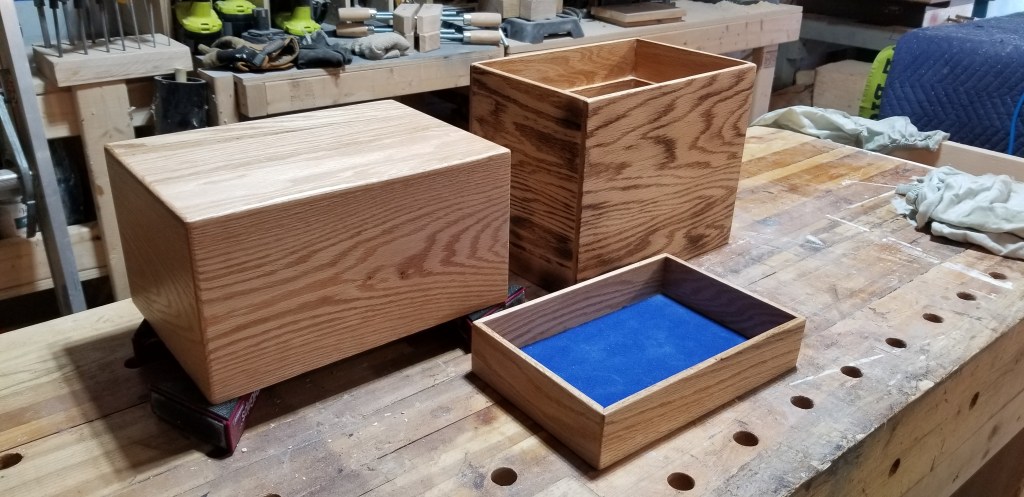
I am going to drastically underestimate how much time it will take me to break down wood boards into something usable for a specific project. Now I’ve had these 12″ wide, by 1″ thick by 8′ long pine boards since the spring of 2020, at the height of our flatten the curve, stay home whenever possible portion of the current dark time line. I had intended this wood purchase for making larger Harry Potter trunks, but after making four of them, plus a few tool boxes, trays, drawers and such it fell off my radar. Now I need a single bed for my youngest child at the cottage, I think now is as good a time as any to try to make some plain, but classy simple furniture.

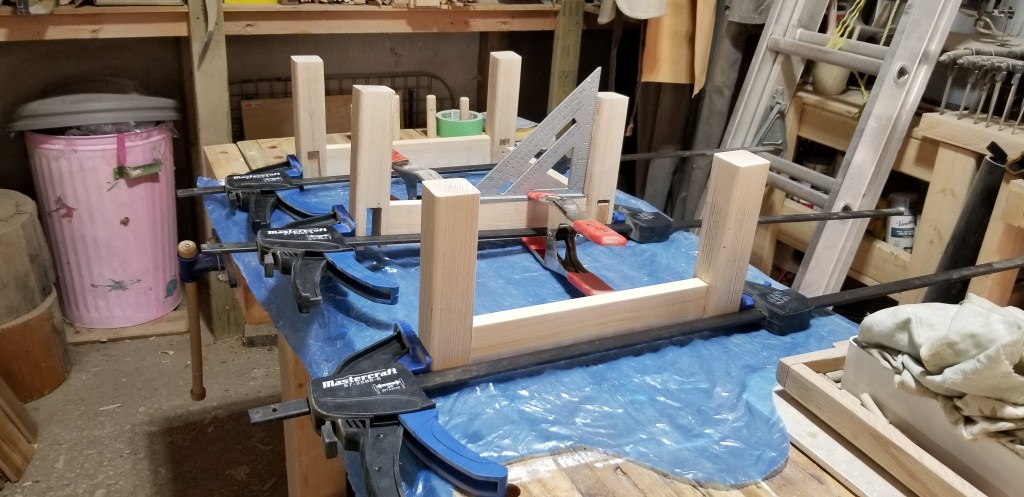
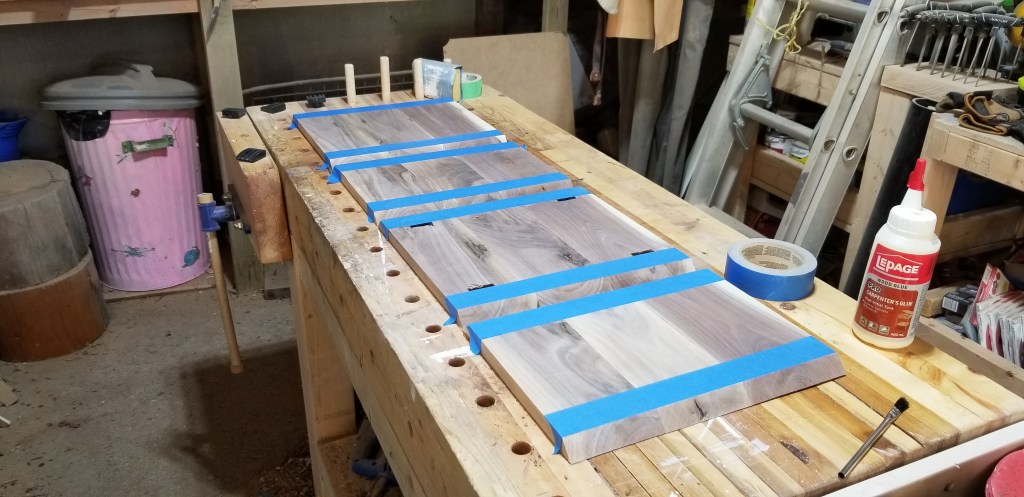
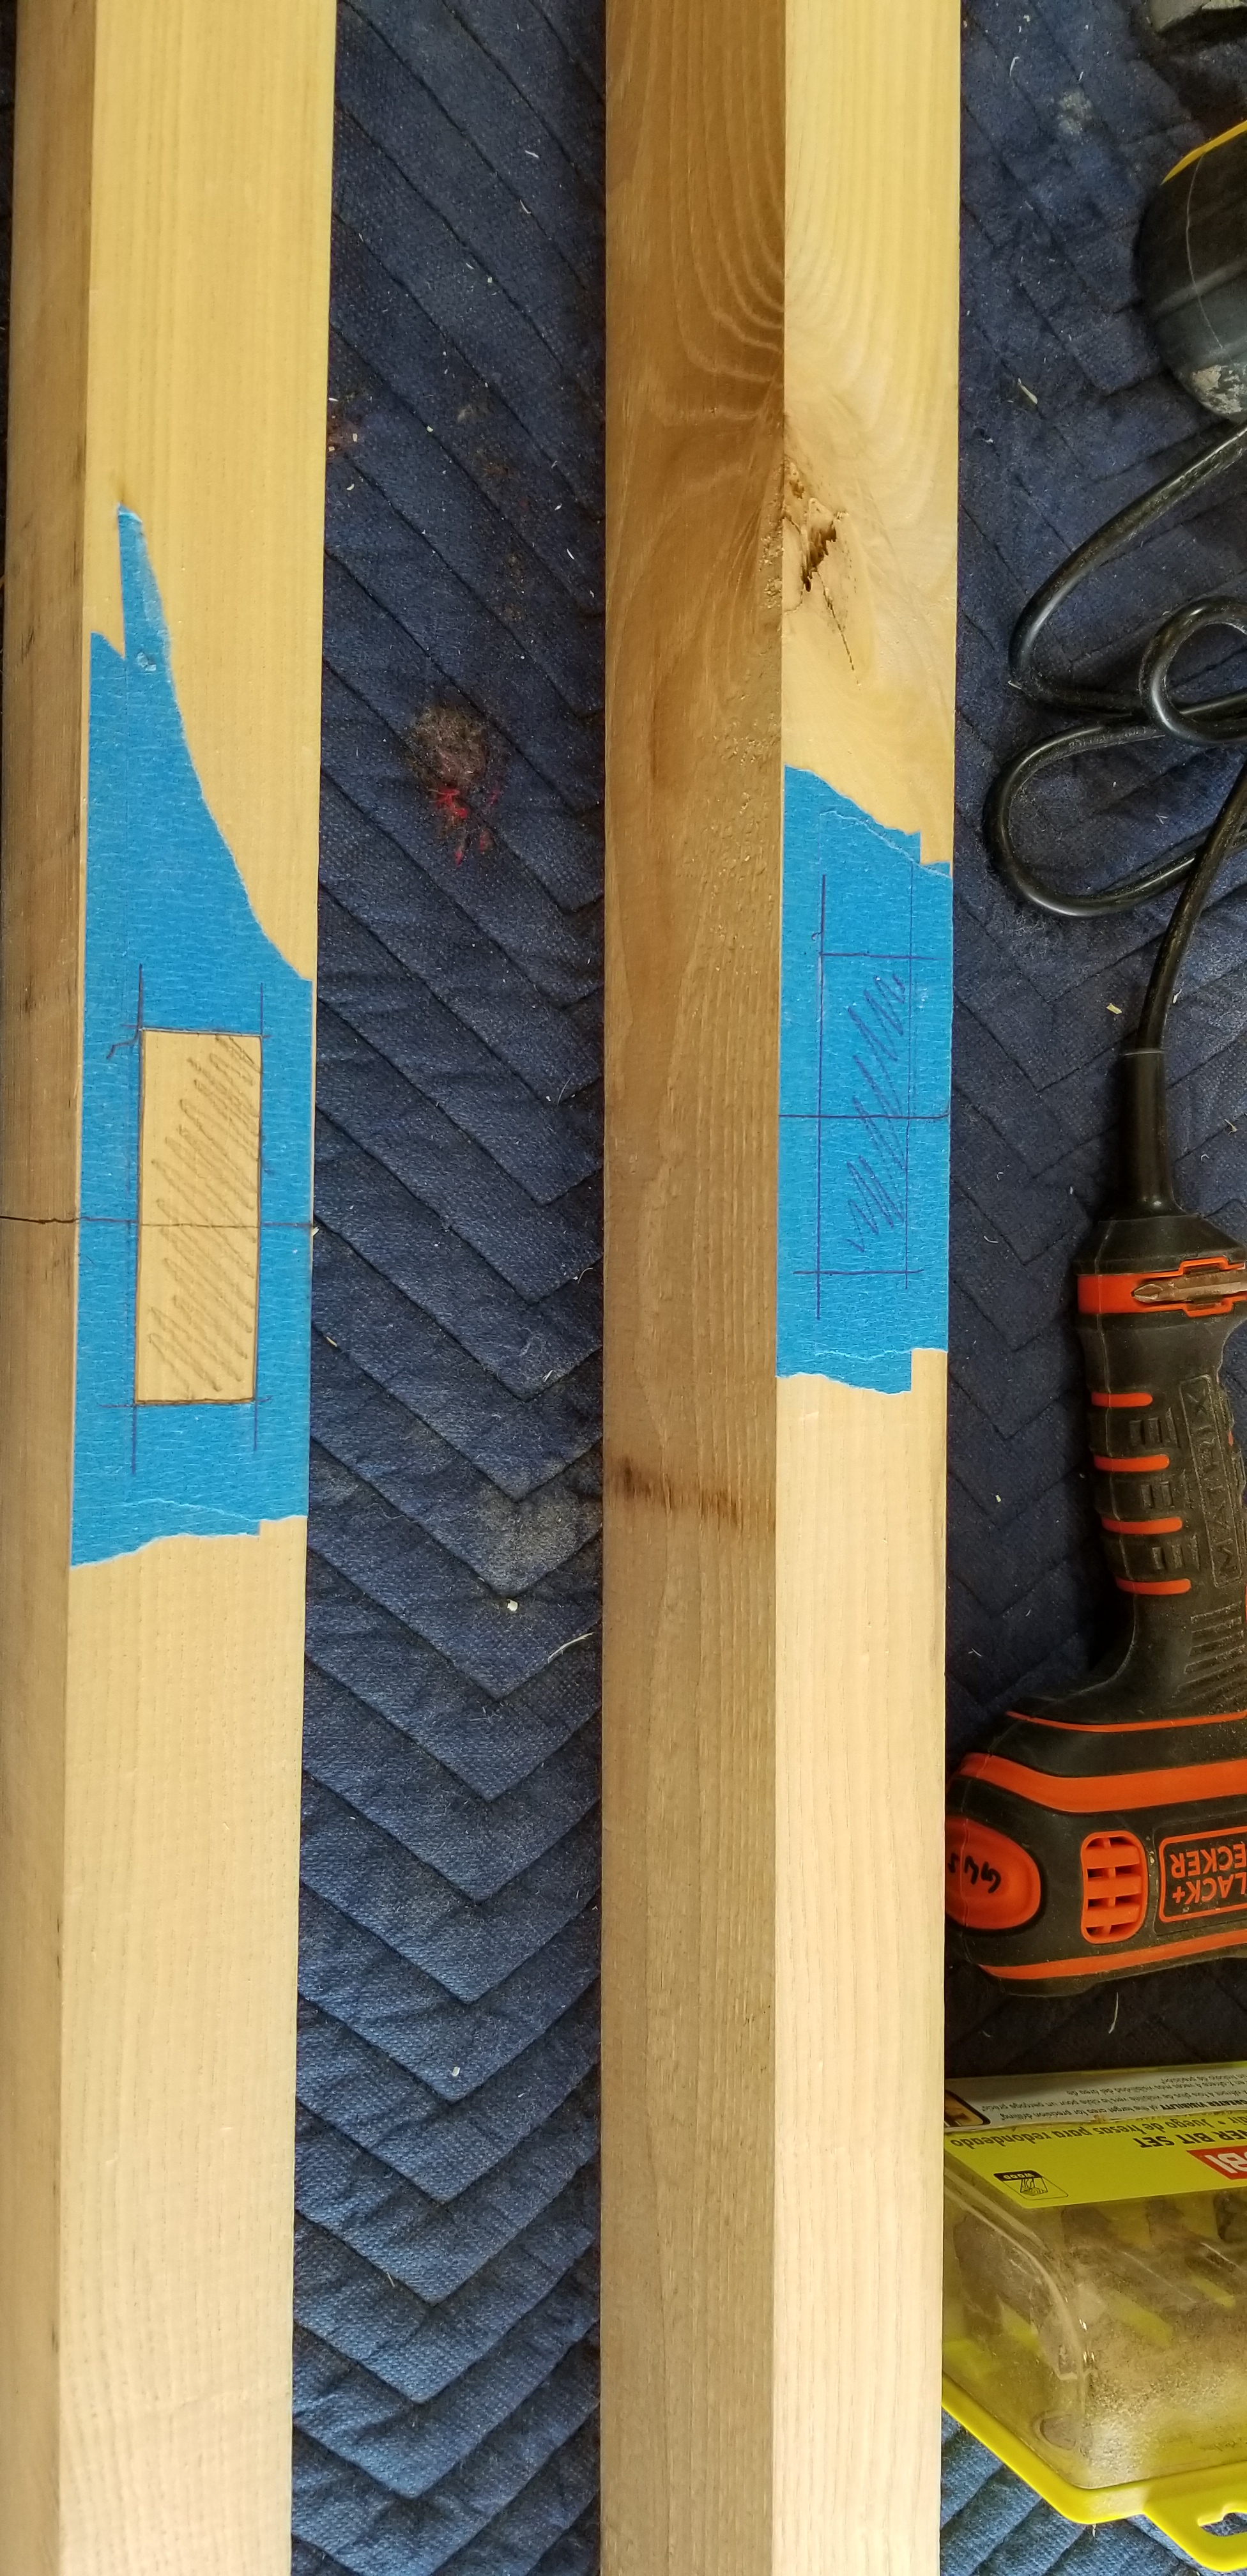
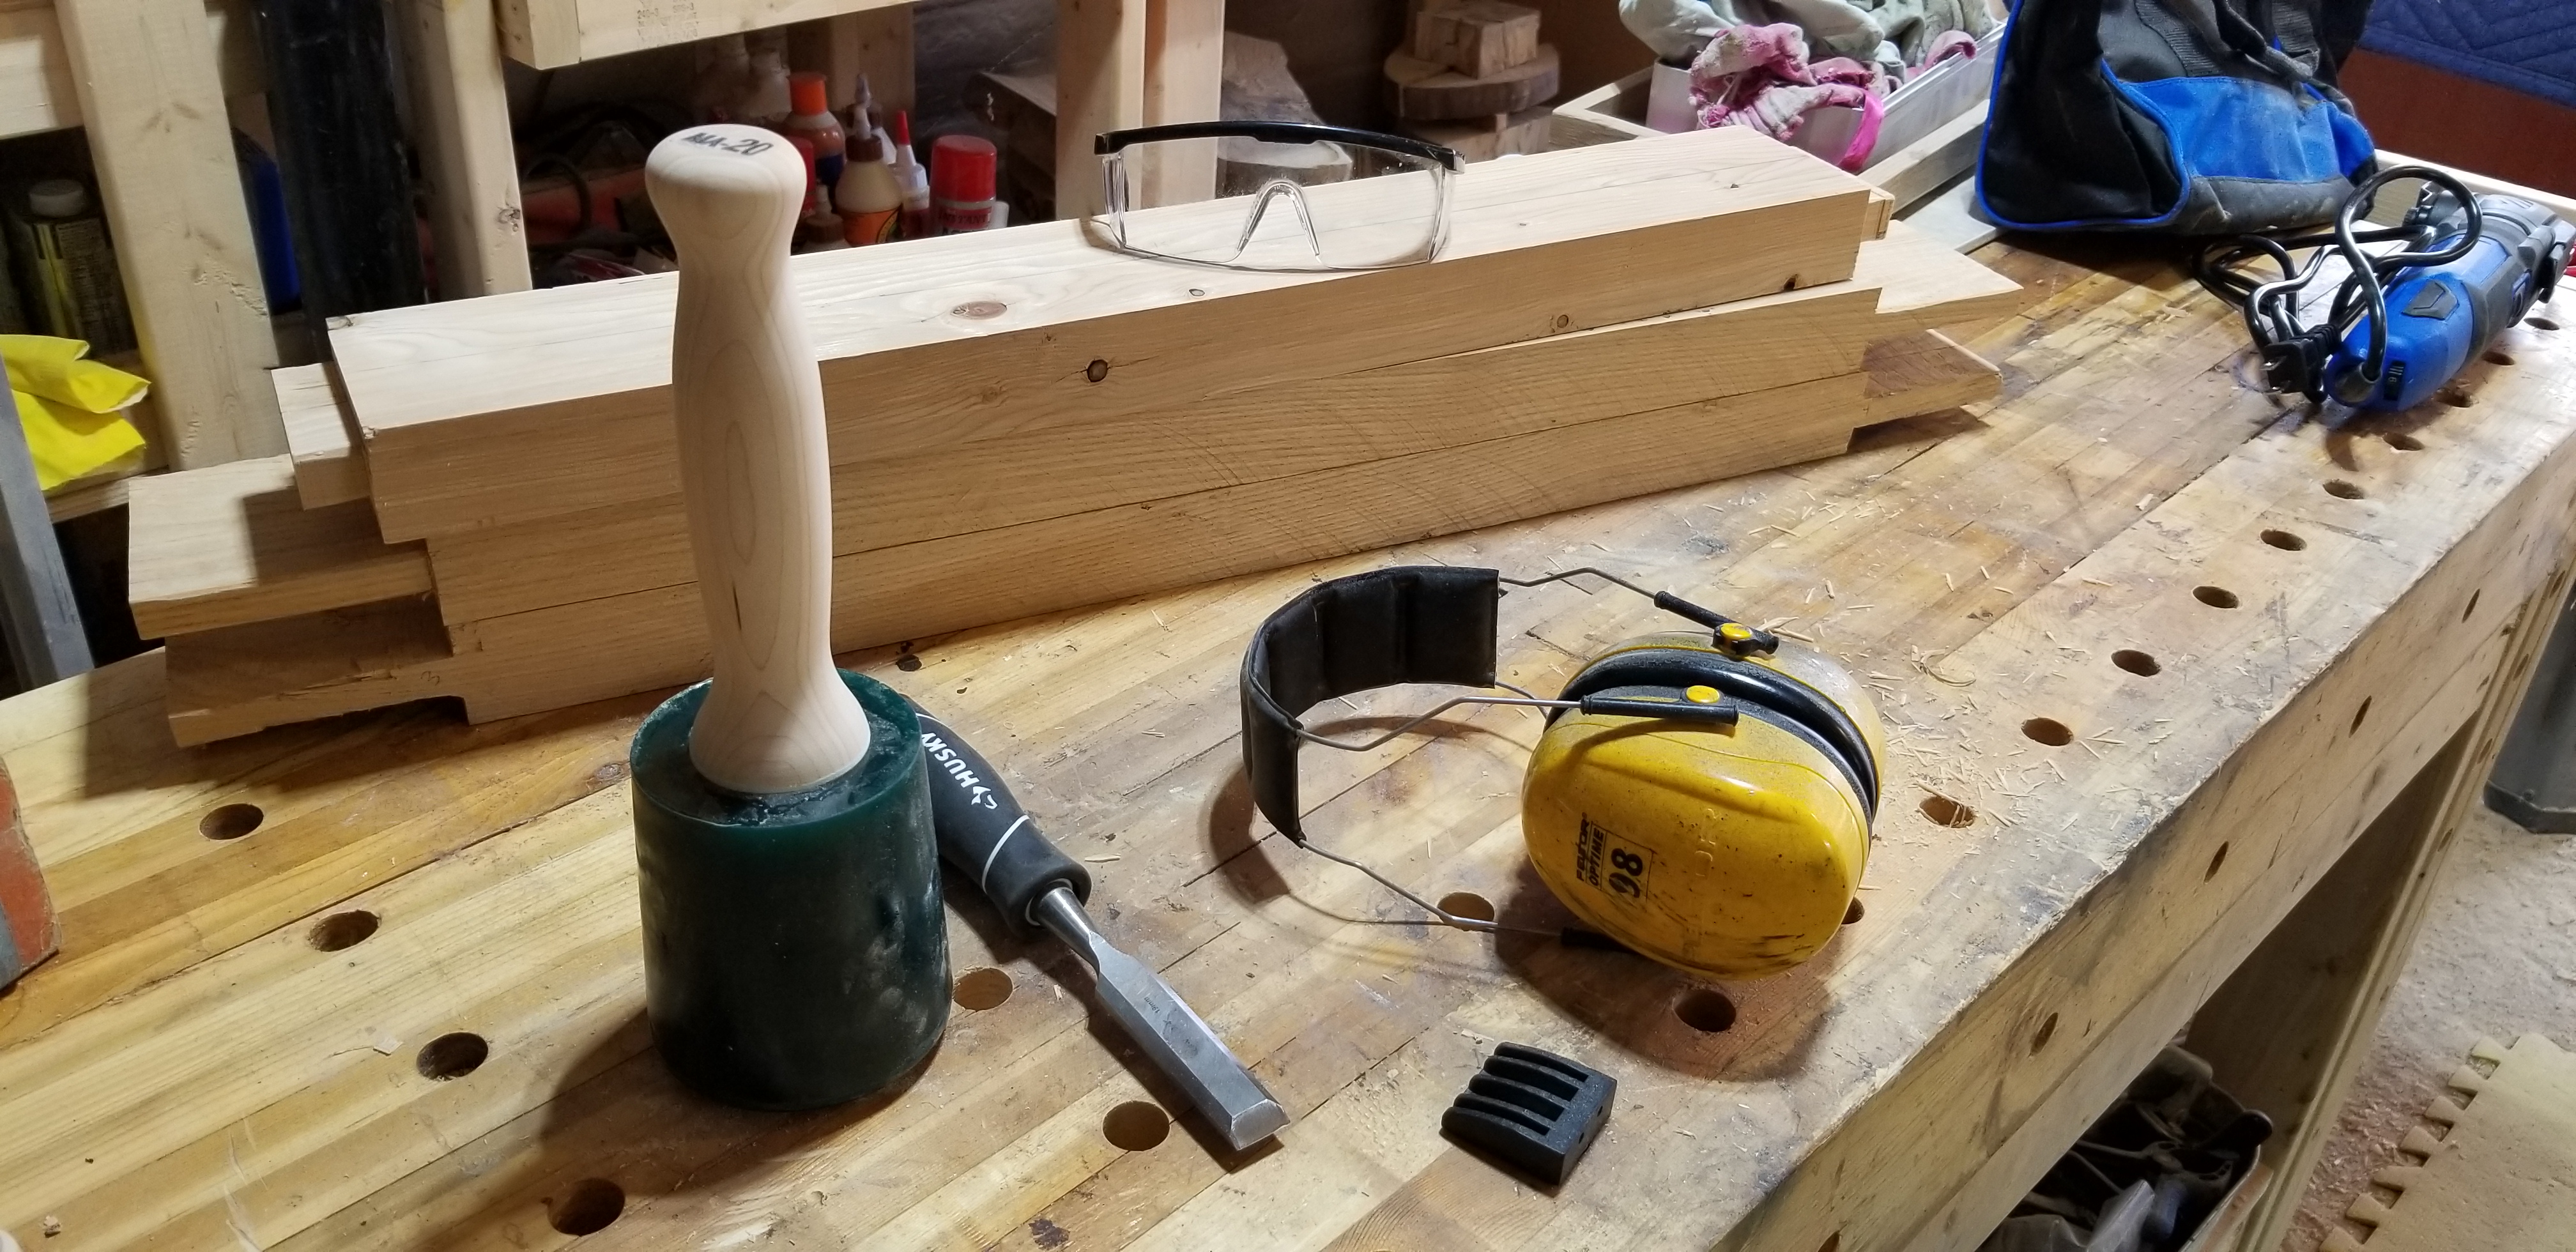
Which brings us back to my original statement. Just how long it took me to break down three 12x1x8ft pine boards into the needed pieces on my improvised cut list. After all is said and done (assume all lengths as 8ft long and 1 inch thick here, I don’t want to have to repeat that part over, and over again) I have four outside members at 5.75″ wide, and three that are 3.75″ wide. I have not planed them as of yet, nor jointed them. I feel like I want to do these with a hand planer, and a card scraper. So smooth, but not an 800 grit buttery smoothness. Had I of chosen to use Cherry or Walnut I think I would go to those kinds of lengths when finishing. But here, hand plane or card scraper smooth will be just fine. I’ll round over the edges with a router, as I don’t own any type of hand jig shaper to do profiles and things of that nature. I’ll get to my point, as I digress.

Just a few simple measurements and a handful of cuts took me 73 minutes. *Face palm*. Yeah – I was not rushing in the slightest. I’m not sure I could have gone any slower though. Setting up the fence, double and triple checking my measurements. Getting my roller stand to help me keep the 8ft long 12″ wide boards horizontal with the cutting plane was awkward. Helpful due to the weight, but cumbersome. My featherboard only worked on cuts below 10 inches. I knocked things over, and banged the fence a bunch, so I had to stop and reset. Glad I don’t charge by the hour for this hobby of mine.

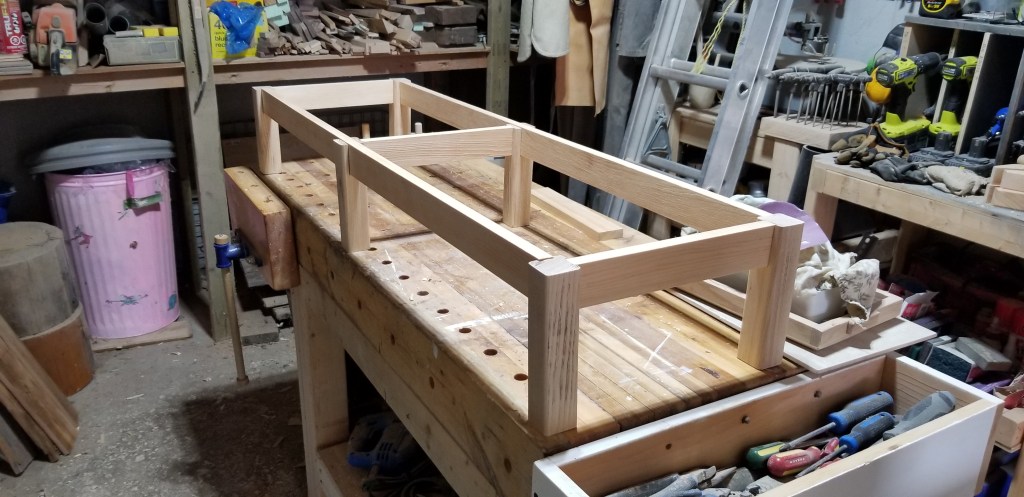
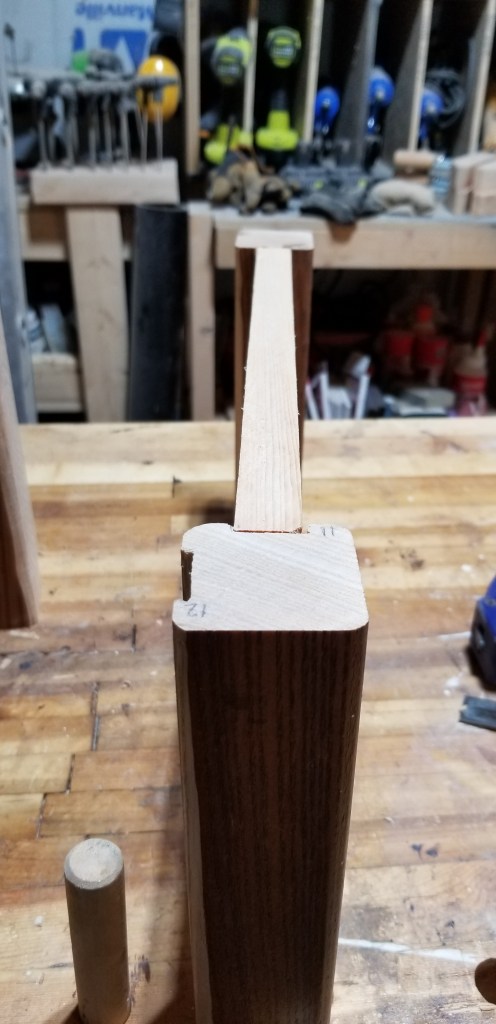
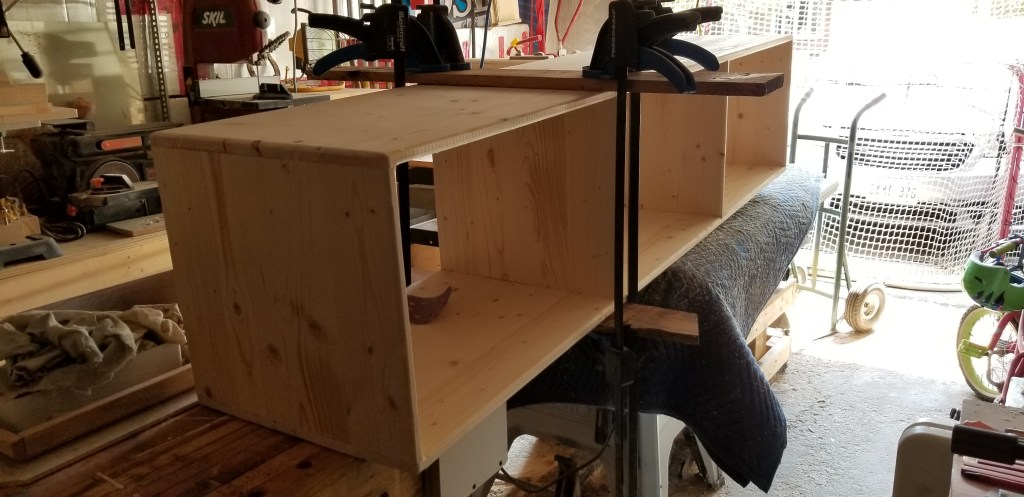
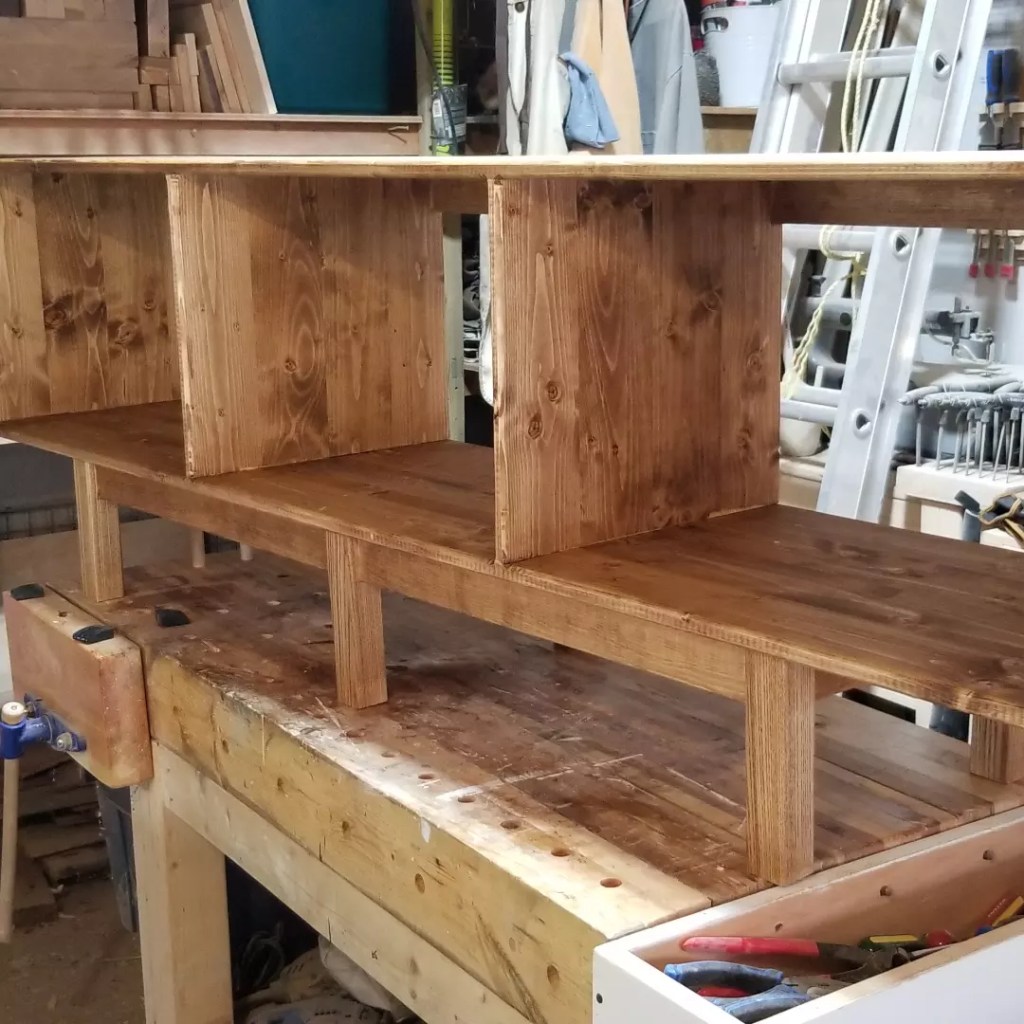
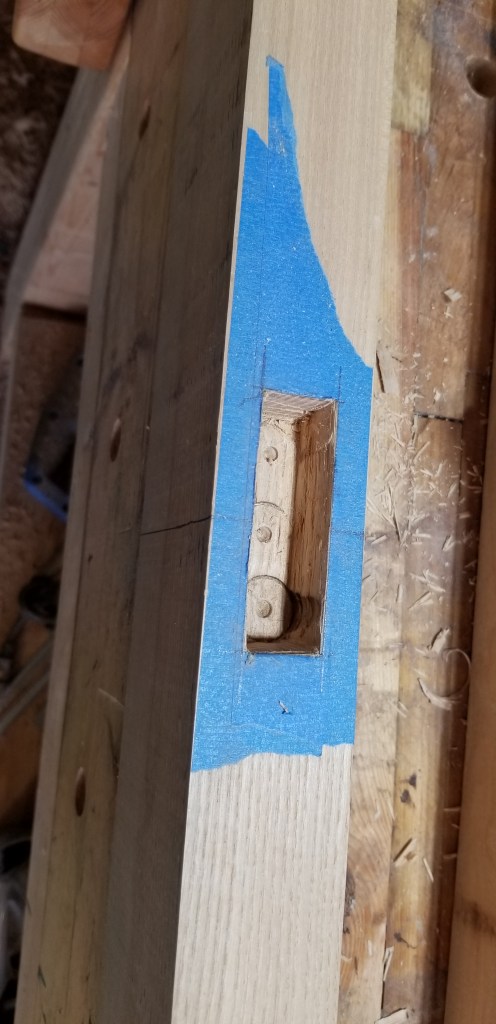
My main concern is doing a three prong box joint for my main bed frame. Some legs with pegs to keep them in place. And some hand cut channels to drop in six (or so) cross braces or slates, so that the mattress or box spring can’t fall through the center. If I get a bit overzealous I can give one end a headboard to stop pillows from falling off. In accordance to the room it’s going into, one side and one end will be up against the walls, so I don’t have to go crazy. I want it to be sturdy. Have no sharp edges, and try to inset the legs to avoid stubbed toes. I want the legs to be tall enough I can get a vacuum head under the bed, but not so high the mattress feels like it’s up in the air. Little kids and falling onto hard floors won’t make me anyone’s favourite human. If I can keep my cuts flush and not full of open gaps I’ll be a happy camper.

I have lots of dark stain. Walnut, smokey green, ebony even. I’ll have to ask my kid if they want it to still look like wood when completed. I really just want to get her mattress up off the floor now that the day bed slash crib is going to a very pregnant cousin for continued use.

I’ll take numerous photos if I manage to get any further into this over the coming days. I know I have six large projects coming between now and Christmas, so if I work smart I should be able to do this without too much of a problem. If I get the legs sorted out, and the slates cut down, I can pick away at the main frame box joints and have it ready for late November or by Christmas at least. I make no promises.

Follow along as I shoddily remake other people’s famous designs like a hillbilly gone blind on moon shine. You like cupped boards, with twists and knots? Have I got the perfect project for you to follow. Adios muchachos.

The Urn Build : Finale Episode… sort of.

I have finally managed to get all three pieces built, sanded up to 800 grit, and now it has one coat of clear coat on it that has been buffed to a higher than usual (for me) sheen. I have it drying in the garage, where it can spend the next 36 hours off gassing before I hand it off. All that is left to add are the tiny rubber feet for the bottom, so as not to scuff the surface where it will reside.

I added one tiny step, by using a blow torch to add some colour, and visual texture to the central column. I am glad I did a test burn on some scrap red Oak, so that I could change my plan up a bit mid stream to work on the central column and not the cap/case topper. A darker base makes it feel more grounded, and less visually monotone. The grain pops with the Osmo finish I used, so it looks pretty sharp. I do like how the blue felt looks against the red/tan tones of the red oak. I could have gone a bit more fancy, by using dove tails or a box joint for the central column, but the butt joints are sturdy. So C’est la vie.

I will need to blow off the felt with my compressor to get rid of the dust, and add four feet, then it’s off to the future resident. Tick that one off the to-do list!

No finish, but assembled.
Lid off central column with tray still inside.
Lid, central column and removable tray.
All three pieces with clear coat finish applied.

Needs a touch more clean up, and out the door it goes! Happy Easter weekend everybody!

Changing interests.

I have spent a great deal of time, over the last three years watching people build & make things on YouTube. Everything from home remodels, to hand made furniture, slab tables and machining. I would like to think that attempting much of this would be fun. Not that I’d be any good at it, but rather to experience it first hand, noise, smells and all. I never cared much for machining as a kid, though my father did it as a tool & die maker, thus a skilled tradesman, before moving into consulting and being a bridge between the shop floor, and the white coat techies and their sales staff. Now I wish I had access to some machining tools of my own, and an ear to bend to help figure things out. I would have had a riot of a time getting some furniture building tips from either of my grandfathers. Both of whom passed away before I even thought about doing it myself. They made chairs and tables in England, before and after the second world war, of which only one grand father had to take part. I myself had a brief stint in wood shop at school for several semesters, built some sets for a university play I was in, and then worked in a cabinet makers shop for a few months making antiques repairs, and milling up baseboards and trim for twelve hours a day, and cleaning up saw dust endlessly. So the wood shop wasn’t totally foreign to me, but I didn’t know I was going to fall for it this hard.

Now that there is no way to get it, I’d really appreciate their hard won expertise (my grandfather’s more so than the German cabinet maker). They could have sat, tea in hand, and pointed and watched as I worked on projects, chiding me for silly mistakes, or making corrections to my order of operations. Those are things I could really go for now. But alas, the furniture makers are more than a decade dead now. No video or hand books left behind of things they’d learned or wanted to pass along. I do have a hand made T square from my Grandpa Holyome. A dense hardwood straight edge he fashioned. Which I use fairly often. I’m not Mr Precise, so it works wonders on eye balled projects. I have properly machined tools too, but those I bought, they weren’t built by my family decades ago. A life time ago now.

When I get to thinking about all of that lost experience and knowledge I feel a little sad. What do they say now, like tears in the rain, or a breath on the wind. Gone.

I’m sure there were some small but strategically important hints or tweaks to techniques that would have gone a long way to improving my skills which they might have shared with me. Not only that, but to have made better memories with them. In all honesty, if they weren’t dead, they’d still be in England, on a six hour time difference. Not living next door or just up the road from me. And they’d both be in their mid nineties by now, anywhere from 94-98 years of age. But the fantasy was, nimble of mind, comfortably close at hand, teaching as we went. Cup of tea to keep them comfortable. Oh well. C’est le vie.

The Shelf Unit Episode: A Tale Told in 275 parts.

The unit is finally taking shape after a few weeks of lingering on the bench, languishing in stoppage after stoppage. I still have quite a ways to go on it, but progress has been made over the last week.

I hand cut all twelve mortises. Well two of which, the through and throughs, were done on the table saw once I had build a quick & nasty jig to clamp the legs to so as to not put my hands near the blades. But all of the .25″ deep mortises were chiseled out by hand over two or three days. I am currently busy with paid design work. So I’m slow moving with home infrastructure projects.

Hand cut chisel mortises.

Then I completed a dry test fit which lead me to do some last minute rasp work for better fitment. Nothing major. I put the whole base together to test things out which was tricky to do single handed, as my pressure fit mortises are shallow, and I knocked it down a half dozen times tugging on corners that weren’t square. But I got it to stand freely of it’s own accord.

Test fit of first two hand chiseled mortises.
After considerable wrangling I did manage to get the whole base dry fitted together and it stood by itself for 24 hrs without collapsing. A good sign!
You can see here how shallow I cut those mortises. Just a tiny pocket to rest in. So delicate.

Then as of yesterday I began to glue up the cross braces for the base, three pairs of them. Glued and clamped for assembly. No real hassles here. I glue up on my bench over blue plastic garbage bags. Only need to glue a vital piece to your wooden bench once to know never to do it again.

The braces in glue up. One tricky leg needed a set square clamped in place in order to remain 90 degrees. Probably should have done them all like that. Next time!

The top box was formed several weeks ago. Measured, cut, built using a dowel construction method, sanded, glued up, and sanded again. Still needs more sanding and then I can stain both it and the base portion together. Then I will use dowel to connect the two pieces, apply finish and bring it inside.

Fixing a dowel burst on the display surface. Peeled back a strip of pine, chopped out over long dowel, glued and clamped pine strip. Seamless.
In need of about two more hours of focused sanding. Then it’ll be ready for stain & finishing.

I’m excited to see it all come together. I used three 72″L x 16″ W x .75″ H pine laminated boards for the top box. Plus 1.5 72″ x 5″ x .75″ pine boards that I cut down into 2.25″ H strips for stretchers and braces and used along the back of my box to strengthen it against any possible racking. The six legs are made of Ash, and are 1.75″ x 1.75″ x 8″h. That I had laying around from a new set of stairs that got put in at the cottage two years ago. I’ll post a photo once I get it all completed and set in it’s final resting place in our living room.

**UPDATE** I managed to get Walnut tinted Danish Oil stain on the base and shelf portion, as well as put in the dowels to join the top & bottom together. Waiting on the glue to dry as we speak. Last item is a 400 grit scuff followed by some Osmo poly clear wax to pick up the shine/gloss. So excited!

Walnut tinted Danish Oil on the base.
Walnut tinted Danish Oil applied to all of the shelf unit.
Test fit for base placement prior to drilling out and fitting the dowels to join the two pieces. Almost finished. Can see the finish line from here!

The Clip Show Episode we all know and love.

Every great show winds up having a clip episode where you get to revisit some of the funniest or most poignant portions of a television show. Usually it’s pretty deep into the later seasons when most of the story arcs are near completion, but they’ve been contractually obligated to provide 22 episodes per season and need to pad one out a bit. So, now I’m going to go through and update some current projects, rather than try to come up with anything new to say.

First off is the Ninja Turtle sculpt. One which I have worked up and torn back down three times so far. I’ve since decided to work the whole thing in Apoxy Sculpt rather than intermingle with Super Sculpey firm. The self drying, uber sticky substance is pretty wild. I’m not going to lie, I struggle with it. I don’t typically sculpt for hours on end, so staying with the apoxy as it gets slightly stiffer to rework it isn’t what I’m doing. I should change my working style to meet the medium, but I haven’t,  so I may not. At least where this turtle is involved. It’s in very rough form, but it has a full body, arms and head. The feet are going to appear to be in standing water, so they are just lumps for the most part. Needs a lot of refining, smoothing and details yet. A work in progress that could take a few dedicated days to finish, or at my current pace, two more months in dribs and drabs.

The second project update is the shelving unit being built using dowel construction instead of my usual mitered box corners, or box joints. So a shit tonne of butt joints. Bland, but hopefully sturdy. So far so good. The plans I drew up call for eight inch high legs, and the outer most dimensions of the top box to be sixteen inches high and seventy two inches wide, by sixteen inches deep. All made with three quarter inch Pine. Except for the 1.75″ x 1.75″ x 8″ Ash legs or feet. It should stand twenty four inches tall, which gives me a quarter inch of room to slot in under the window sill. My true goal is to have the final build meet the pre-determined spec’s on the drawings, without having made any major edits on the fly. Not that that is a deal breaker, but if I can get better at building to plans that would make me happier. It’s pretty humid around here, so warped wood is something I really have to be aware of. Could funge the whole project if I leave it in the shop for too much longer. The top box is cut and dry fitted together, but needs to be sanded, glued, rounded over and stained, and have final finish put on it. I have a ways to go with the base portion. Cut my pieces, and did the round overs on the legs. But I have a lot of mortises to cut. Twelve of them to be exact. I probably need to round over the stretchers along the base too. More work! If I treat it with respect I hope to have a decent looking bit of furniture to have in the living room. Could be a fun reveal if all goes to plan.

The third project, is a doozy. It encompasses the whole house, mainly because it’s my fall clean up as the kids go back to school, and my wife off to work. I started with a bang, cleaned the appliances, counter tops, cabinets, both inside and out. The hall walls, door frames and doors, as well as the base boards. Washed the floors but did not polish them. In socks you’ll fall over and slip if I polish the floors. Lesson learned with bumped knees and one bruised tail bone. Ouch! I have a paper purge coming. I’ll sort the girls best artwork into a binder, and the rest can go to recycling. Between the two kids we have a seventeen inch tall stack of school work just sitting in the dining room. That’s gotta go. Plus I want to purge broken toys, and remove stuff to the cottage, which doesn’t get played with at home. My niece and nephew are both still small, and would love to play with that stuff still. Oh the memories. I got a jump on it, sure. But the real work will start once school starts again next week. I went through their closets, so that too is done, for now. Growing kids, so clothes and shoes will be a consistent issue for years to come. Ha. Lots to do around here.

Lastly is paid work. I have a solid line up of projects between now and November, so I am very happy about that. I have the room to slot in other projects inbetween my planned work, which is handy. And I’m ok if one or two drop off the map until next year. Next year? Yes. Only four months left of 2022, can you believe it!?! Every so often I think about going out and gathering up more clients, and then when I see what I actually have in the pipeline during the summer & fall, I’m glad I haven’t done so. Busy is great, run off my feet is no good. Creativity suffers when I’m too stressed. Have a solid work life balance right now. Love it!

So there it is. The clip show of what’s going on around here. I could mention, though it’s a bit late. That I also have a model kit I built more than a year ago on my desk that needs panel lining and it’s water slide decals placed on it. This thing has more than two hundred decals to place on a twelve inch tall 1/100 Gundam model kit. Going to be at that project for about eight hours or more. Will look great when done, but ugh. That’s a commitment I’m reticent to make right this second. Stuffed in a box in the closet is a much larger 1/60 scale resin kit that needs weeks worth of work. I lean into my model kits over the winter months when my garage is too cold to work in. Keeps me occupied when not working or cleaning, or shoveling snow.

Lastly is the childrens book I wrote and am currently illustrating (poorly I might add). That’s another item I’ll leave for the winter months when I can’t work outdoors. I have eight more background illustrations to complete, and then I need to tackle the two main characters. It fell off the radar, kind of on purpose, but still I’ll be glad when I get it done. Which reminds me. I’m not entirely certain if I will write a third novellas worth of short stories this winter. I never officially published book two on Kindle Unlimited. I probably should do it. Accompany book one so it doesn’t look so lonely. I sold one copy. In the UK. I believe it was to one of my cousins. It was great to write it all, edit it and then collect all those stories together into one unified thing. Felt amazing to have actually done a thing on my bucket list. Now with book two I’ve written more than 100,000 words worth of short fiction. I’m proud of that. Regardless of whether or not it sold any copies.

Ciao Bella!

Don’t we all just take code word classified documents home from work for no reason? No? Oh well, just your pal then.

One can only imagine how much information could be contained within twenty seven (27) bankers boxes of paper work, file folders and manilla envelopes. That’s too much cheese for one Cheddar coloured man to horde. Going to attract rats, and moles, and all manner of other pests into their midst. Not worth the effort. Should have left it all alone.

Had a few work related e-mails and some personal text messages come in before 8:00am so now I’m wide awake watching CNN discuss DJT and the subpoenaed classified boxes. Oh lordy. Can we get a break from TFG. All I want to see of him is an arrest, a over arching criminal trial series that covers many of his criminal activities, and finally a sentencing. That’s it.

Did a tiny amount of wood working yesterday, nothing major. Refinishing an old bench that has sat in the elements for several years. If I could have taken it back to my shop I could have done more to it, but sanding it in place wasn’t too bad.

You know what I’m really starting to miss, playing my guitar. I’m looking forward to having a lengthy jam session with my trusty Gibson Studio and my portable speaker. That and tapping out some tunes on my electric keyboard. Music really is a vital part of what relaxes and recharges me. Back before I had kids I used to cart all of my gear up north and play on the dock. It wasn’t much but it was a whole lot of fun.

Looking forward to playing some golf on Sunday with one of my brothers and his eldest son. I have to imagine that his daughter doesn’t care much for golf, she’s into ballet, and quite talented from what I’ve seen. (Which isn’t much unfortunately, given Covid). I’d have to ask. Wish I had brought my own clubs with me. But I left them elsewhere. That’ll be the fourth round in twelve years, woow! Look at me, developing a golf habit. Ha. I had hoped to go to the driving range, and play several rounds of golf this summer, but I’ll take two rounds of nine (9) holes. Better than zero rounds of eighteen! I’m more of a nine iron, pitching wedge and putter type of golfer. I’m either right down the middle, or twenty seven strokes to the hole. Not much inbetween. I tend towards mini putt and the driving range more so than actual golf. Probably why my game is so streaky. I can get a good run of long straight balls, then fall apart. So we’ll see how Sunday morning turns out.

I’m closing in on 250 days soon. I may even take this to a whole year if I can! I wonder if I should dig up my children’s book this fall and try to finish that up. Would be great to get such a big project finally finished. I started it when my eldest was like three years old, and now we’re getting close to eight, so, you know. Get on that shit my man! Then I’ll post the pdf’s for all three books on here and see if anyone at all reads them. Not that that really matters to me, I’ll just be happy that I had an idea and brought it to life, story and artwork and all. Nice!

When Covid comes to town, round seven.

Earlier this week we learned that my wife’s great grandmother, who is 94 years old, has Covid for the first time in the nearly three years it’s been around. Not only that but at least one farm hand in his seventies has it too. We suspect the second farm hand, also in his seventies has it as well, but is such a heavy smoker with heart issues and a permanent cough/wheeze , that he just hasn’t noticed it yet. How could he, inbetween smokes all he does is cough and wheeze and shake like a leaf in the wind. He’d never know anything was wrong until he woke up dead one morning. He’d shrug and say “Could have been anything?” And float off on his merry way, oblivious to actually being dead. What a guy! But in all seriousness we are concerned for the 94 year old former nurse who grew up with a pet bear, and worked in a mining town for ages before getting married and going to med school. Lots of interesting stories wrapped up in that one believe you me.

Years ago, before I got married, I used to cut grass on the side of my full time job, and one of my clients was in Locust Hill. A brash and harsh old lady, I was told by everyone who knew her. A widower, her former husband had struck it rich by being the guy who built a machine, or series of which, that could consistently dye wool in any colour you like. Their house was huge, set back on an acre or so of lawn, with massive old growth trees. A shed full of relics, and a house stuffed to the tits with art and sculpture. When i met Barb, she was the cold and scathing witch i had been warned of, but as i kept coming back week after week, she started to open the door to chat, then poke a head out of a window, then settle on the porch, and after a month or two she’d invite me in for a meal and we’d talk at length about medicine (i have Crohn’s disease after all) so i don’t shy away from over sharing, or gruesome details. Anyway, in Barb’s youth she worked as a nurse in the sexual reassignment wing of a Toronto Hospital. Went in to great lengths and detail on how they could turn a penis into a vagina, and collect the meaty parts of a vagina and reconstruct a working penis. It was all very interesting and shocking. This was stuff they were doing in the 60’s, 70’s and 80’s, and into the 90’s after all. I don’t recall when she retired, or under what circumstances, but she was a hoot, a real riot. Couldn’t cook for shit, but was generous with what she made me, and as a side note she didn’t know how her kids would survive after both of them attended Harvard and now ONLY earn $700k a year as of 2006. Ha. I fucking wish to be a $700k pauper. Her husband was a good looking dude. I saw many black and white photos of him in Jeans riding a motorcycle like a stud. Classic striped down low riding bike too. Old style seat with the coiled springs at the back two corners.

Barb died a while back, and I didn’t attend the funeral. I felt bad about that, but I spent a long time thinking about her that weekend. Had a drink in her honour as well, as I recall.

Really makes me sad that neither of my grandpas are around anymore. I really could have picked their brains on my furniture building projects. They both worked making furniture as a skilled profession for decades in Britain. I remember our house used to be stuffed with things they had made. Chairs and tables alike. Shame I can’t get access to all that experience now that I enjoy doing it myself. Details lost to the wind, like the sands of time passing between our finger tips. Books and YouTube will have to suffice for the moment.

Staining on Day 196.

Last quiet days of school are upon us, and I have some hobby stuff to finish prior to my next report coming in. Decided to recut my cross braces, as I sanded them too vigorously and the snap fit became too loose. So I recut those four pieces and sanded the two faces only that don’t affect their fit. I have it all broken down and am just waiting for the danish oil to soak in and dry. Then a quick glue up and this project is done! The oil really makes it pop. The Osmo I ordered came in, so maybe I’ll polish this up with some later on? Not certain. I’ll be holding off on furniture building until September anyway. So now rush now it’s just about built, and I can keep it inside where it is temperature controlled and the humidity is under wraps.

Not even ten am yet. What a great day. Glad I had enough material laying around to recut those braces, as i was pretty mad at myself for the overzealous sanding. The Walnut stain really does bring it all together though. Love it.

I’m going to close down for a bit, give this a chance to dry without interference from me. Glue up next! Weeee!

Tear out, glue ups & cutting splines.

As much as I love the look of Walnut, it comes with a fair few issues to work through. Namely gouges and tear out during milling, and chunks coming loose when hand chiseling. I will have quite a few places to patch when it comes time to do a final sanding. I need to glue it all up first, then make a Walnut dust paste to patch all of the imperfections. I hope it doesn’t ruin the overall project.

I used packing tape on the outside mitered corners, and painter’s tape on the inside edges of each glue up. See fig 1. And fig 2.

Fig 1. & fig 2.

I used a good amount of LePage glue in the joints, which I spread with an acid brush. I folded it all up into a box, and added additional painter’s tape to the final corner. I used two box clamps and a set square to keep the hollow Walnut box as square as I can get it. See fig 3. And fig 4.

Fig 3. & fig 4.

I also clamped around the middle of the box to make sure it didn’t bulge or have the seams pop open or slide around.

After the box had dried in the 27°C heat of the day for several hours I unclamped the hollow Walnut box and began to cut in my Hickory splines. I chose to do three per corner edge on the top. And depending on how the experience goes, I might add two more on both bottom edges too. I started with a Crown Dovetail saw, cutting just inside my marked lines, and then used a .25″ chisel, cutting along a 45° angle from both the top & bottom to remove the gap where my Hickory splines will rest. If you’re legit, you’d take note of grain orientations and how your boards were sawn, and grain patterns, but I’m just trying to get something done here. Two of the three had good pressure fits, but a possible gap situation might have occured from a too deep of a run with the Dovetail saw. More Walnut dust paste will be needed. See Fig 5 & fig 6.

Fig 7 shows the glued in splines.

I only managed to cut in three splines on one side and glue them in yesterday evening. See fig 7. Once the top panel has three more glued in I can flush cut them off. I added them purely for visual interest and not for strength. Though, they may help in that respect.

I had managed to complete a dry fit test and have it all stand up on its own. I will take that as a win at this point. I know I have several hours of touch ups to do after the build up and assembly is done.

Parts layout. Still so much sanding left to do!

Once I complete the top portion I will shift focus back to the legs and skirting braces. Lots of sanding to do here. I think I will finish it off with some Danish Oil to tie the whole thing together. Ciao Bella!

Throw Back To: Episode of when I took two plus years to build a screen door.

It all started when I was gifted some Ash boards from the family farm, that were rough sawn, and stored in a shed for twenty plus years. I gladly took them home after sawing the sixteen footers in half by hand, and tossing those heavy suckers in my van.

I planed them for what felt like hours, and then had to man handle them across my jointer. Which took forever to do. This was back when I had my tiny 10″ Ryobi table saw, which kicked on full tilt, and scared me to death. Cutting 2 inch thick ash boards that were 80 plus inches in length took some doing, and set my heart to pounding. I settled on four inch wide boards by roughly eighty inches long, and two inches thick.

I then cut down four cross members, two in Ash, and two in a douglas fir that was pretty heavily knotted. It was at this point that I began to run out of warm season, and all my flat, square milled lumber got shut away in the garage for seven months.

The following spring I dug out my lumber, which was still square and decided to hand cut some mortises for the top and bottom of the door uprights. I first used a circular saw to cut two slices through the end grain about four inches deep. This was super sketchy, and my super old school, under powered Kawasaki circular saw died after a cut & a half – twice. So I finished it off with a Stanley hand saw. You know the old kind that weirdos play with a violin bow to make high pitched whiney muzak. I had to climb up on my work bench in order to get this to work.

I gathered up my chisels and a hammer and got dug in cutting away the channel where the cross members would rest. This would prove a difficult and arduous task. It took several days, and my channel was not straight, nor were they even. I took a file to them, and worked that for a few days too. It was at this point that I started to refinish a rocking chair for my very pregnant sister in law, and that took my whole season.

The following year ( this year 2022) I took some rasps to my channels, and evened them out a fair bit. I then used a brand new Dado blade to cut some even tenons for the cross members. It was an endless cycle of dry fit testing, rasping, filing, and planing until I had a suitable snug fit. Then I measured out my center line, and cut out two mortises for the third, and final center cross member. I hugged it out with a forstner bit, then used a multi tool to cut through the rest, and then hand chiseled it to a clear rectangular hole. It worked quite well. After assembling it all as a dry fit, I noticed my angles were all wonky, and then realized my flat, square lumber, was now bowed, and twisting ever so noticeably. But as I was about to begin sanding I hit the most egregious spots with a hand plane, and sort of made the best of it.

I took the time to glue the frame together. Then in each corner I drilled out a 3/8ths hole and glued some dowels through the joints. Flush cut those, and then did endless rounds up through the grits on every single surface of the door. I stopped to add copious amounts of filler, which meant no more natural wood look, but I was now going to have to paint it all white, to match the house trim.

I used an oil based primer to paint on four coats of pristine paint. Then I cut down some Cedar strips, 16 lengths in all, which would sandwich my screen mesh in place, for the two openings on my screen door. After much cutting and sanding i put the first layer in place. Cutting the mesh material was far simpler than i was imagining it would be. So i put those in place, and pin nailed my last strips on, holding the mesh as tight as i could get it.

It was at this point I placed my hardware on the door. Pilot drilling holes for the handle and a push plate. I also then hand cut in my hinge recesses. Drilled and attached those. Fought with the door for an afternoon to cut in the receiving hinge slots on the house, and hung the door single handedly (do not reccomend). I then added backing trim to stop the door swinging too far inwards and binding. Added a latch, and an extra handle, and Bob’s your uncle. Done like dinner.

I didn’t take any photos while cutting the cross member tenons, but they’re there, and I did them myself.