No real set of instructions to follow, but you will need: six (6) eggs, salt & pepper, milk (poured in to suit) a whisk or fork to mix, and either a bowl or pourable container with a spout. Also important, a stove top and a shallow sauce pan, or a frying pan. One flat edges spatula or your favourite design.
Glop all of the eggs, a few shakes of salt & pepper, and somewhere in the vicinity of 3/4 of a cup of milk. Mush all that together with a whisk or fork for about a minute. At least until all the yolks have ruptured. Turn your stove top burner to a medium /medium low heat. Let it warm up as you work your ingredients together. (Might want to read through before starting, my had). Pour all contents into the now heated pan on the stove. In a constant movement, scrape off the bottom of the pan to reveal the newly congealed scrambled eggs. Keep going until all of the liquid eggs have become a solid. At this point you can start to flip the mass over in chunks. Then using your spatulas edge cut the mass into many, many smaller pieces. Turn off the heat, and it is at this point you could add a cheese to the top, or go and make some toast to go with it. Scoop up with a spatula and enjoy. The whole process can take about ten (10) minutes, if you start off with a not blazing hot pan. A slow heat will yield softer fluffier eggs, and not a rubbery overcooked mess. Slow and steady. No burned patches, no charring, and every bite is edible. Good if you’re on a budget and can’t afford to let any go due to waste/mishap.
Smell like shit? I had never noticed it before, but now every one we get called out to stinks like hell.” Moans the slight framed man with a wispy beard. “Probably due to all the piss and vomit, would be my informed guess there Garreth.” Replies the short heavy set woman with cropped grey hair. “That and the dead bodies.” She chimes in a second later. “Yeah – the dead bodies would most likely be the culprit for the stench.” Chuckles Garreth, his weak shoulders jumping as he laughs. “So how the fuck do we keep finding these bodies after they’ve been dead for so long?” Garreth whines as the two officers walk deeper into the dilapidated tenement building, wandering the labyrinthine halls lit by flashing yellowing bulbs. Everywhere you look is cracked dry wall, mould patches, and peeling paint. Ceiling tiles with greasy brown water stains, and puddles of urine gathered at the edges of the red well worn carpets. “Well Garreth, in these instances most of the neighbours are junkies, extremely poor, or illegals. Nobody wants us here, they want as little local law enforcement scrutiny as possible. So shit goes from bad to worse, until they can’t stand it. And we turn up, bother people by asking questions which nobody will answer, and then cart off the rotting corpse. Rinse and repeat. Feel me wee man?” The large woman croaks through gritted teeth. “How many does this make for us Garreth?” The female officer asks as they get within visual range of the slumped body. Previously laying on the floor where it meets the wall. Turned inwards to face the baseboard. From the angle they are standing at they can’t tell if it’s a man or a woman. There is a definite unusual twist to the torso, like it had tried to scratch an itch went too far and died after snapping it’s own spine in twain. Various fluids and puddles seep out from under the grayish blue body. The smell is thick in the air. A humid and pungent overly rotten orange twinge to the air. “At last count we were up to six this week. Not counting the four last week left in a similar state.” Garreth replies quietly. “Looks like the last apartment on this floor. Shouldn’t this hallway have a window or fire exit or something?” Garreth asks as he kneels down to poke around the body with one latex glove on, and a thin metallic rod he uses to lift a collar here, and a jacket pocket flap there. “I’d be surprised if any of the rooms had more than a port hole sized window per unit. These bastard builders cram as many bodies into these apartments as they can. What a shit hole.” Grumbles the larger officer turning away from Garreth while he conducts his first pass over the prone body. “Something tells me we won’t find a listing for this victim in this apartment block. Not sure why, just a vibe I’m getting.” She offers offhandedly. “Whatever you say boss lady. I don’t see any Id on the vic, and the coroner’s folks will get here soon. We can get some fresh air and wait for the retinal scan from doc’s people.” Garreth answers standing up while peeling off his lone glove by the heel of his palm. “Want me to go grab us a bite?” He offers. “Yes. We passed a Longo’s on the way in here, grab me a partial rotisserie chicken.” “No problem Priss, what you eat for breakfast is no business of mine.” He chuckles as he walks back out of the dim pungent hallway.
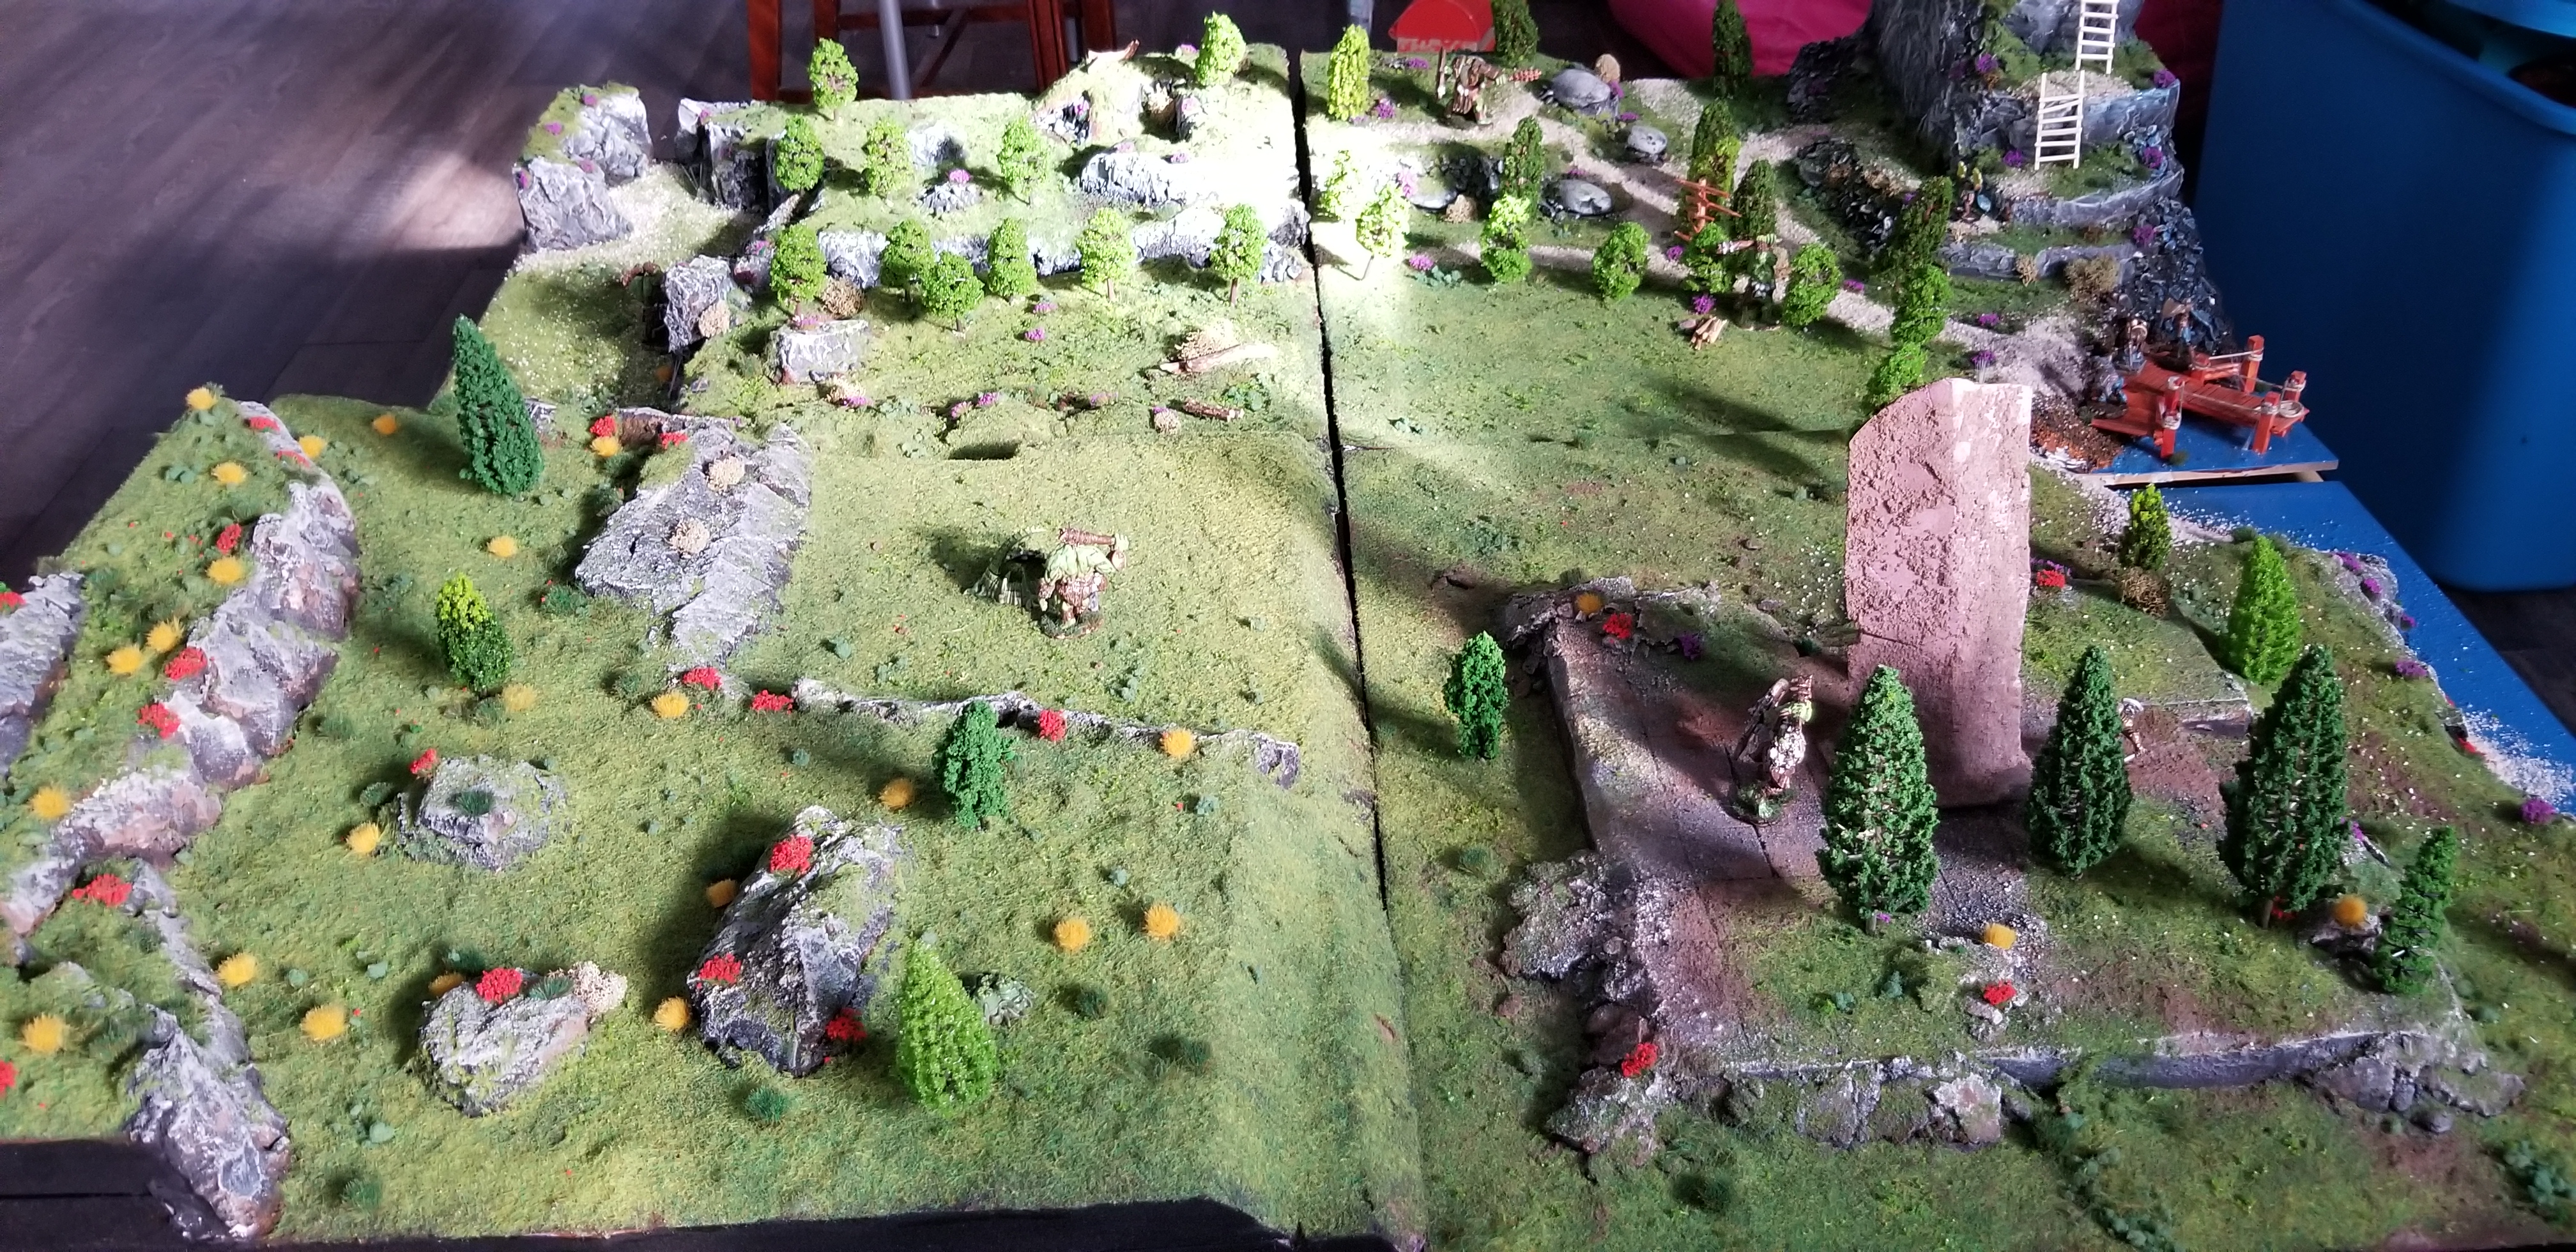
And they are tromping around the boards using their collection of LOL Dolls. I’m not sure it’ll withstand the level of punishment that they dole out. But what a good excuse to build new ones if the bash and beat my current one beyond repair. Not that I want to see four hundred dollars worth of static grasses, tufts, trees and miniature flowers, rocks, stones, tree barks and sculpt a mould, and paper mache, and three types of foam not to mention the two to three months I spent, painting, modeling and building it all. I made a small dock and a water/beach area, open plains, mountains and a grid plateau where I have ancient ruins of a temple. There is an underground cave network, and a road, road signs, ladders and a marsh too. I hope it survives, as we haven’t gotten around to playing any D&D games with it yet. I usually have it left as a diorama of a battle/fight.
I keep meaning to reread my books and create a campaign that my young kids can enjoy, but I have been distracted by home DIY projects, sculpting, guitar, model building and making furniture as of late. Plus throw in paid day job and parental commitments and my D&D dreams of family conquests of far away lands has laid dormant for quite some time. Could be worse.
We are back to Monday, and a good amount of rain has fallen since late last night. I do hope, nay – pray that all this rain finds it’s way to the farm. They had a full inch of rain last week, but more during the month of July is always welcome. A steady drizzle over days that soaks into the ground rather than a massive singular downpour that runs off into the creek/river is preferable. But at this point, rain is rain. France is bacon. As it were.
Not a whole lot of domestic duties will be accomplished on this Monday, nor any Monday in the next seven weeks. I need an empty house in order to get a worthwhile cleaning session in. Not to say we aren’t cleaning up after ourselves. But a touch of a lackadaisical approach to the floors has entered the chat, if you know what I mean. Laundry, dishes, food prep surfaces are unaffected by the kids 24/7 presence. But the floors? Hoo boy, not their proudest moment. Cabinets ate looking shabby from a plethora of grubby hands touching them constantly. Blood and food has found it’s way back onto the hallway walls – again. This is why the first week of school is spent decluttering and cleaning the house from top to bottom. My kids spent nine weeks getting grime over every surface imaginable. Chocolate milk spatter on the ceiling? Check. Blood streak on the hallway base board? Check. Face imprints of both sides of every glass door or window? Check. Takes several hard working days to get rid of it all once I have them both back in school come September.
I am trying very, very hard to not get mad or have an outburst regarding the current state of our home. But it’s always there, just under the surface. Itching to throw away any and or all items left on the floor after weeks of requests to tidy up after themselves. I did build a series of large toy boxes for this exact reason. So I wouldn’t step on anything sharp every single god damn day. But growth, exploration and experimentation are key building blocks for well rounded youth. Just wish a healthy dose of tidying the fuck up, was as important to them, as making a huge fuctangular mess of my living room floor. But I digress.
This weekend we visited the Mediterranean festival in town and enjoyed some funnel cake and ice cream. Not going go lie, had hoped to find that Fish Taco food truck that swings by once in a while that makes fantastic – well, Fish Tacos. Squeeze of lemon juice on top, fresh from the batter and fryer. So good. Was sad to not see it. The whole thing was a Fusion event, with lots of Greek cultural stuff to explore. Smelled so good down at Memorial Park on Saturday.
Last quiet days of school are upon us, and I have some hobby stuff to finish prior to my next report coming in. Decided to recut my cross braces, as I sanded them too vigorously and the snap fit became too loose. So I recut those four pieces and sanded the two faces only that don’t affect their fit. I have it all broken down and am just waiting for the danish oil to soak in and dry. Then a quick glue up and this project is done! The oil really makes it pop. The Osmo I ordered came in, so maybe I’ll polish this up with some later on? Not certain. I’ll be holding off on furniture building until September anyway. So now rush now it’s just about built, and I can keep it inside where it is temperature controlled and the humidity is under wraps.
Not even ten am yet. What a great day. Glad I had enough material laying around to recut those braces, as i was pretty mad at myself for the overzealous sanding. The Walnut stain really does bring it all together though. Love it.
I’m going to close down for a bit, give this a chance to dry without interference from me. Glue up next! Weeee!
The best I can say was it felt muddled, over long and gave Wanda a real shitty send off. Far too focused on spectacle and not much in the way of story telling, or character development. It was bright and colorful but empty. Perhaps my tastes have altered after nearly 30 MCU films now that I have seen. They just aren’t geared to my age demographic, which is fine. That’s how I felt about the first two of the new Spider man movies too. No Way Home felt a little more mature in tone, and it spoke to me. But Dr Strange felt like a crazy, busy, meandering puzzle box that ended up being empty at the end anyway. Cameo heavy and ultimately unimportant. Phew.
It wasn’t all bad, I enjoyed parts of it. But I don’t feel as though there was any kind of suitable outcome. It could have all been a dream, and we’d still be where we left off after Spiderman NWH.
But now I’m up and awake after 11:00pm again, with another domestic duties Monday on the way, with 3.5 school days left for this term. Temperatures are rising, the rains didn’t show up, so we’ll have to start actively watering crops at the farm. I started off on rows of tomatoes today. Beets and potatoes and peppers to get watered next. My Saturday sunburn was not happy that I decided to spend any part of today outdoors. IV rash guards will have to get dug out of storage. Not a blunder I wish to repeat anytime soon.
As much as I love the look of Walnut, it comes with a fair few issues to work through. Namely gouges and tear out during milling, and chunks coming loose when hand chiseling. I will have quite a few places to patch when it comes time to do a final sanding. I need to glue it all up first, then make a Walnut dust paste to patch all of the imperfections. I hope it doesn’t ruin the overall project.
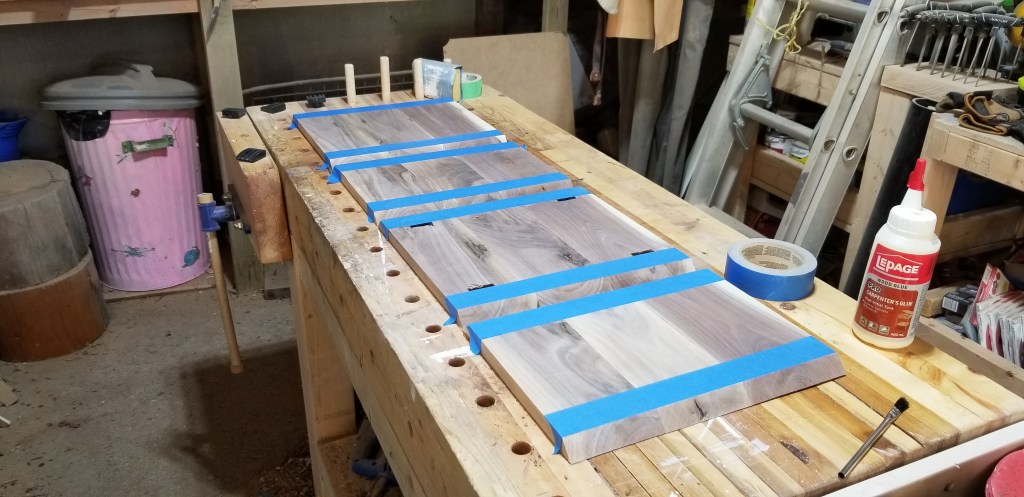
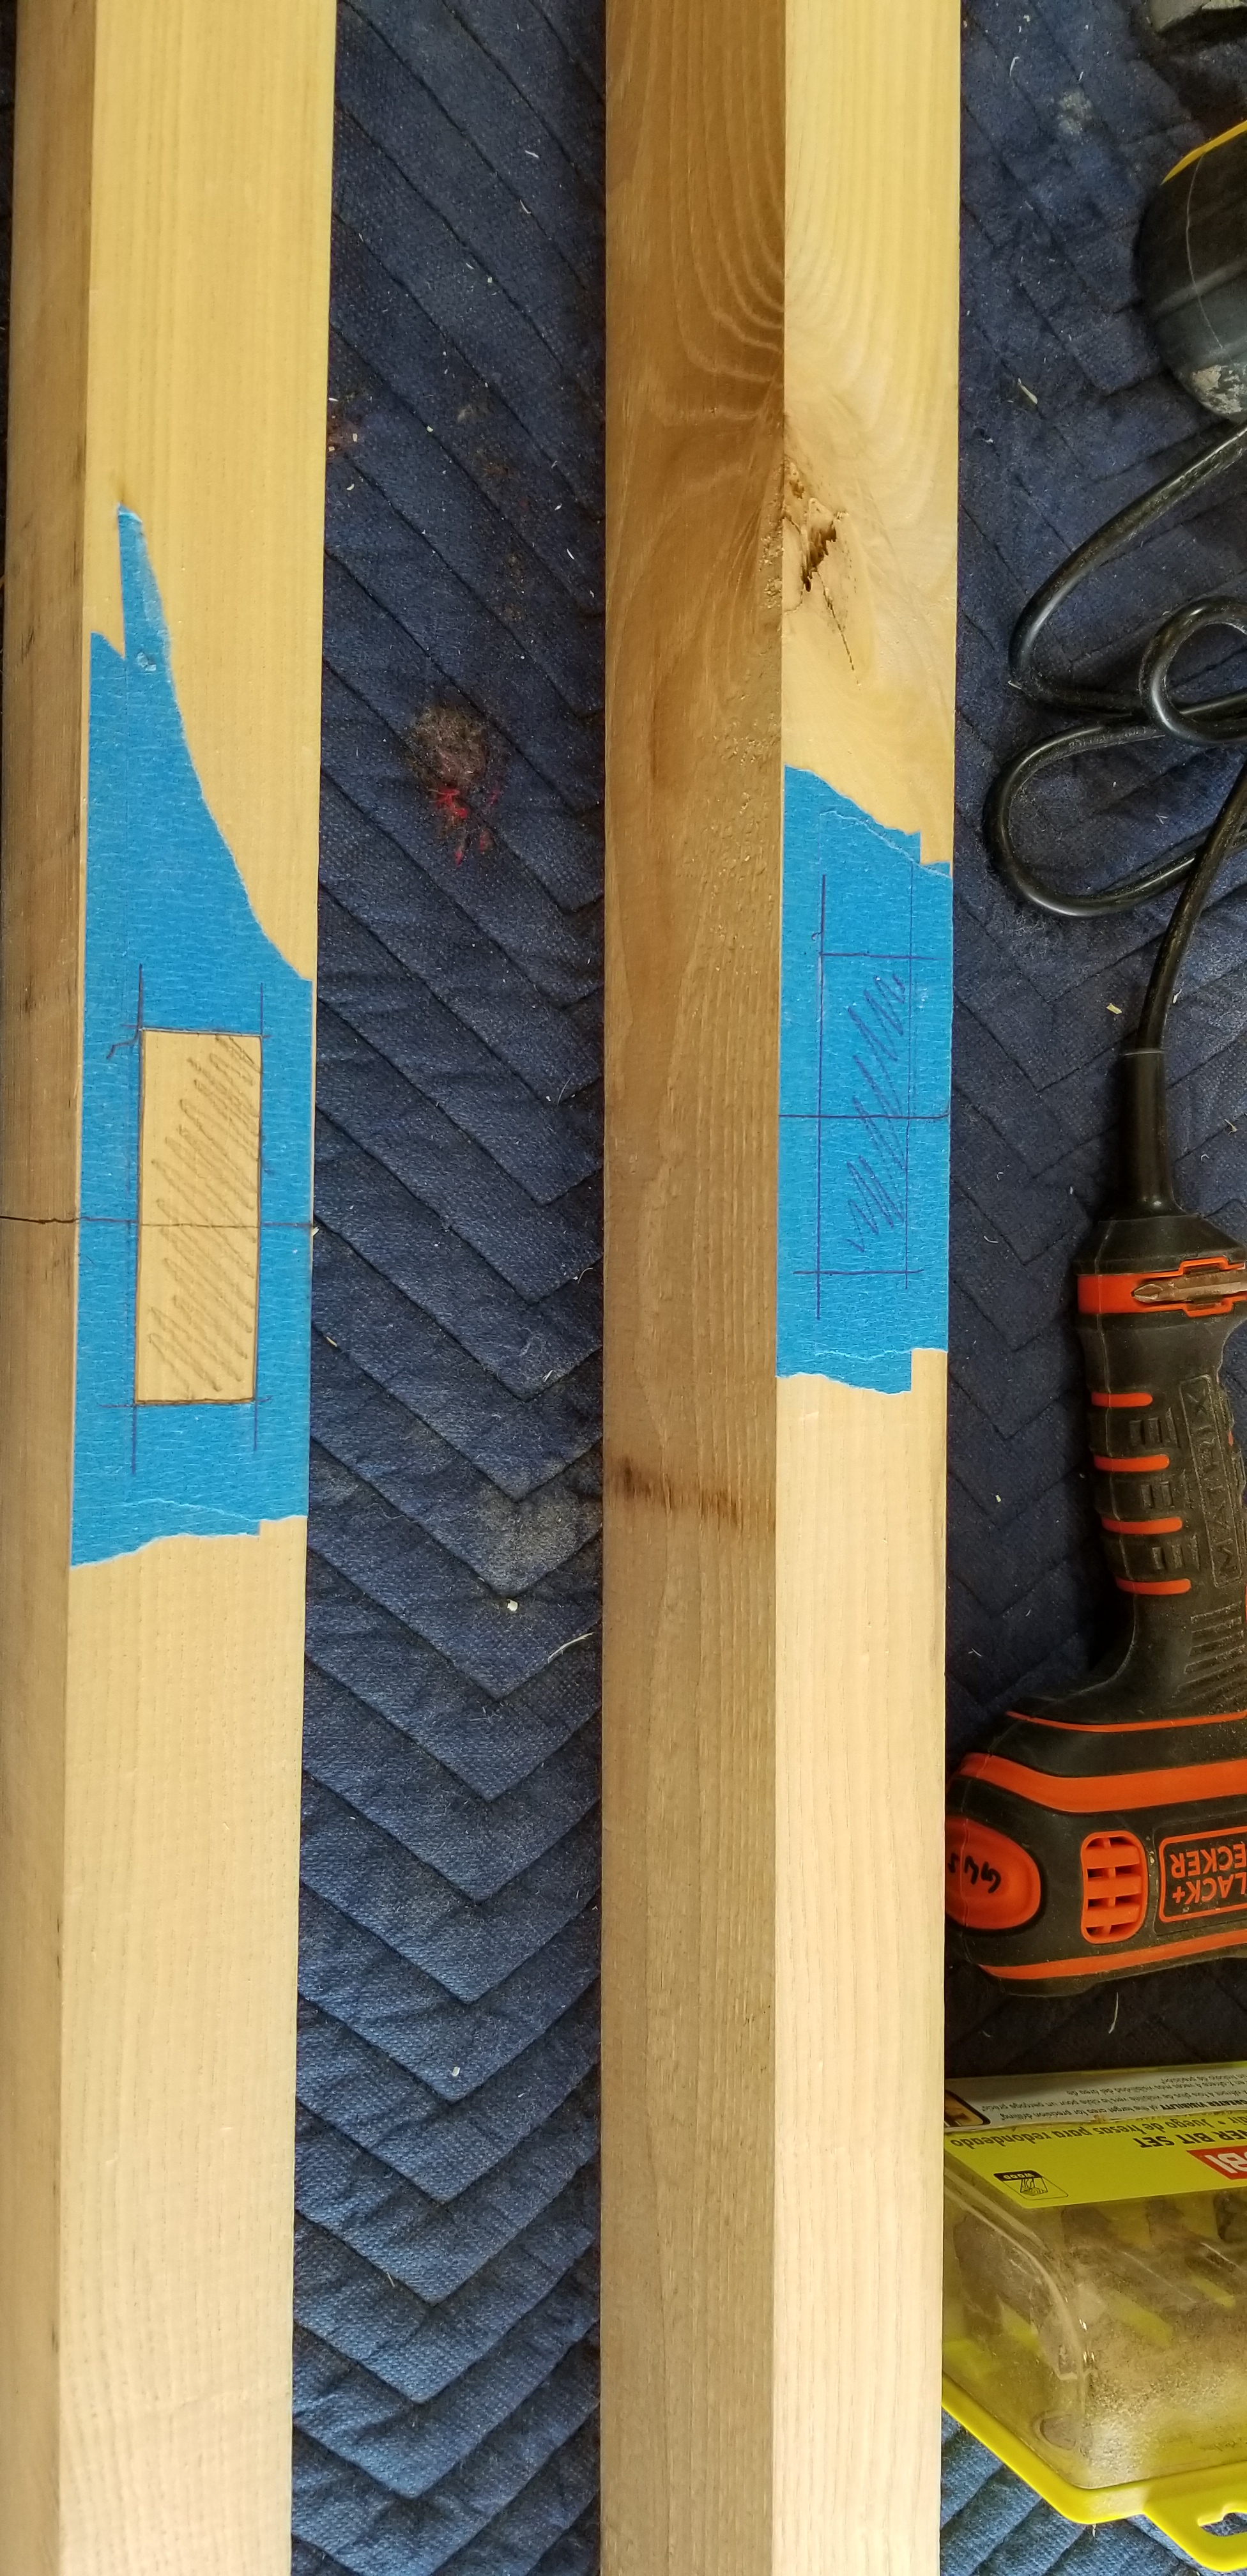
I used packing tape on the outside mitered corners, and painter’s tape on the inside edges of each glue up. See fig 1. And fig 2.
Fig 1. & fig 2.
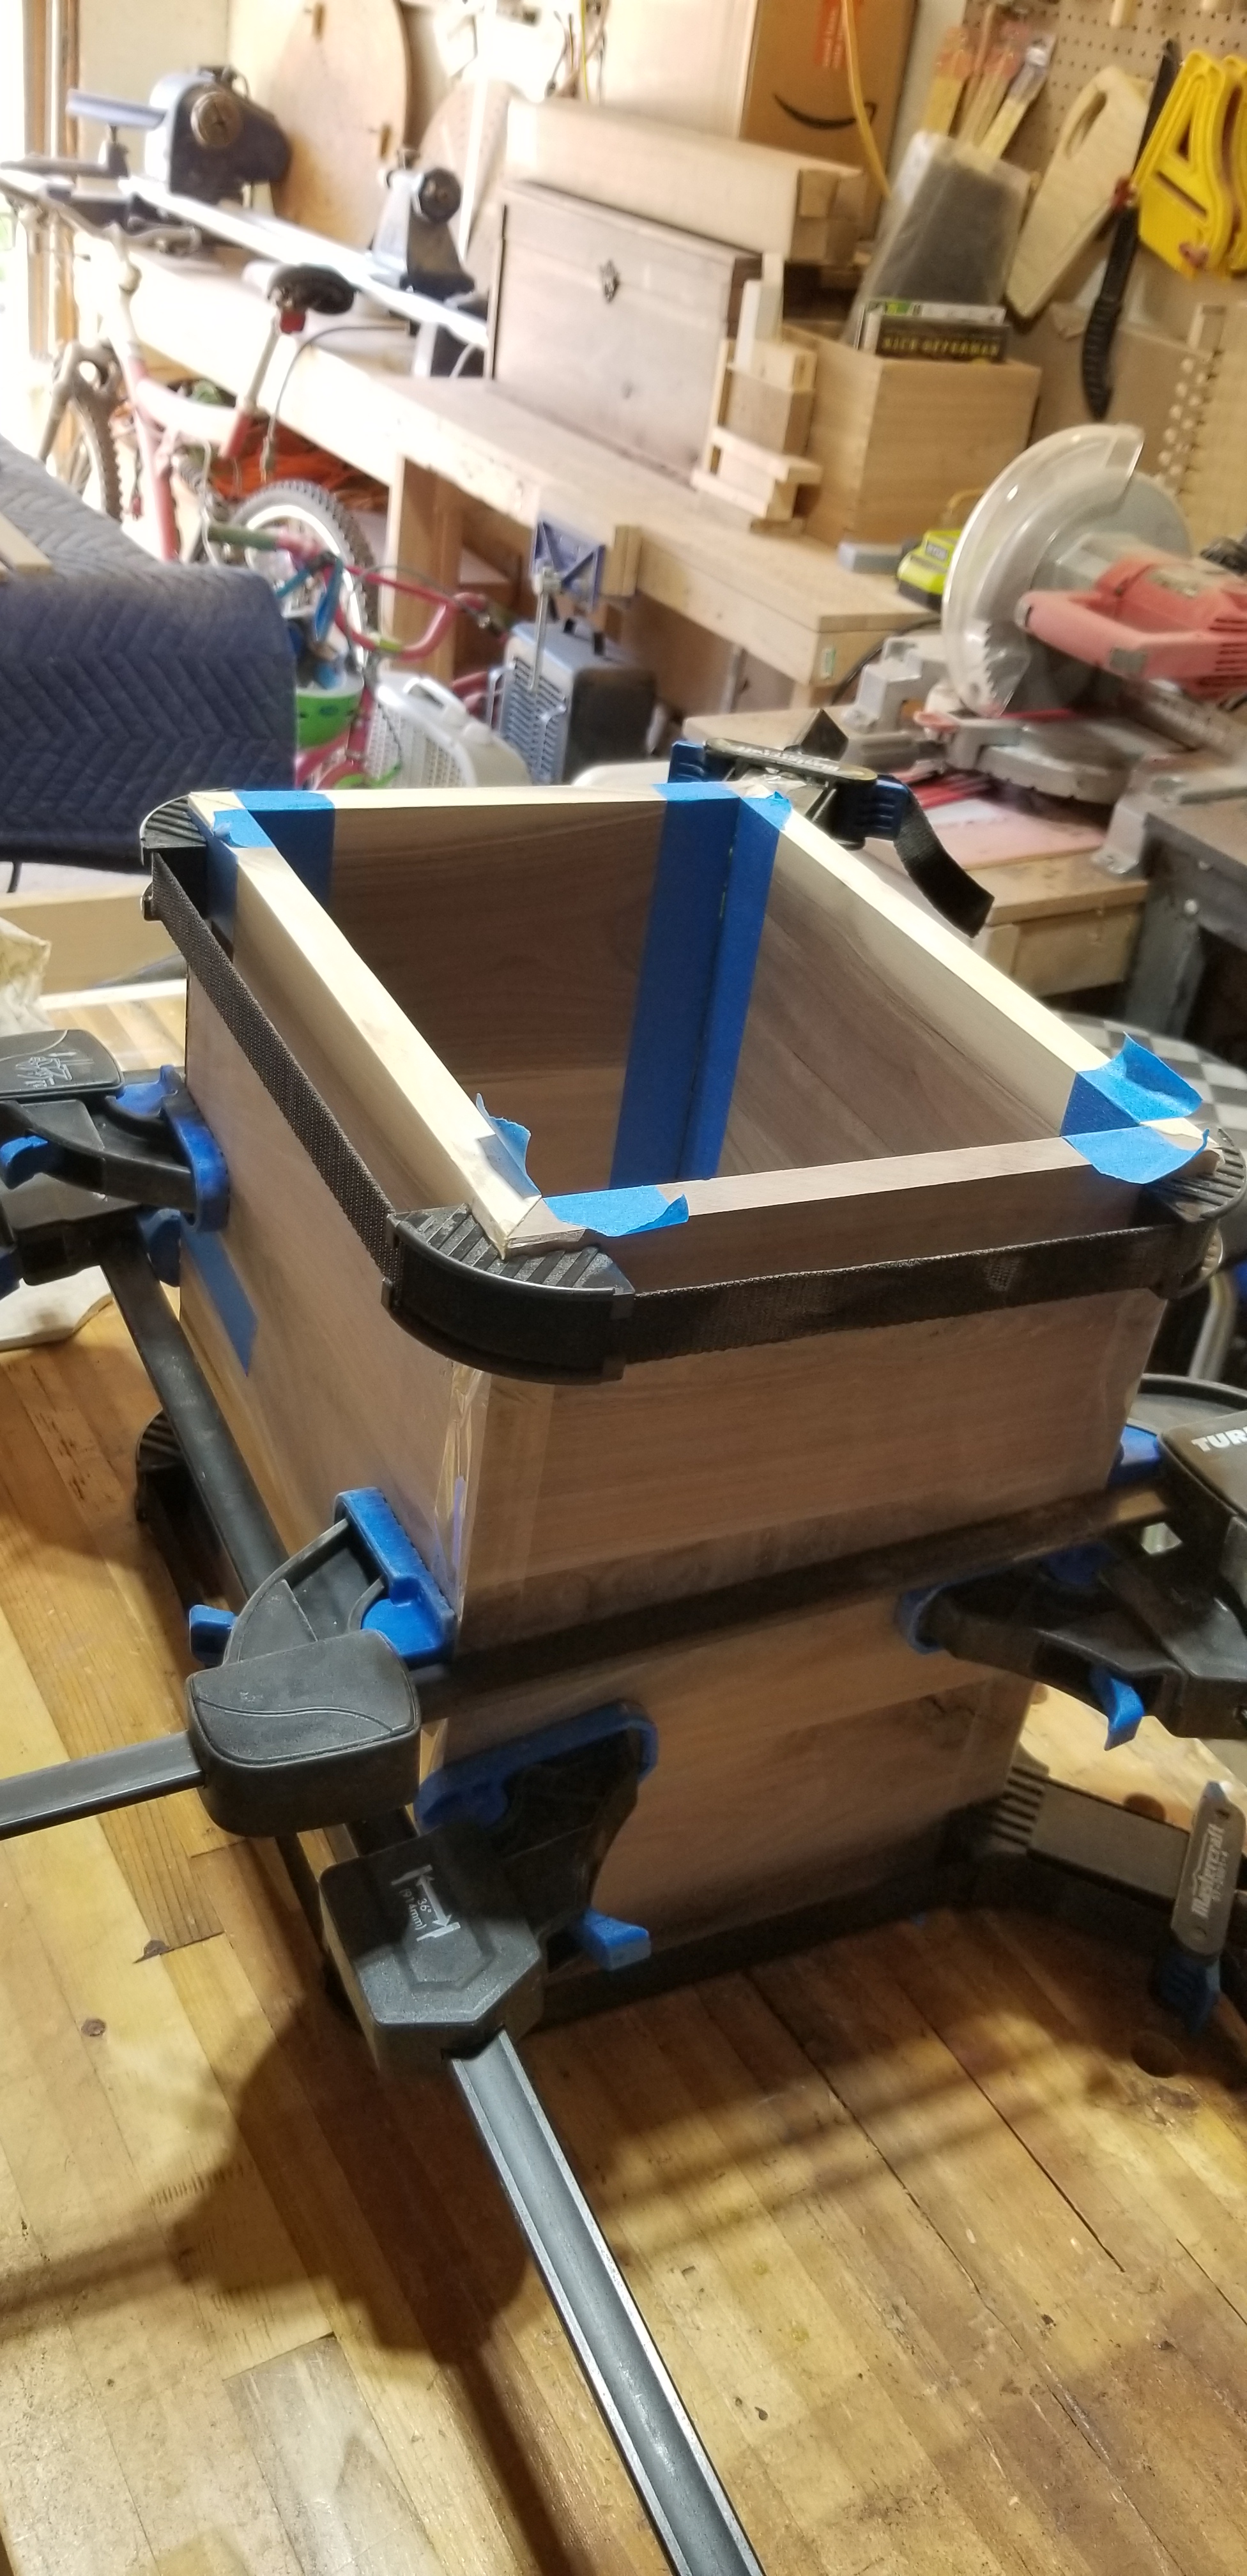
I used a good amount of LePage glue in the joints, which I spread with an acid brush. I folded it all up into a box, and added additional painter’s tape to the final corner. I used two box clamps and a set square to keep the hollow Walnut box as square as I can get it. See fig 3. And fig 4.
Fig 3. & fig 4.
I also clamped around the middle of the box to make sure it didn’t bulge or have the seams pop open or slide around.
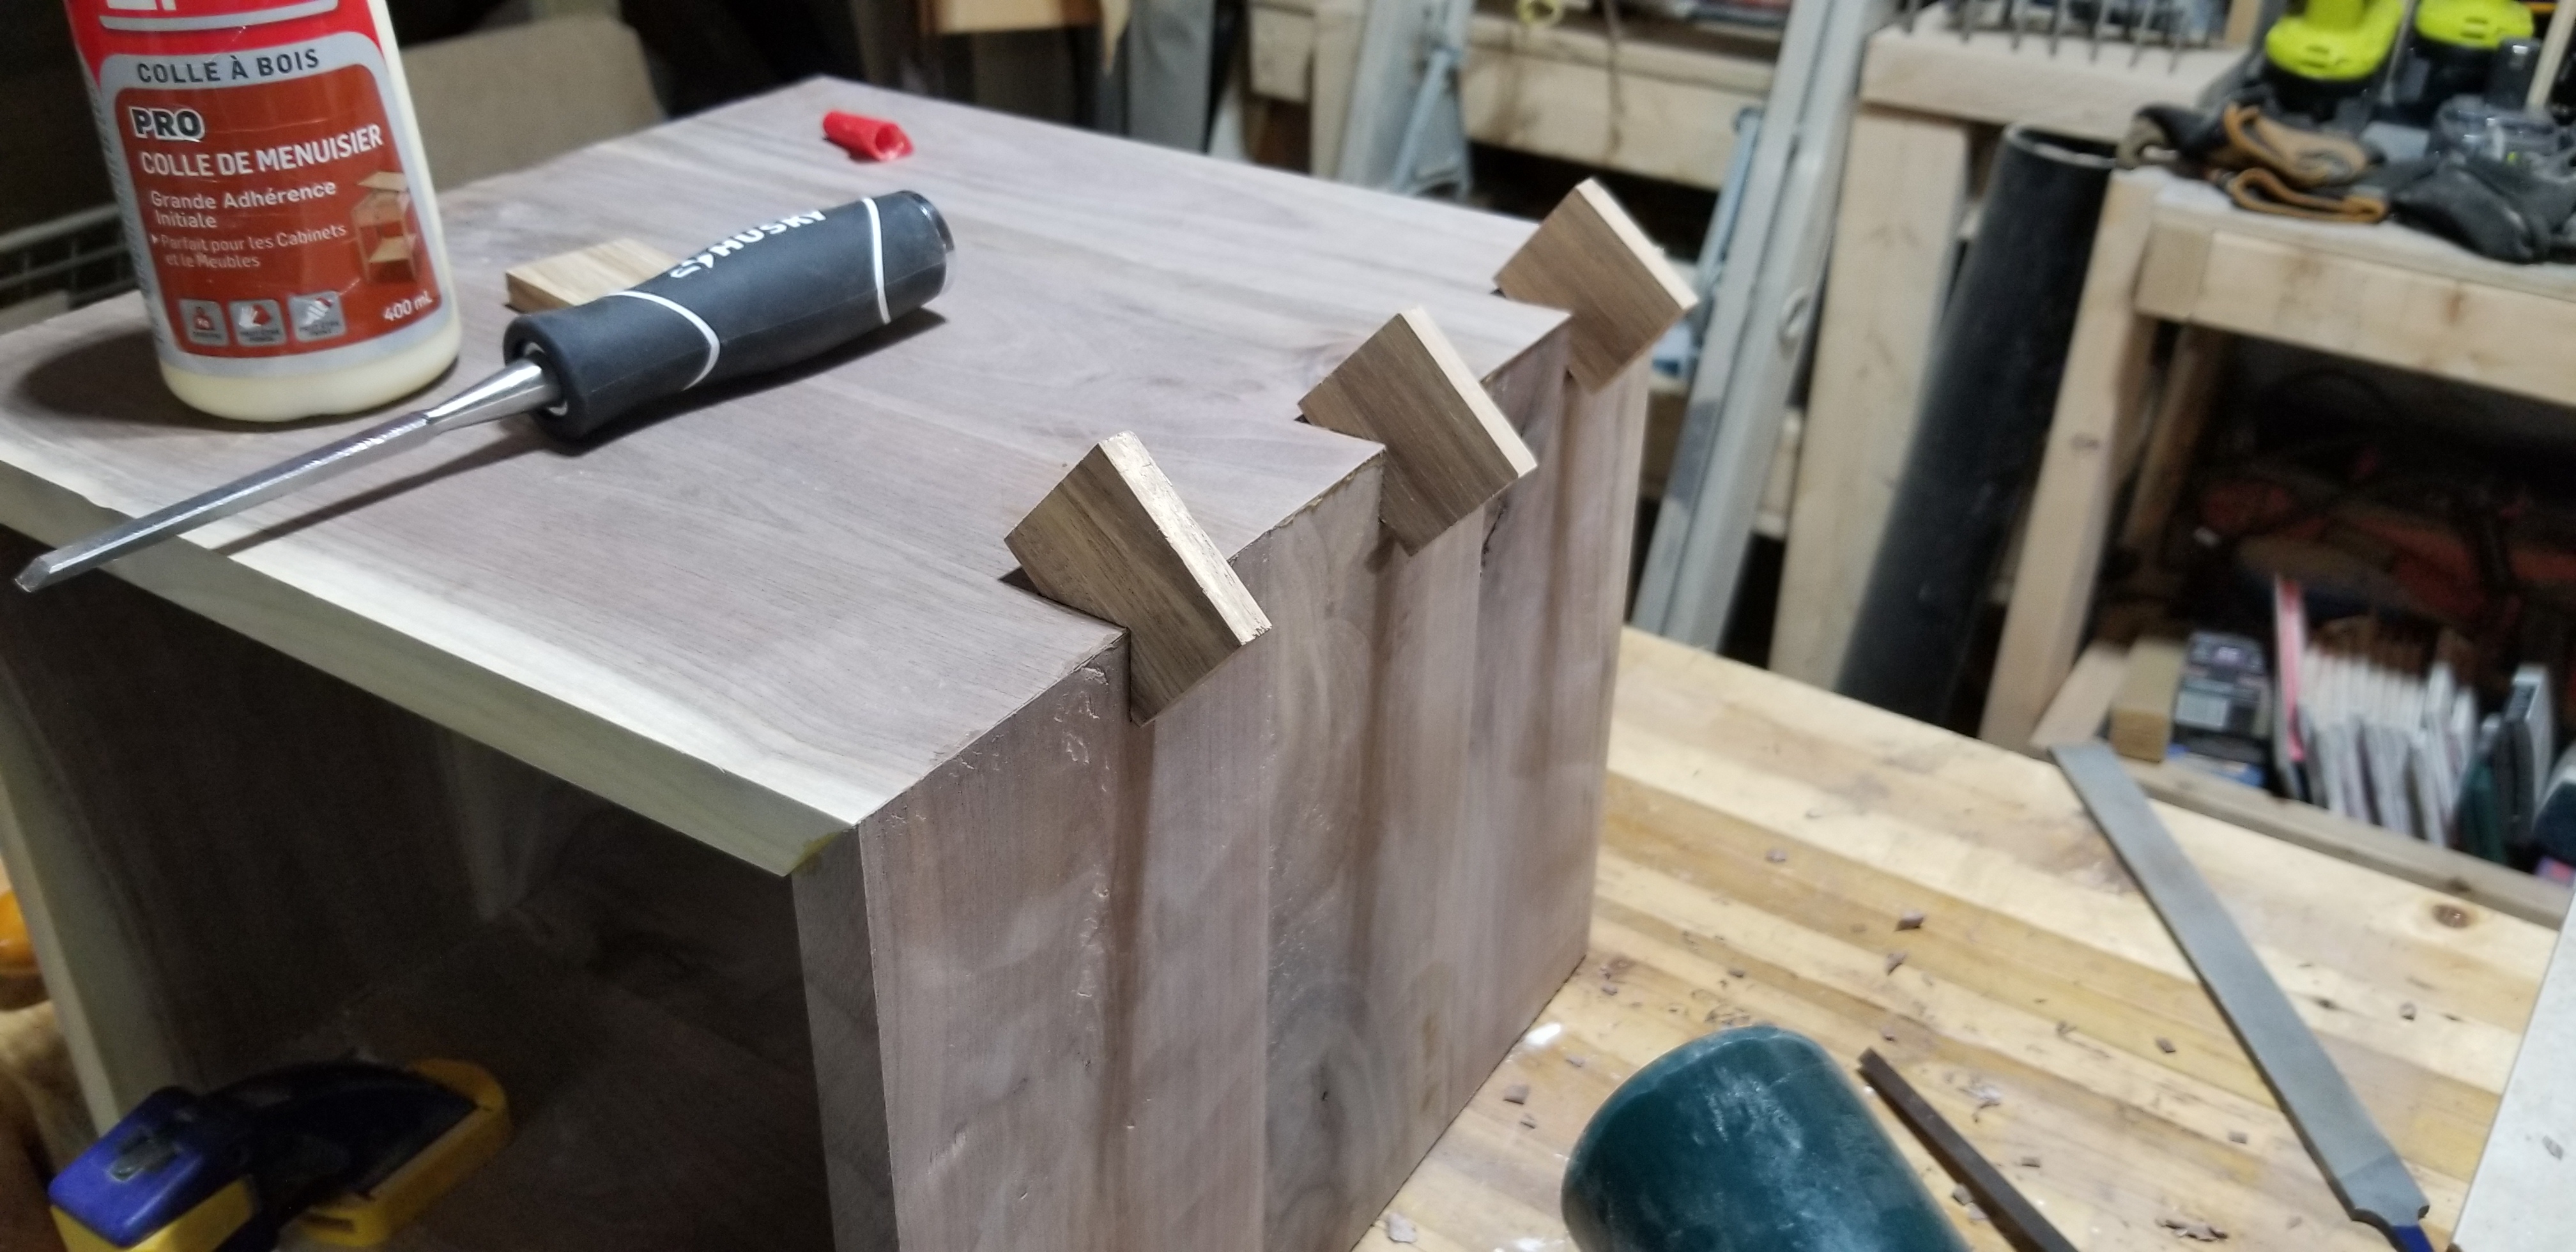
After the box had dried in the 27°C heat of the day for several hours I unclamped the hollow Walnut box and began to cut in my Hickory splines. I chose to do three per corner edge on the top. And depending on how the experience goes, I might add two more on both bottom edges too. I started with a Crown Dovetail saw, cutting just inside my marked lines, and then used a .25″ chisel, cutting along a 45° angle from both the top & bottom to remove the gap where my Hickory splines will rest. If you’re legit, you’d take note of grain orientations and how your boards were sawn, and grain patterns, but I’m just trying to get something done here. Two of the three had good pressure fits, but a possible gap situation might have occured from a too deep of a run with the Dovetail saw. More Walnut dust paste will be needed. See Fig 5 & fig 6.
Fig 7 shows the glued in splines.
I only managed to cut in three splines on one side and glue them in yesterday evening. See fig 7. Once the top panel has three more glued in I can flush cut them off. I added them purely for visual interest and not for strength. Though, they may help in that respect.
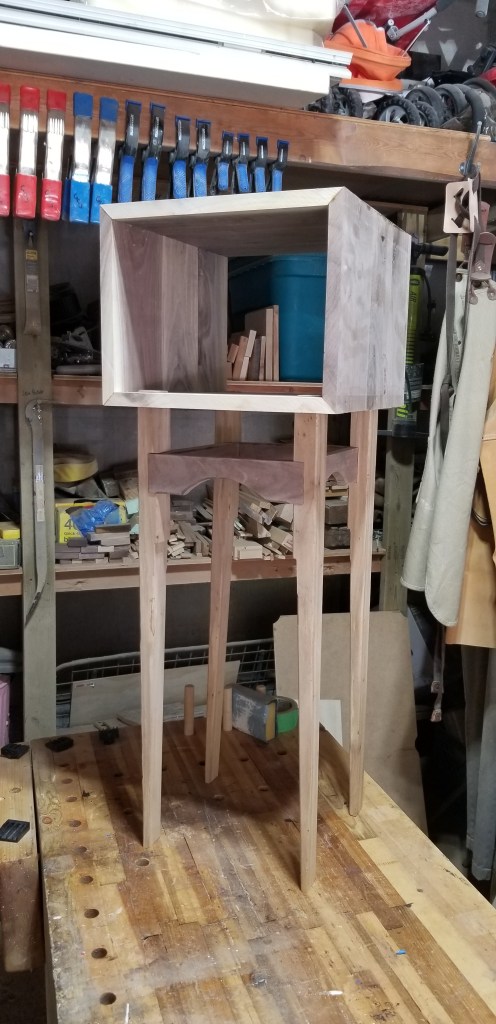
I had managed to complete a dry fit test and have it all stand up on its own. I will take that as a win at this point. I know I have several hours of touch ups to do after the build up and assembly is done.
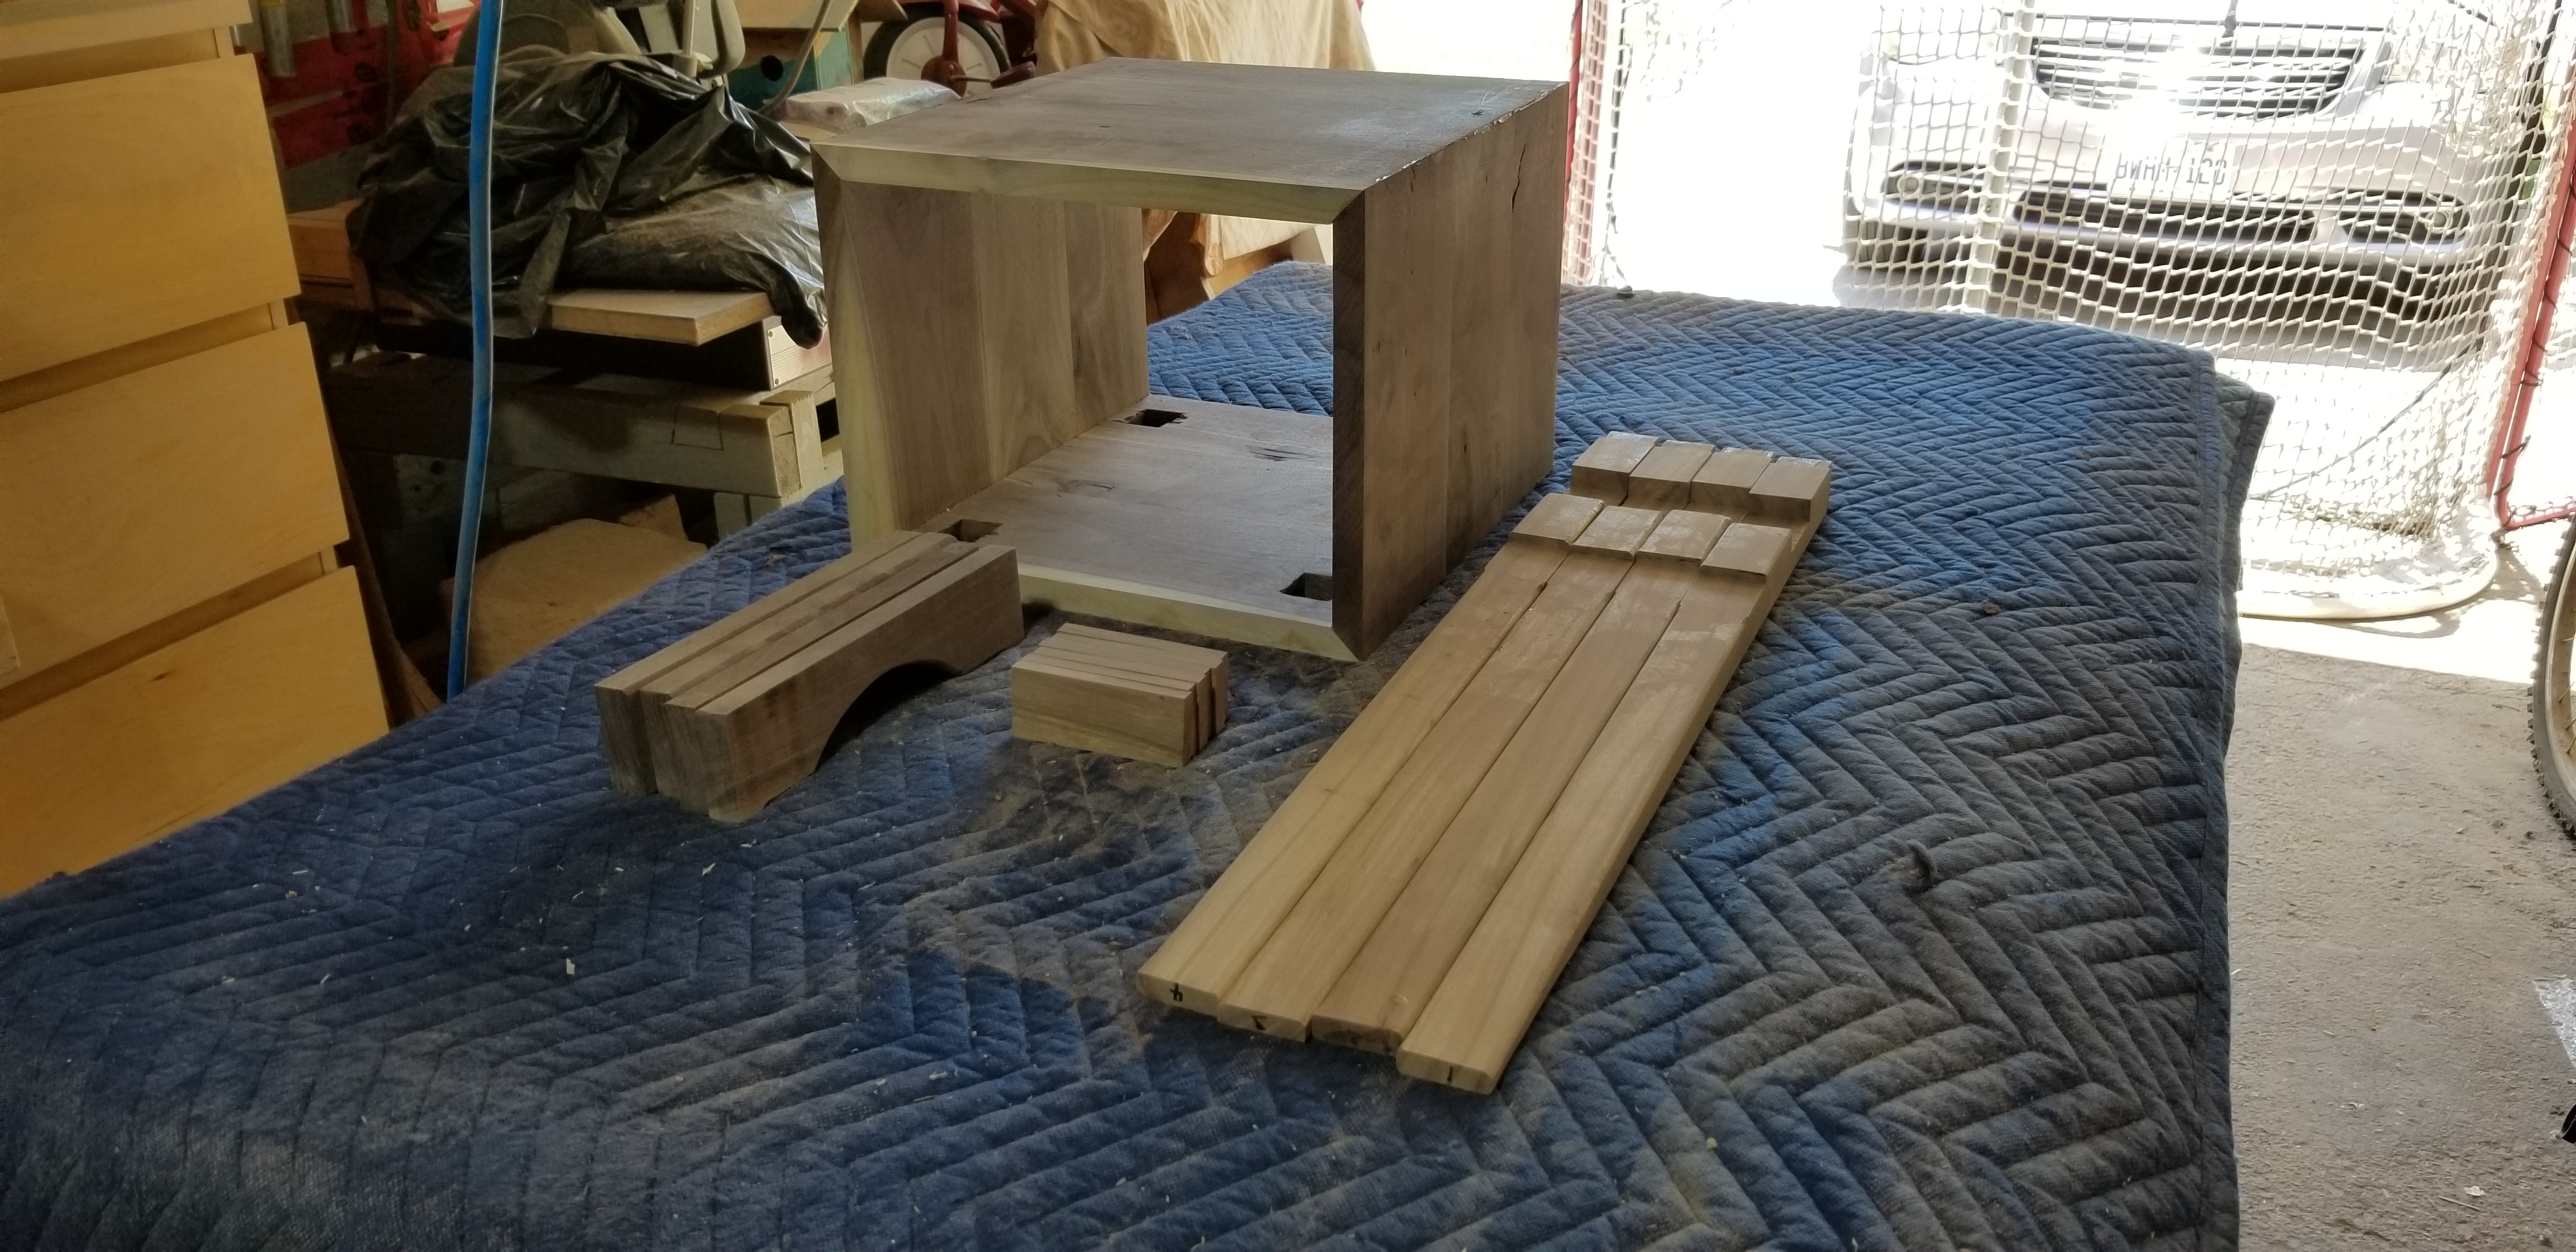
Parts layout. Still so much sanding left to do!
Once I complete the top portion I will shift focus back to the legs and skirting braces. Lots of sanding to do here. I think I will finish it off with some Danish Oil to tie the whole thing together. Ciao Bella!
It all started when I was gifted some Ash boards from the family farm, that were rough sawn, and stored in a shed for twenty plus years. I gladly took them home after sawing the sixteen footers in half by hand, and tossing those heavy suckers in my van.
I planed them for what felt like hours, and then had to man handle them across my jointer. Which took forever to do. This was back when I had my tiny 10″ Ryobi table saw, which kicked on full tilt, and scared me to death. Cutting 2 inch thick ash boards that were 80 plus inches in length took some doing, and set my heart to pounding. I settled on four inch wide boards by roughly eighty inches long, and two inches thick.
I then cut down four cross members, two in Ash, and two in a douglas fir that was pretty heavily knotted. It was at this point that I began to run out of warm season, and all my flat, square milled lumber got shut away in the garage for seven months.
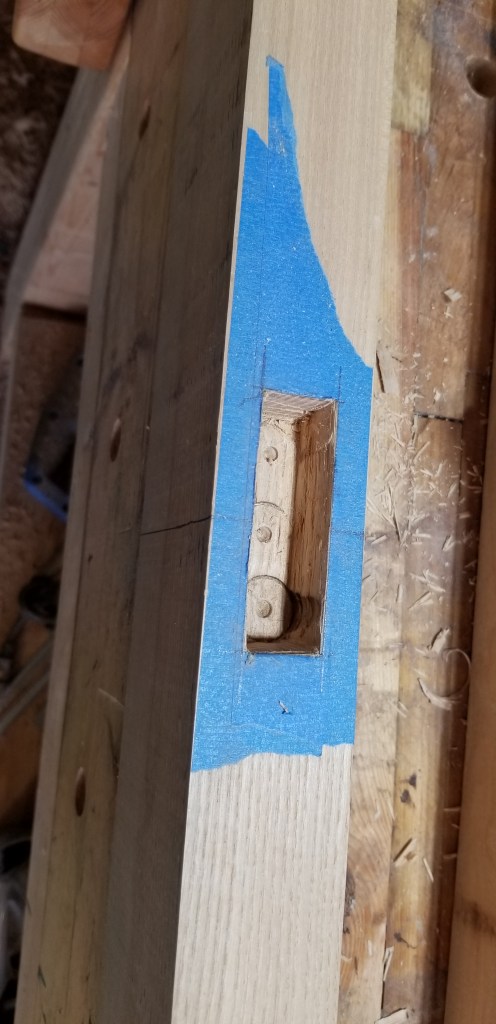
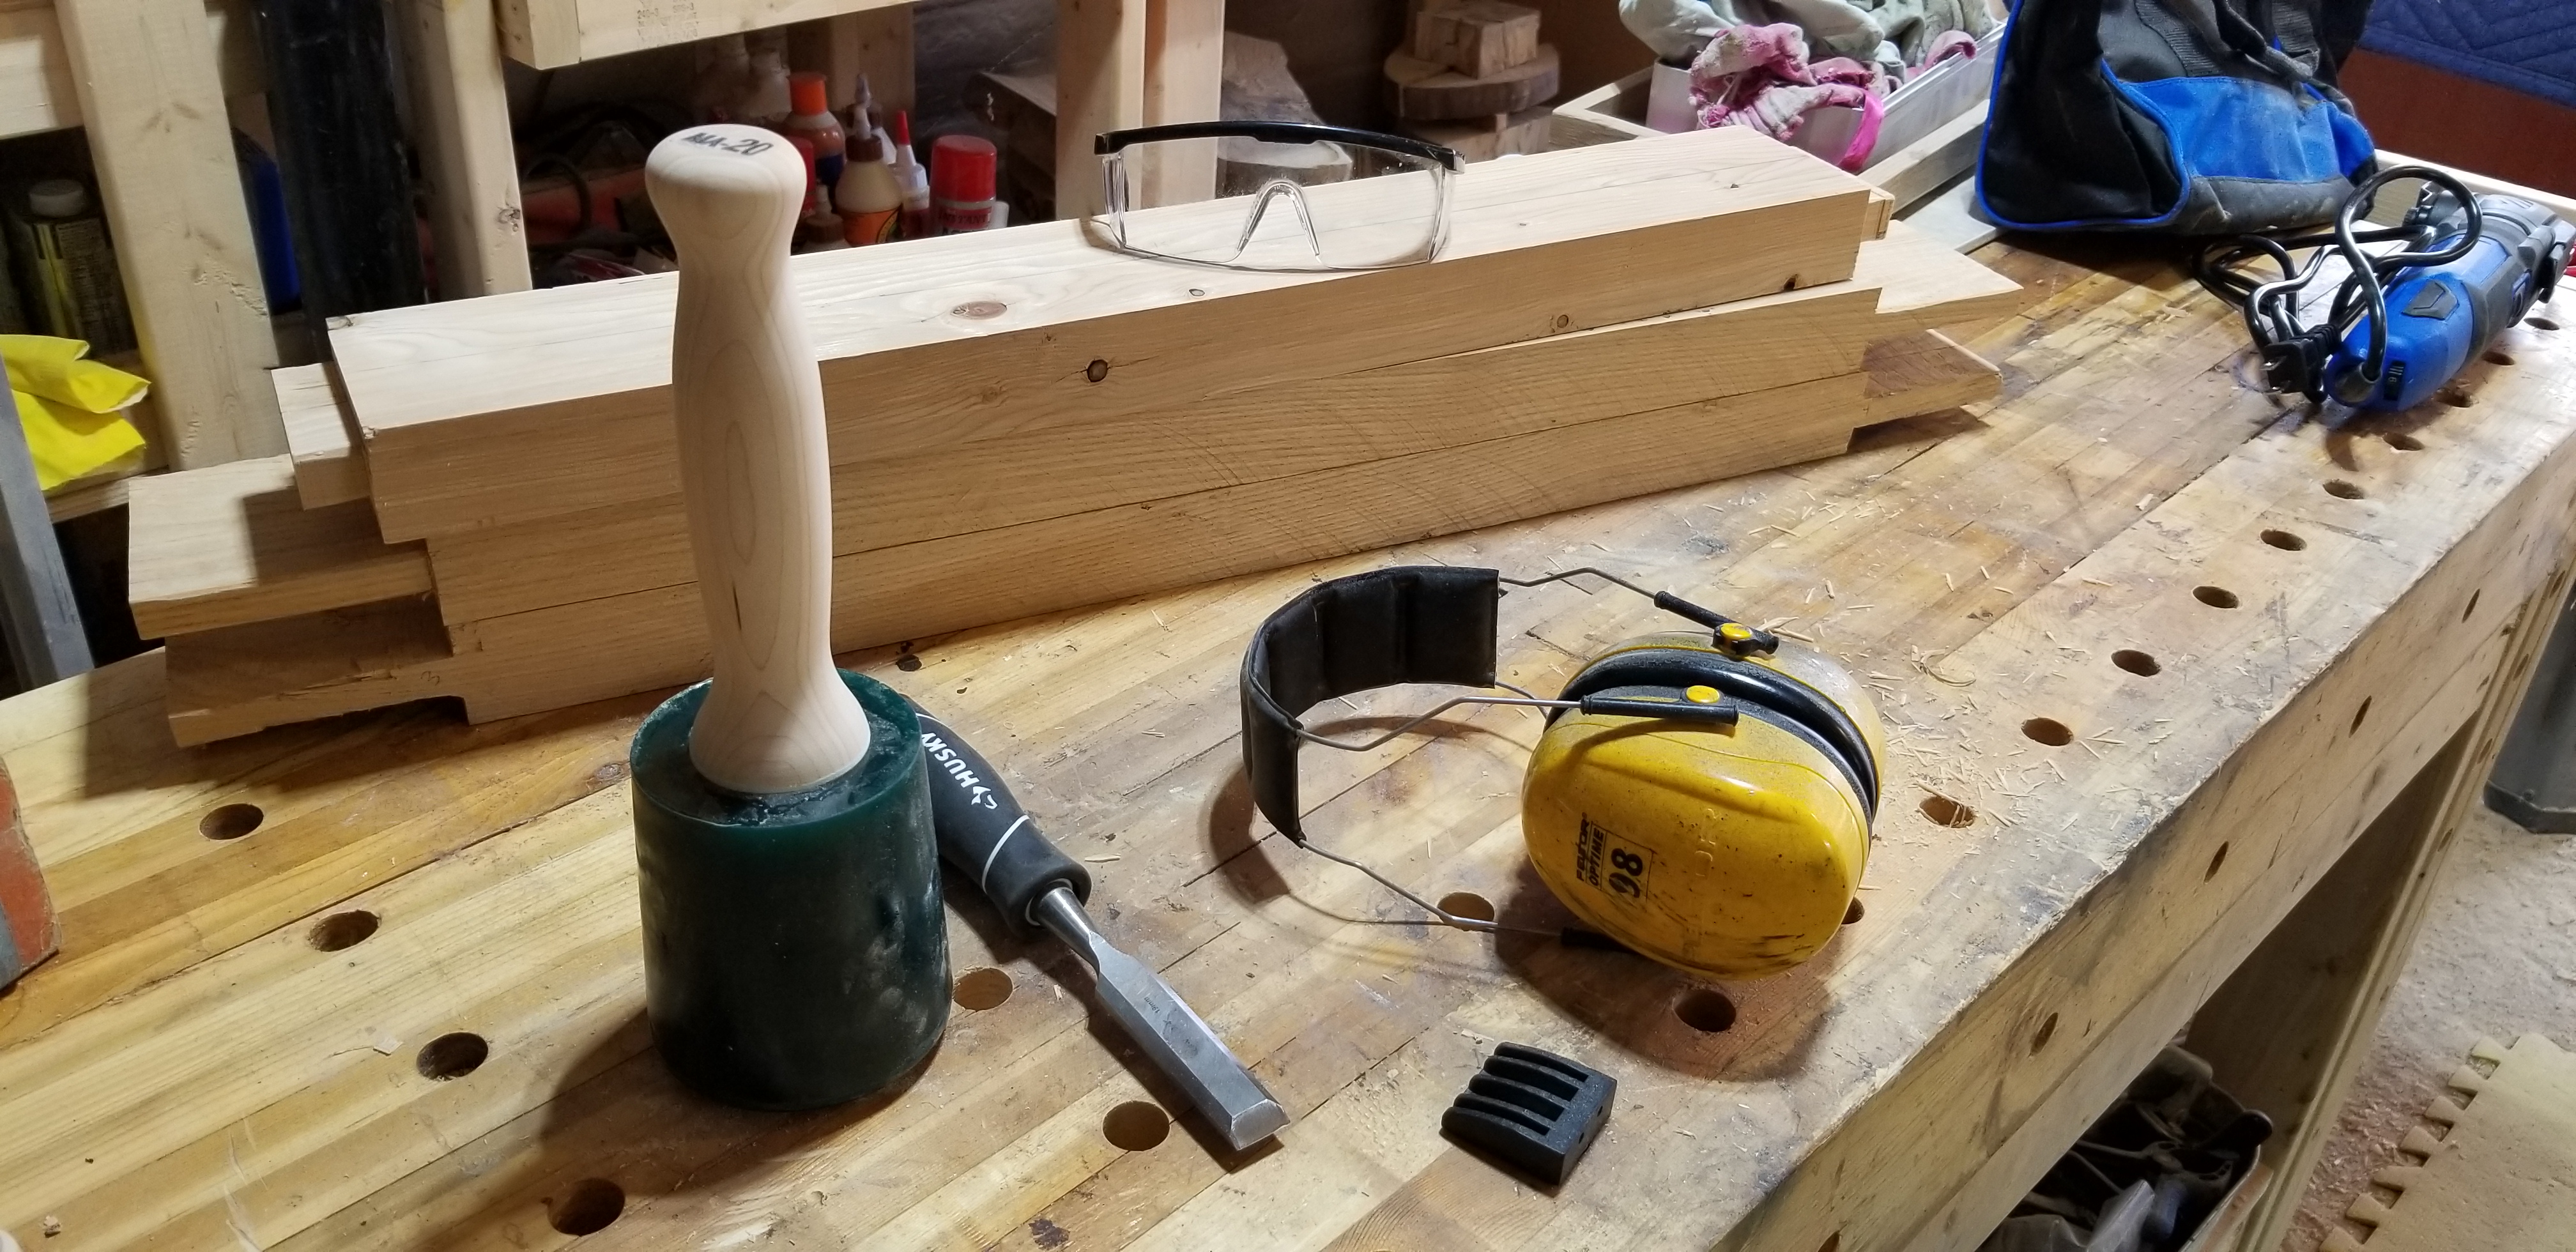
The following spring I dug out my lumber, which was still square and decided to hand cut some mortises for the top and bottom of the door uprights. I first used a circular saw to cut two slices through the end grain about four inches deep. This was super sketchy, and my super old school, under powered Kawasaki circular saw died after a cut & a half – twice. So I finished it off with a Stanley hand saw. You know the old kind that weirdos play with a violin bow to make high pitched whiney muzak. I had to climb up on my work bench in order to get this to work.
I gathered up my chisels and a hammer and got dug in cutting away the channel where the cross members would rest. This would prove a difficult and arduous task. It took several days, and my channel was not straight, nor were they even. I took a file to them, and worked that for a few days too. It was at this point that I started to refinish a rocking chair for my very pregnant sister in law, and that took my whole season.
The following year ( this year 2022) I took some rasps to my channels, and evened them out a fair bit. I then used a brand new Dado blade to cut some even tenons for the cross members. It was an endless cycle of dry fit testing, rasping, filing, and planing until I had a suitable snug fit. Then I measured out my center line, and cut out two mortises for the third, and final center cross member. I hugged it out with a forstner bit, then used a multi tool to cut through the rest, and then hand chiseled it to a clear rectangular hole. It worked quite well. After assembling it all as a dry fit, I noticed my angles were all wonky, and then realized my flat, square lumber, was now bowed, and twisting ever so noticeably. But as I was about to begin sanding I hit the most egregious spots with a hand plane, and sort of made the best of it.
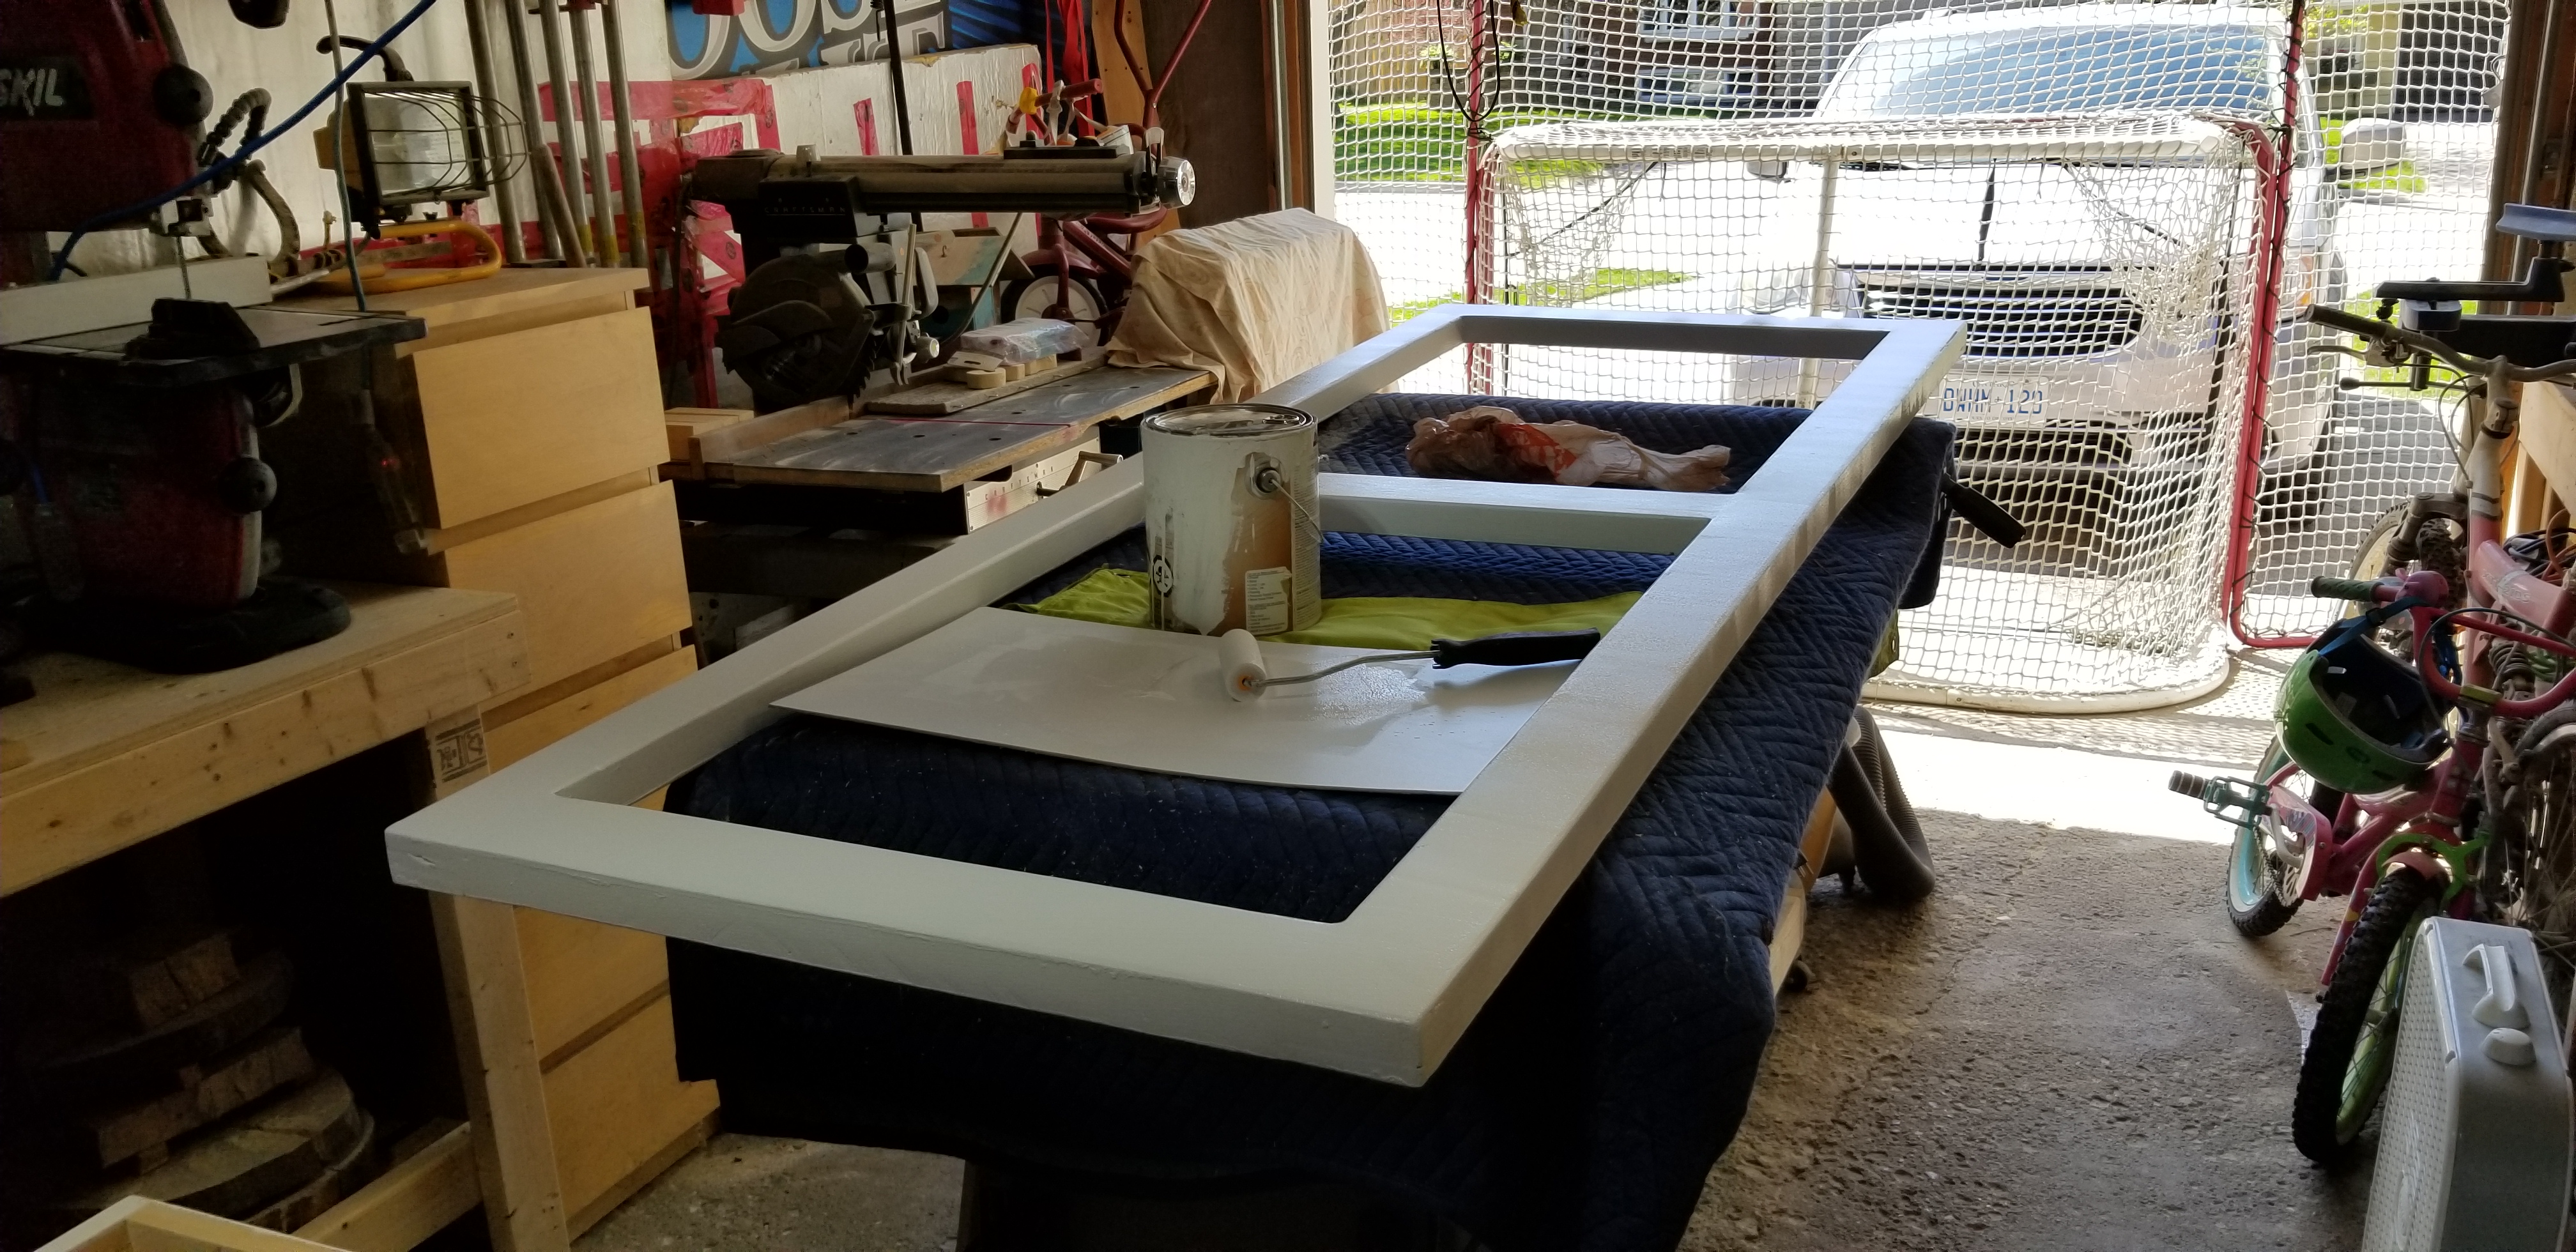
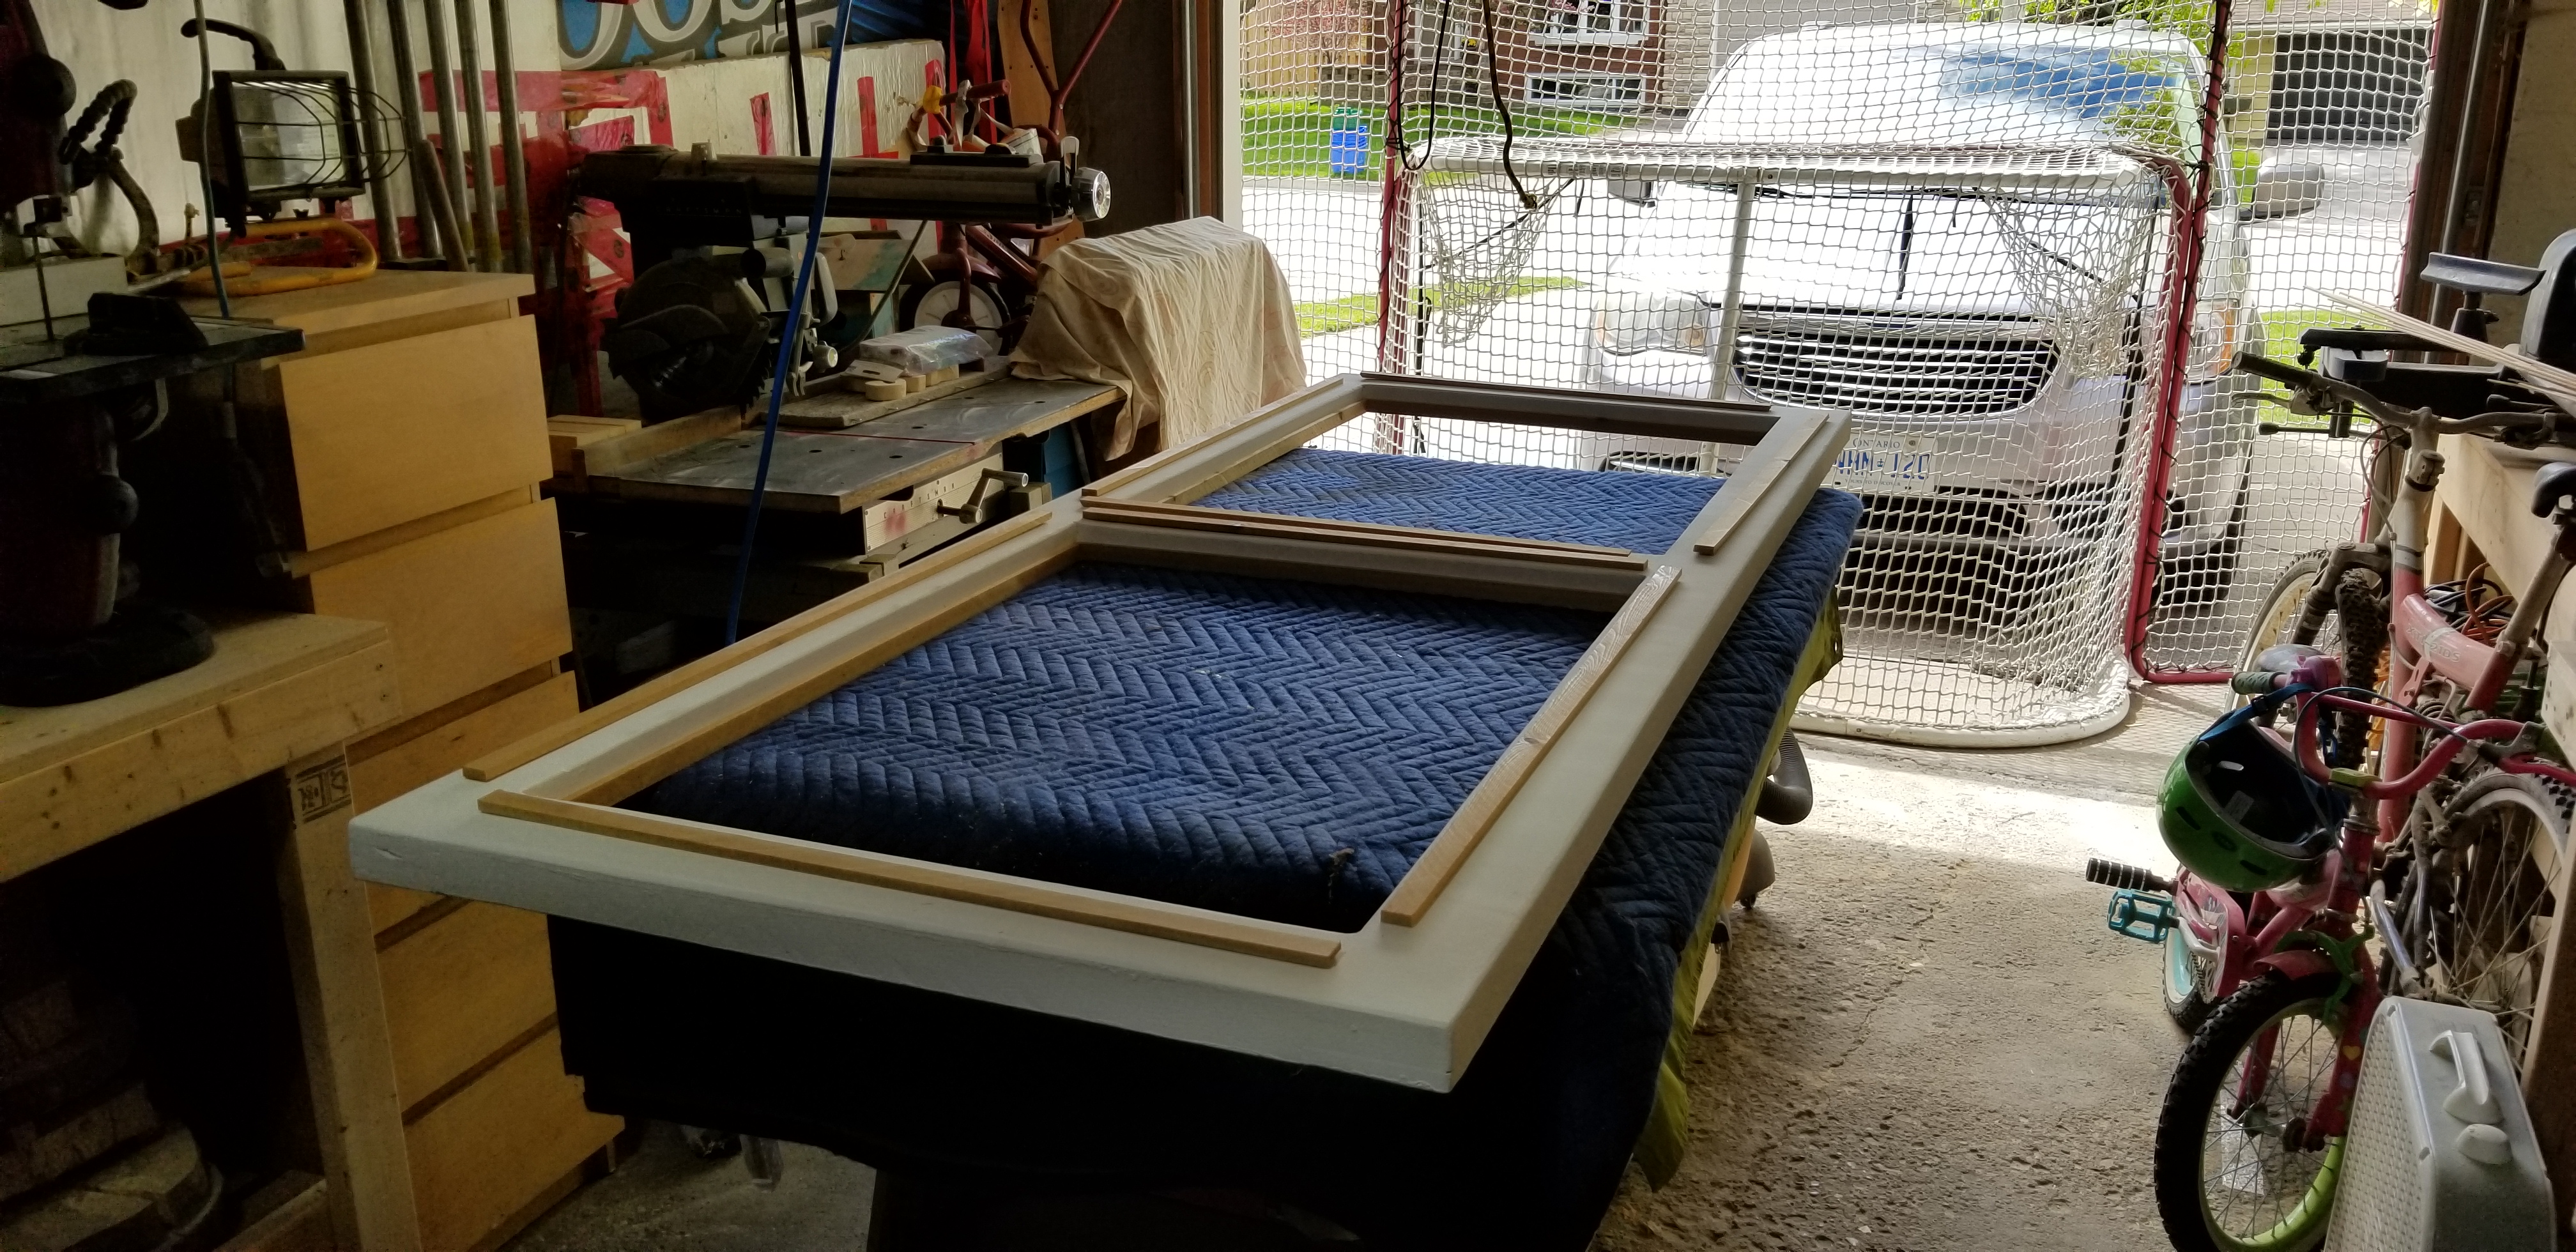
I took the time to glue the frame together. Then in each corner I drilled out a 3/8ths hole and glued some dowels through the joints. Flush cut those, and then did endless rounds up through the grits on every single surface of the door. I stopped to add copious amounts of filler, which meant no more natural wood look, but I was now going to have to paint it all white, to match the house trim.
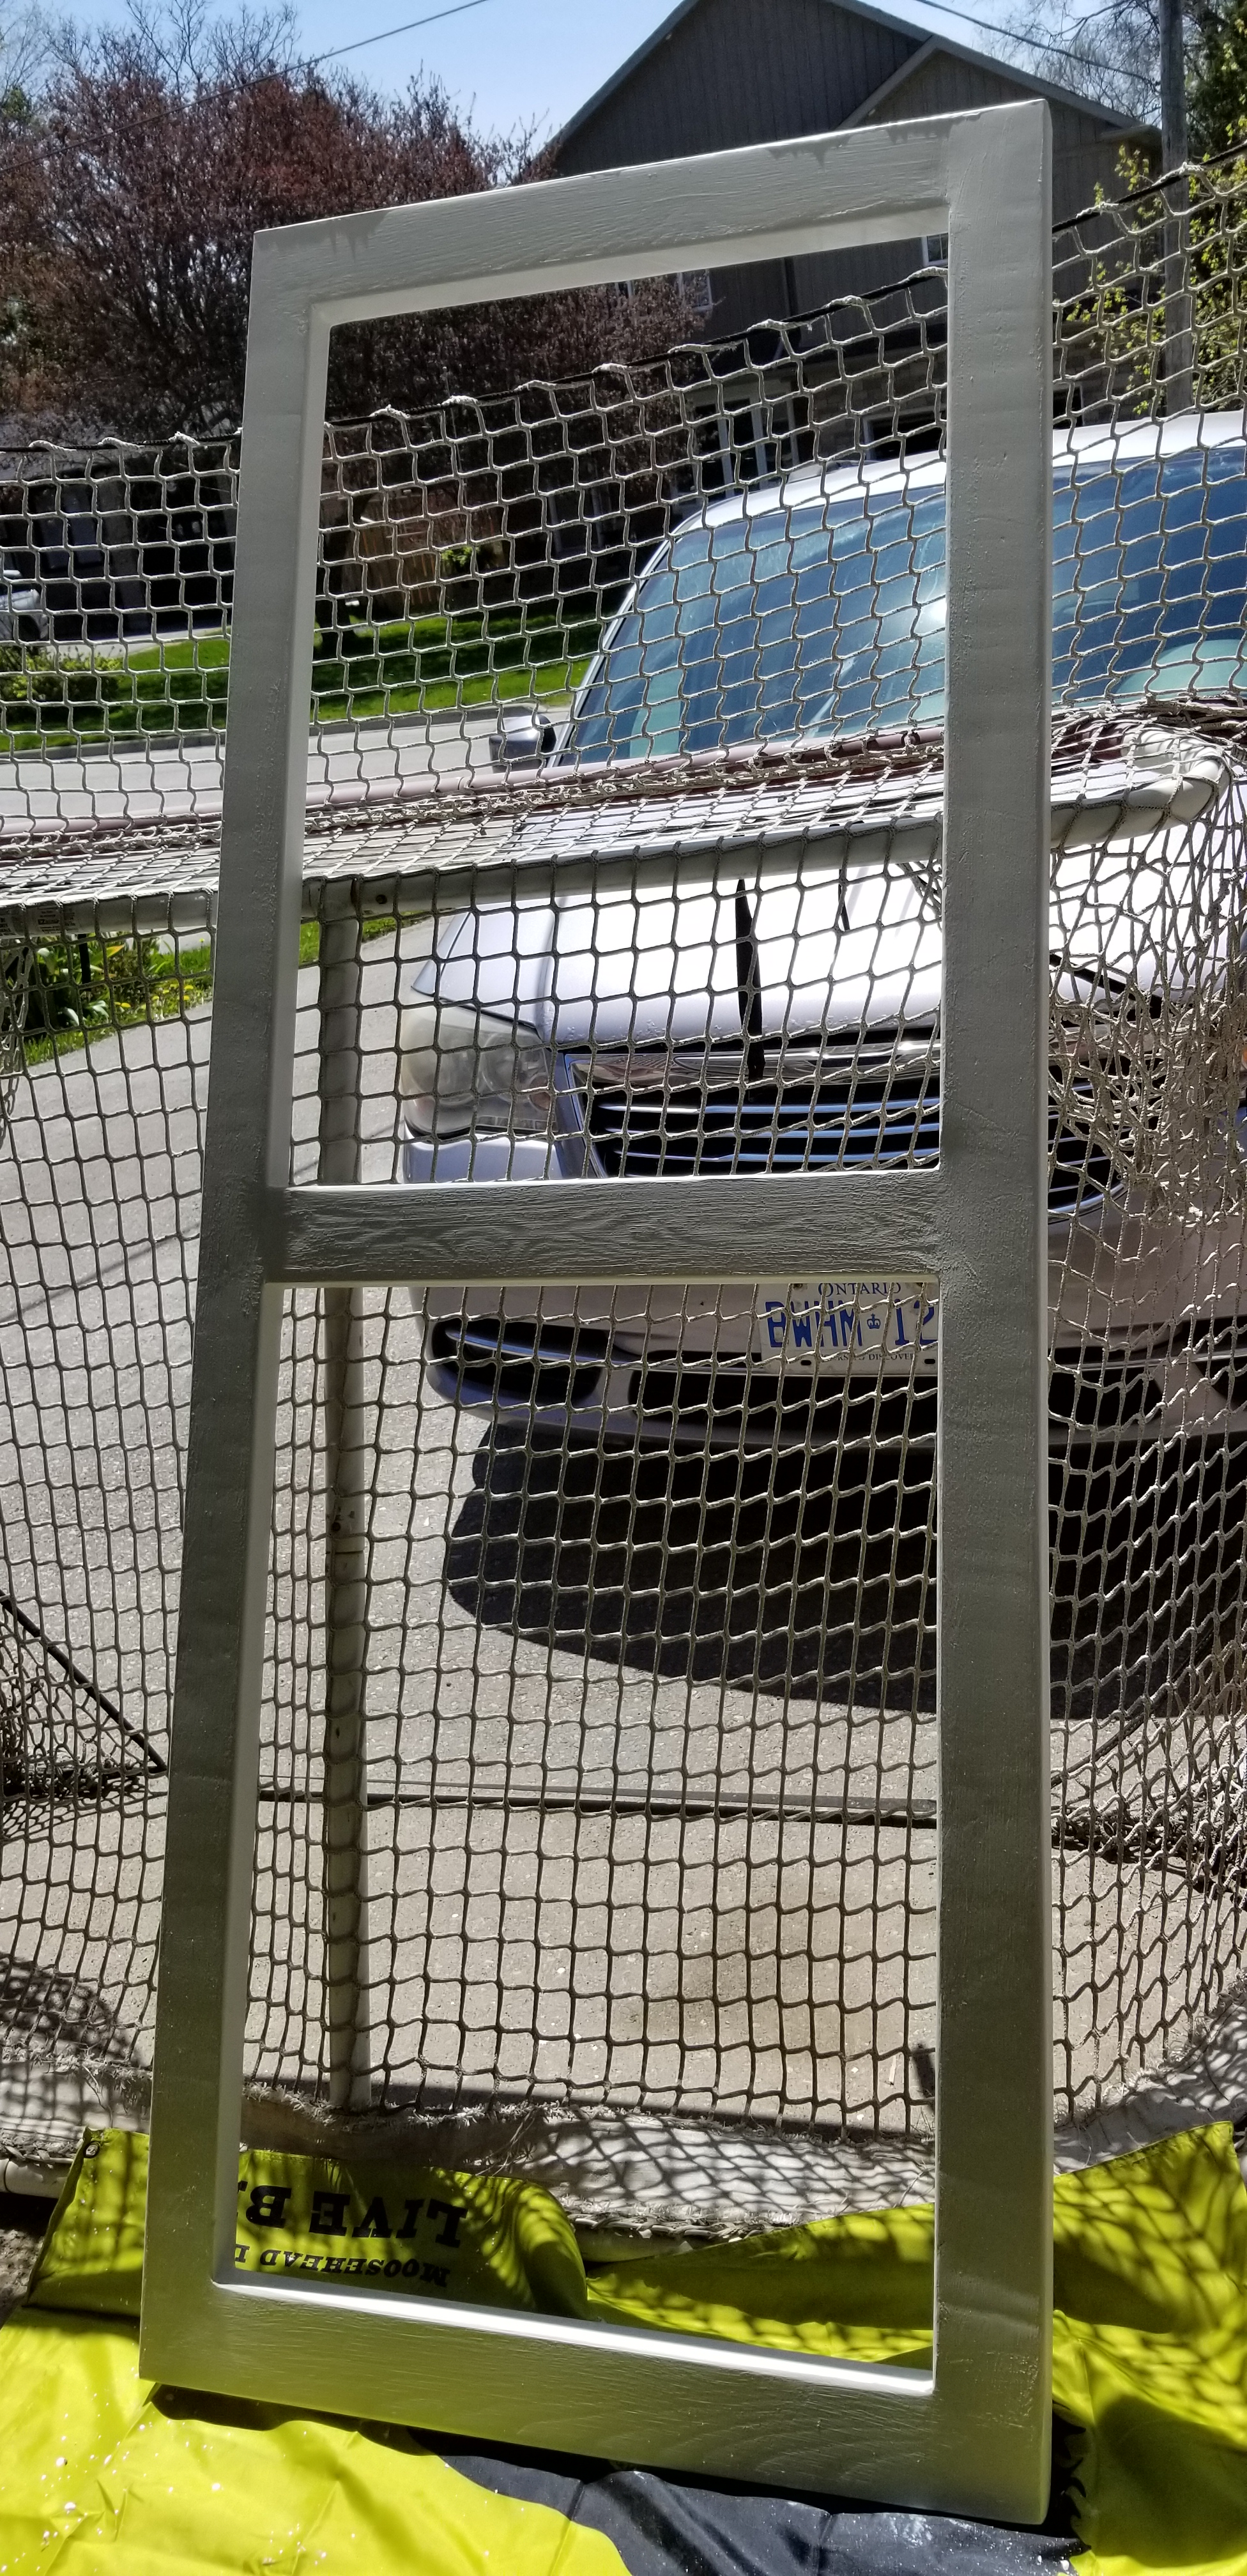
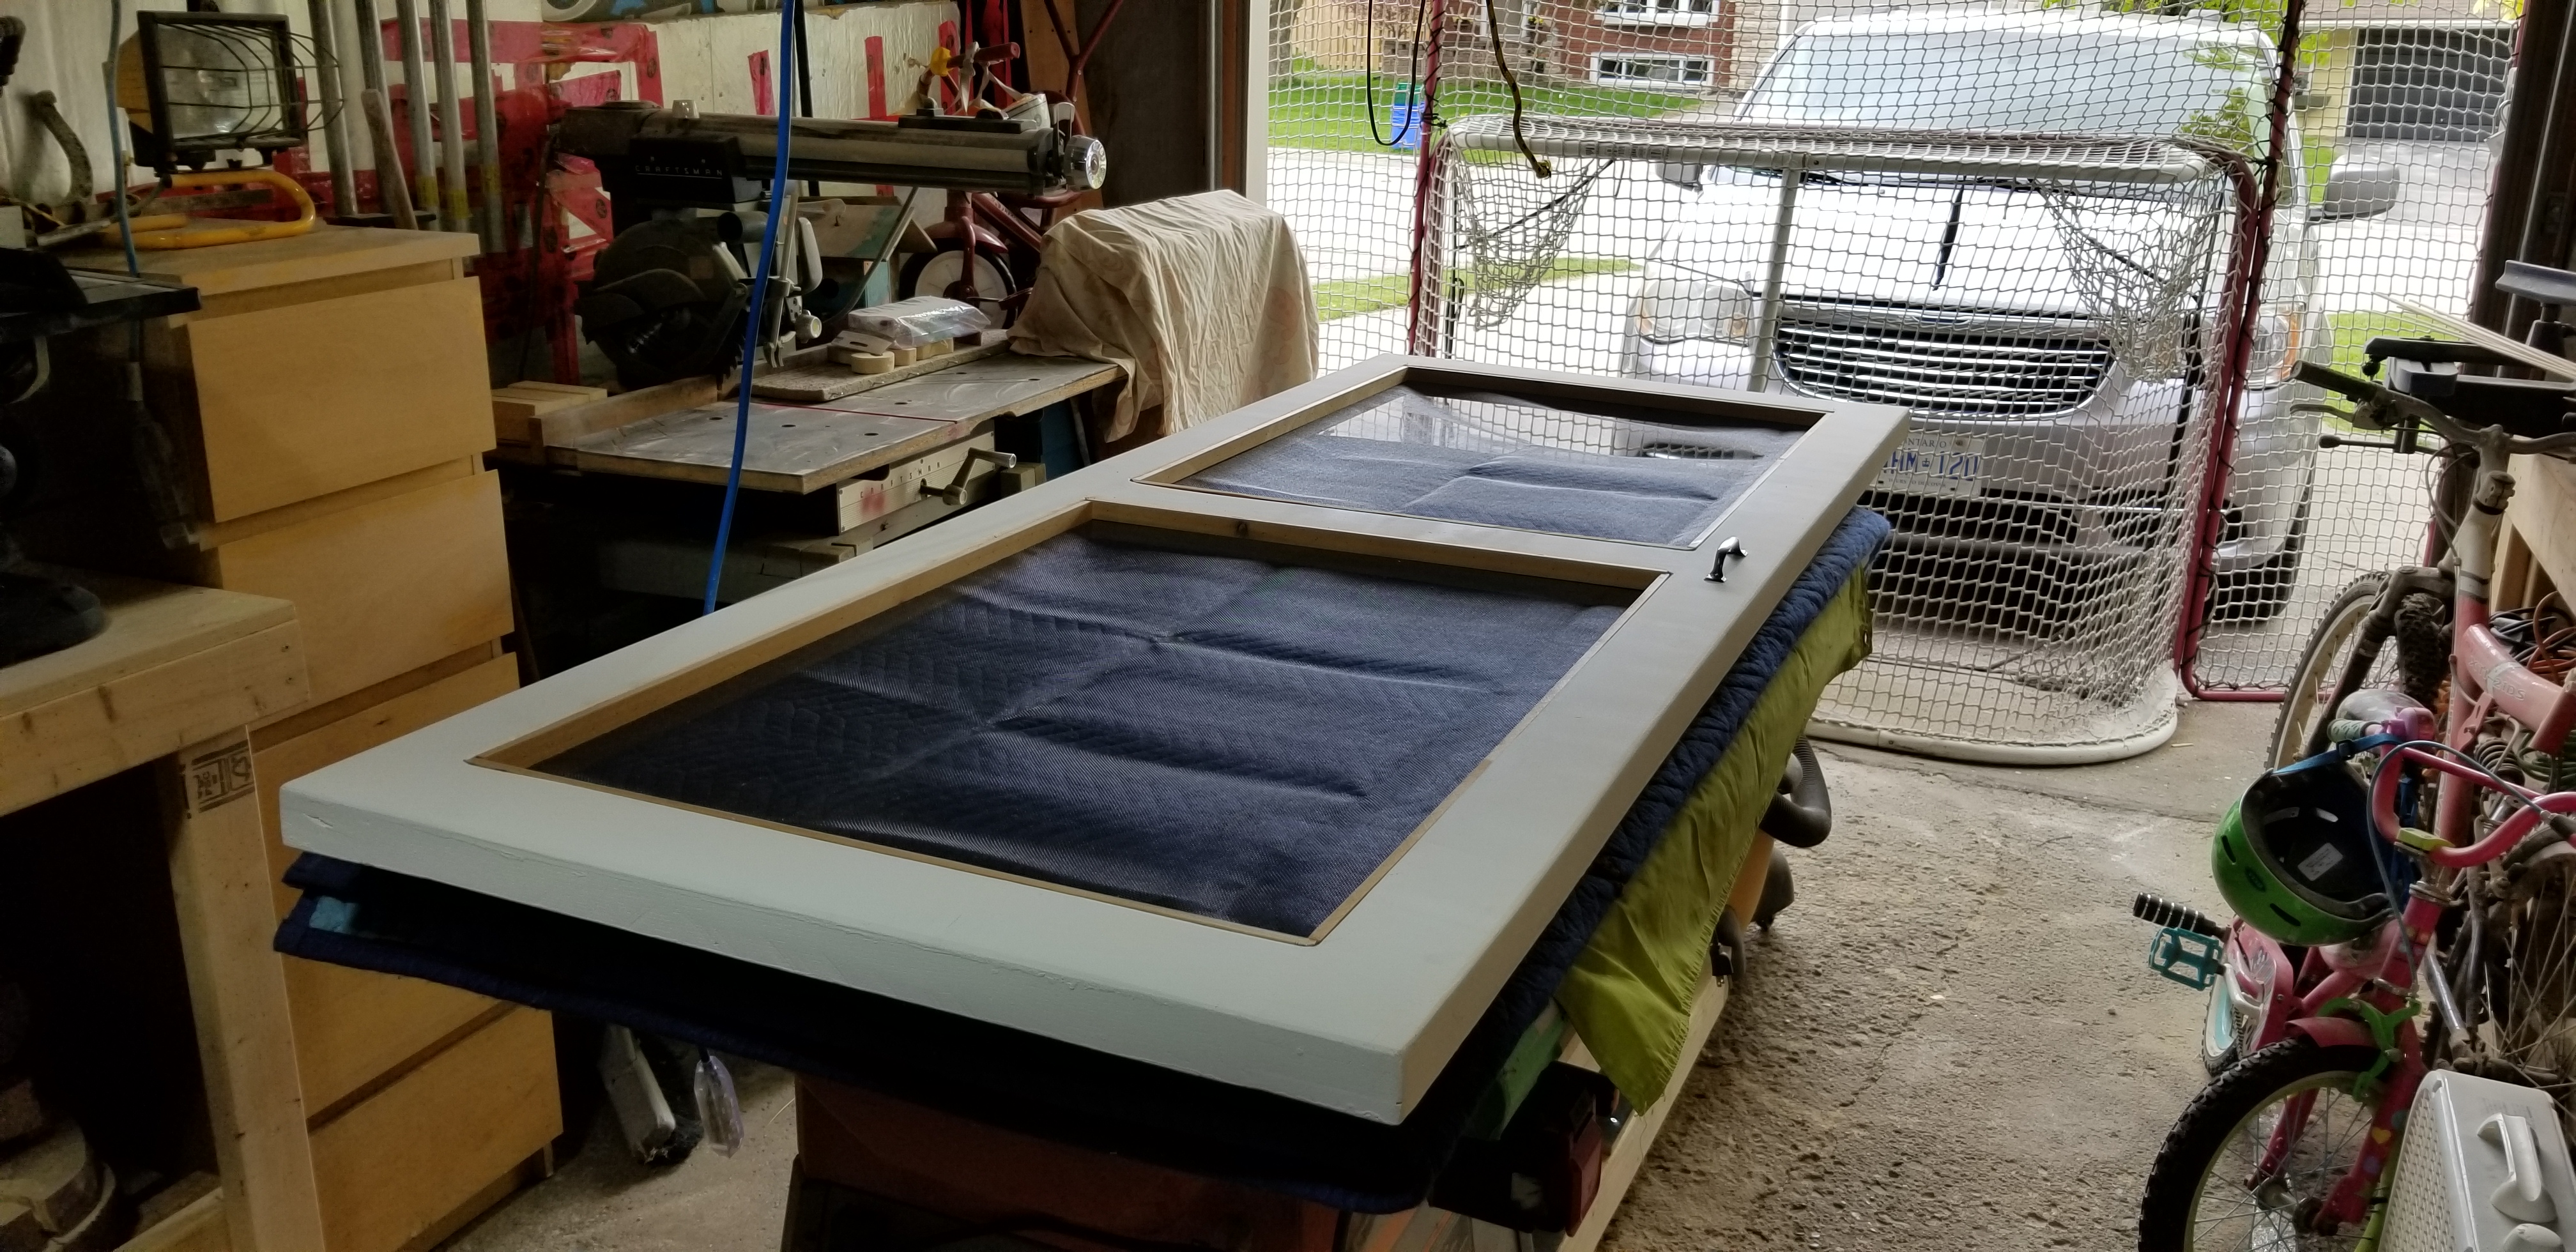
I used an oil based primer to paint on four coats of pristine paint. Then I cut down some Cedar strips, 16 lengths in all, which would sandwich my screen mesh in place, for the two openings on my screen door. After much cutting and sanding i put the first layer in place. Cutting the mesh material was far simpler than i was imagining it would be. So i put those in place, and pin nailed my last strips on, holding the mesh as tight as i could get it.
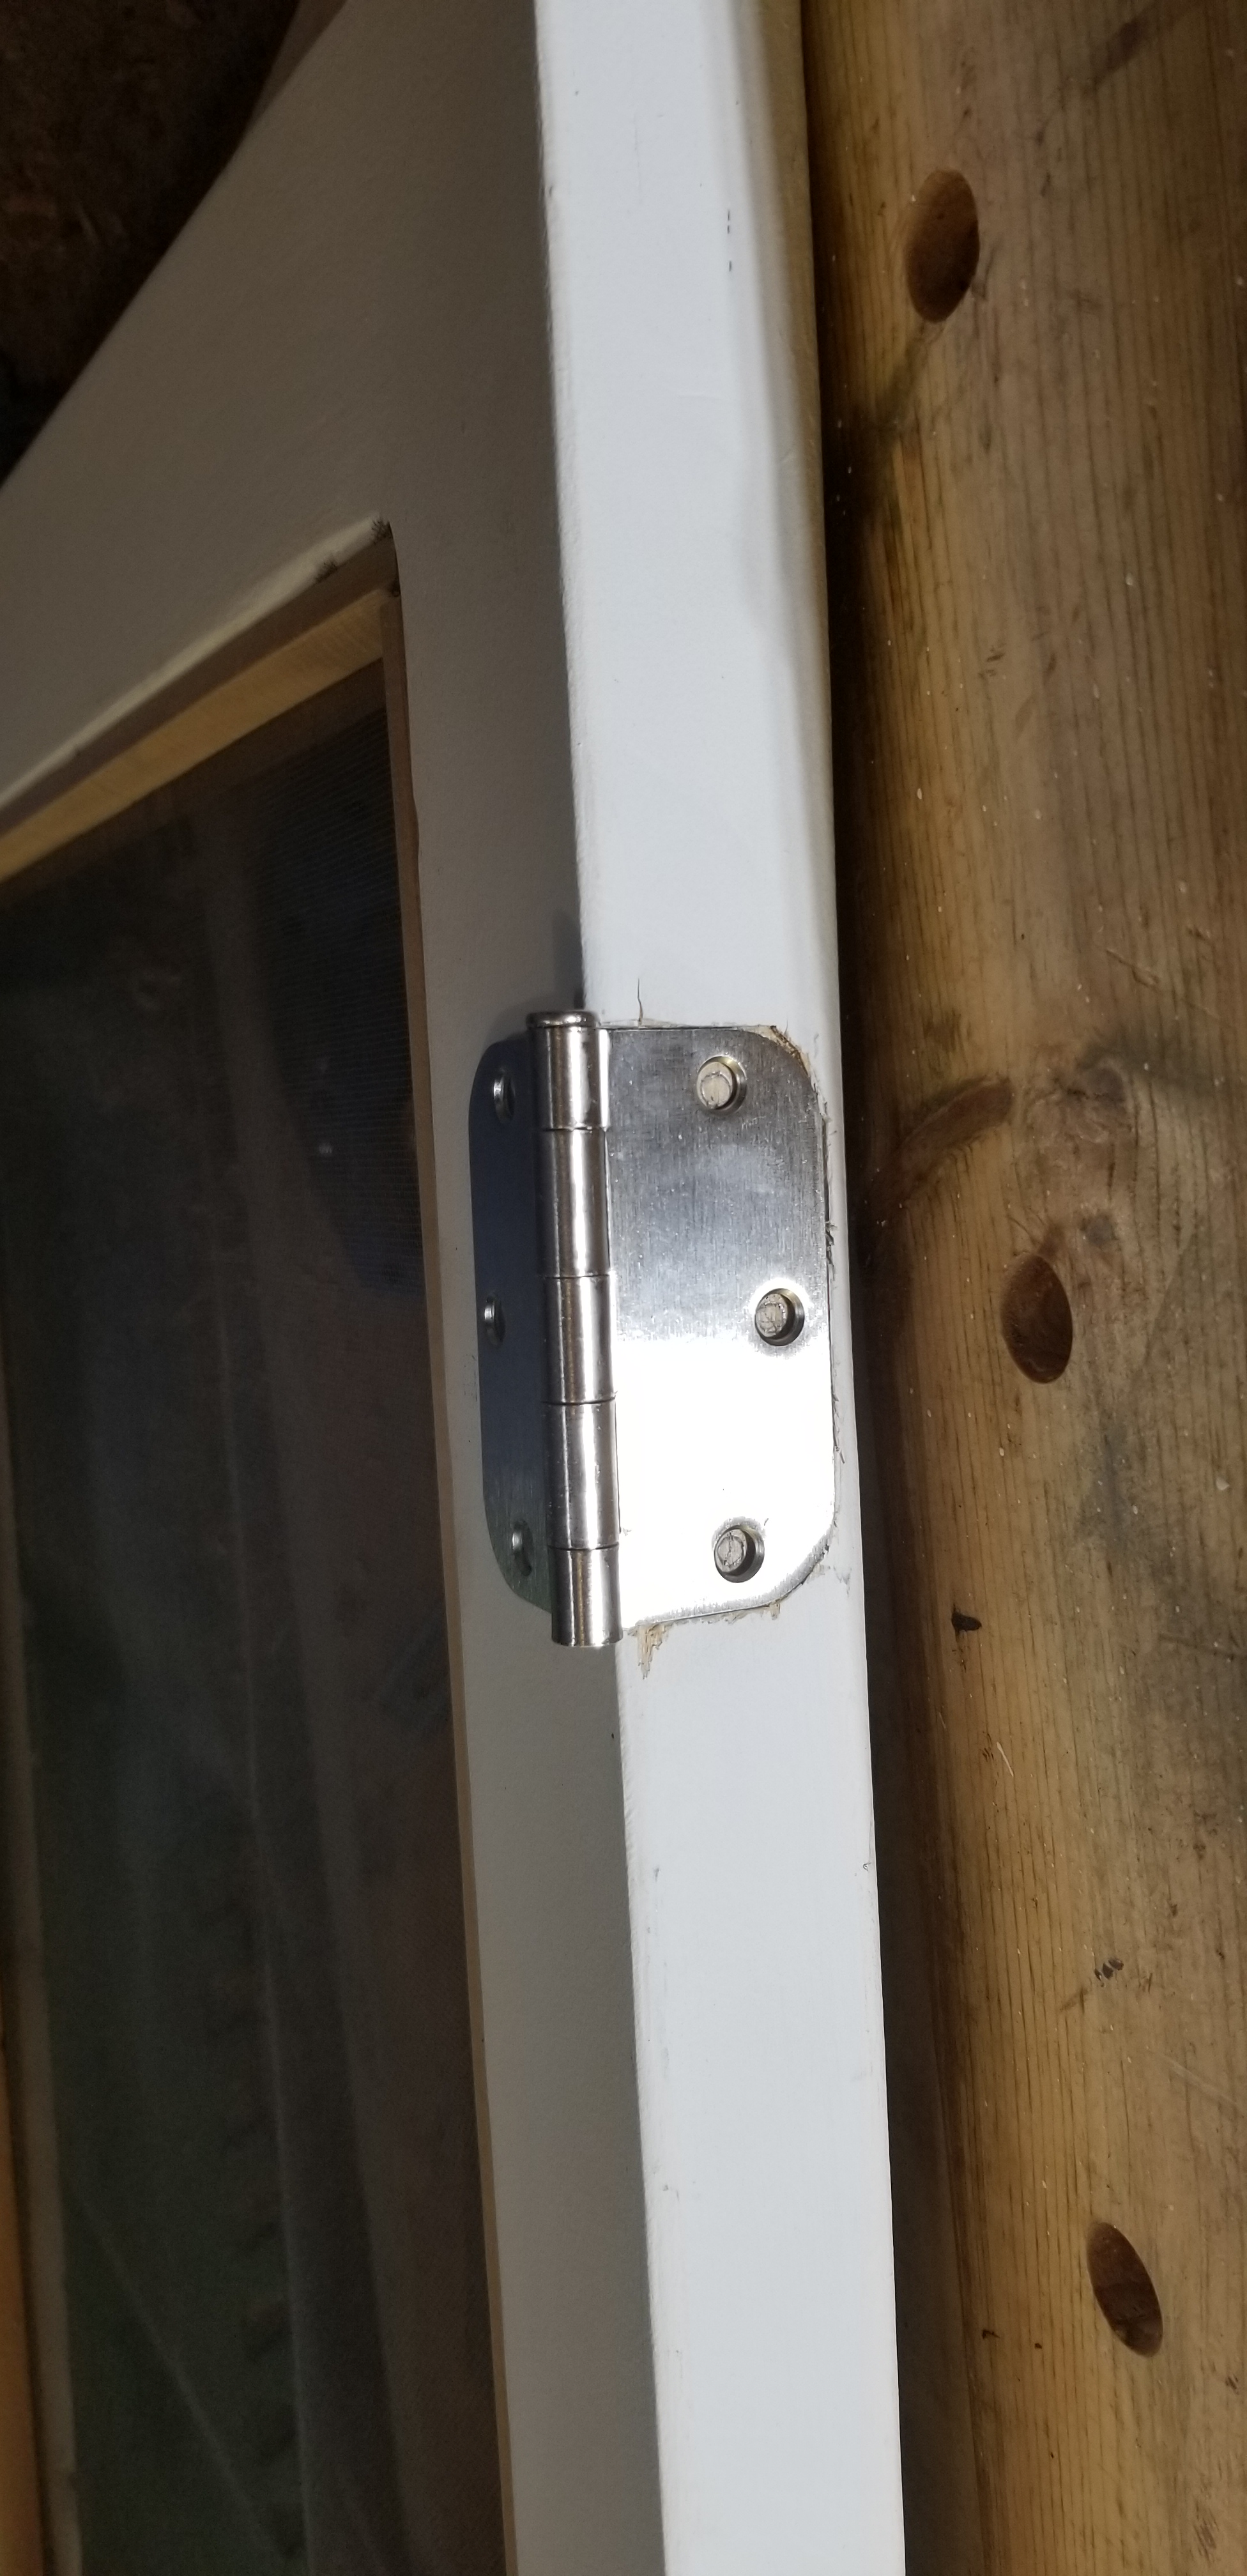
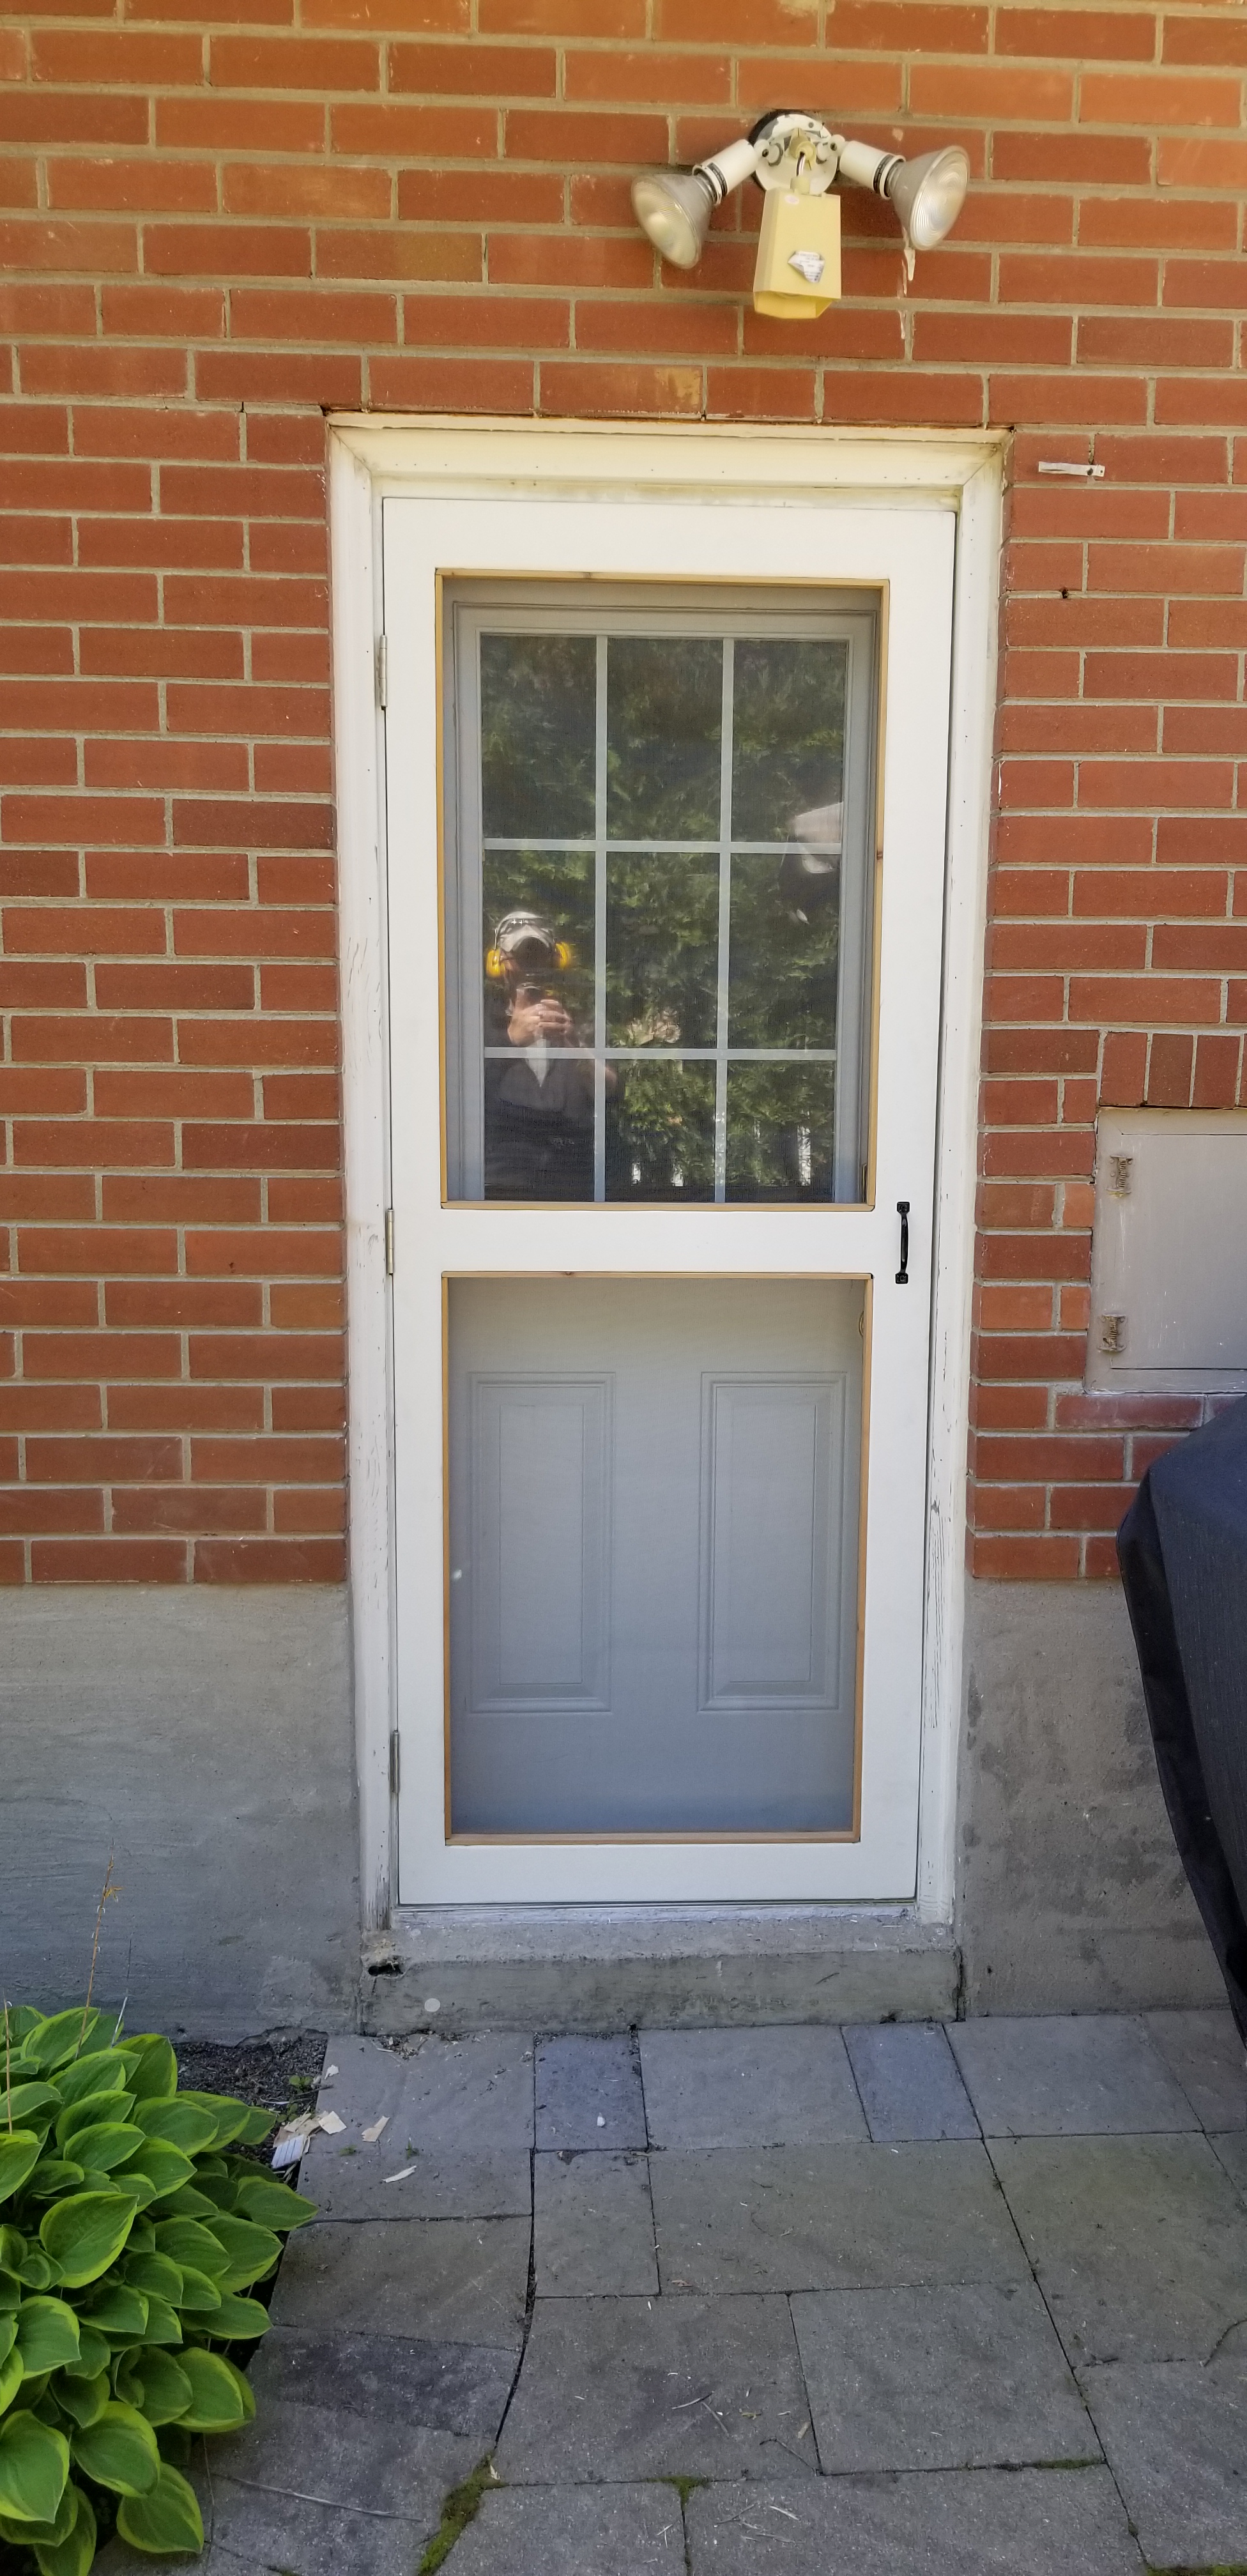
It was at this point I placed my hardware on the door. Pilot drilling holes for the handle and a push plate. I also then hand cut in my hinge recesses. Drilled and attached those. Fought with the door for an afternoon to cut in the receiving hinge slots on the house, and hung the door single handedly (do not reccomend). I then added backing trim to stop the door swinging too far inwards and binding. Added a latch, and an extra handle, and Bob’s your uncle. Done like dinner.
I didn’t take any photos while cutting the cross member tenons, but they’re there, and I did them myself.
This time around I thought I’d go a little bit fancy. Which is, or course, a relative term. To me that meant attempting repeatable tapered Hickory legs. Which required me to build a whole new jig/sled to accomplish exactly that. And would you look at that it worked. I was duly impressed with myself.
Then I cut down my skirting, and added a relief to the underside, which recieved a round over, to soften it up a bit. Followed by setting up the dado blade as fat as it’ll go, and cutting the slots for said skirting, and adding the .75″ long tenons to the end of each leg.
I rounded over all four faces to each leg, and did a test fit of the skirting. Wouldn’t you know, three of the four were spot on, and the first was a touch loose. Not a big deal. I can manage.
The glue up of the three Walnut boards to make one large panel was mostly uneventful. I had to joint a bunch of complementary edges, and RIP off the bark, or ruined portions. Use thirteen clamps to wrestle the twist out of the boards. Scrape the excess glue off, and then move through a series of hand planers, and my Bosch electric hand planer to even out the end product. I also took my card scraper for a spin to get a better starting surface once I complete the structural elements and begin the sanding process.
I saw a tutorial somewhere that said for tighter outside edges on a mitered box, you should over shoot 45°, for something like 44.8°. But my table saw doesn’t do that, perhaps a higher priced Cabinet saw would, but mine does not. So a straight 45 it was. Praying for no slips or binding against the fence. We will only know during the glue up.
I used a 1″ forstner bit to hog out the bulk of my mortises. I had intended to chisel out the rest, but I cracked an edge, so had to pause to blow glue into it, and reclamp it. Switched over to a coping saw to save any undue stress on the base piece of Walnut.
I will progress through, 60 / 80 / 100/ 120/ 150 / 220 / 320 grits with an random oribtal sander. Then after I glue up and I need to do touch ups, the very top most surface with get a hand sanding at 400 grit.
After assembly of the hollow top, I will cut in eight (8) splines on all four corners, to add some visual interest. Then round it all over to look a bit cleaner. The tenons of the legs are through & throughs on the base. So a pocket of colour should be seen when you get up close to it. Not finished yet, but you get the gist of it.
Had a brain wave the other day about building a walnut side table that was hollow, but could accept the floating bottom walnut drawer I had made a few months ago. Make it tall, on thin Hickory legs, do a thicker walnut skirt, and try a tapered edge on the legs. Round it all over, and then see how close i got to my plans. I’ll draw it out first, and then see if i was actually able to pull it off. That should give me a sense of where i am making my mistakes. I also need to finish by June 30th, before 11:00am, as that’s when schools out for the summer. Pushing against a dead line, and following a plan. Could be fun. But i have a report coming late this week, so that’ll cut into my time significantly. Chop chop, quite literally.
So I have cut up four Hickory legs, the last substantial portion of my slabs. I milled and cut up some rough walnut, and have glued up a single four foot long panel, which will be chopped down into my hollow top. I cut two inch strips for skirting too. I need to figure out a jig for careful, and repeatable tapered legs. Dado out my leg slots to hold the skirting on. I’ll keep the legs poking up above it, to tenon into the hollow top. Then it’ll be round overs on round overs, and sanding until my hands go numb. A quick and easy project.
Walnut skirting and the as of yet un tapered Hickory legs. Followed by a four foot long walnut panel glue up. Didn’t skimp on the clamps this time around.
Here’s how my other table build turned out. Doesn’t look too out of place in the basement. Good height for the sofa that’s there anyway.
The Ninja Turtle is progressing. I like the Apoxie Sculpt, a tad sticky though. But fast to work with. I may still end up detailing it out with Super Sculpey, but for now I’m enjoying the process with Apoxie Sculpt. This could potentially sit for months if need be before I come back to it. I’ll focus primarily on the furniture build, as that can warp, buckle and twist if I don’t build it sooner rather than later. Learned that lesson the hard way with my screen door.
Today is domestic duties Monday, so I need to get the second load of laundry in, run the dish washer, vacuum and tidy up a bit today. I’ll need to sort and hang the laundry too. I hear the temperature is on the rise through this week. Going to feel like 40 °C for several days in a row. Yikes. Also need to get rolling on my youngest child’s birthday party later this week. Busy – busy. Ciao Bella!
Now we are staring down the barrel at the possibility of a 200 day writing streak, and I’m at a loss for words. Now the question becomes, can I reach 250, 300, 365? Can I do a whole calendar year of writing every single day? I don’t know. I just don’t know at this point. It has definitely become a part of my day. Same with lifting weights either first thing as I wake up, or last before I pop into bed. Making time for stuff is kinda getting easier? I’m not sure how to say it. I don’t believe it to be outside the realm of possible to do at least 5 minutes of whatever you like, almost every single day.
But a caveat may be prudent here. I for one, am self employed, and I work from home. I have my hours set up so that I can take my kids to school in the morning, and pick them up at the end of the day. I have a small list of clients, and I don’t work more than 40 hrs on a busy week. The rest of my days are far lighter on average. So I’m not single (for starters), I do a lot of the cleaning, and household work because I am home, and I have the time to do so. And my spouse makes pretty good money, so my wages are offset by what we save for not doing before and after school care for two children. Plus I take them to appointments and look after them on their sick days, so my spouse doesn’t have to miss work, unless it was communicable and she ended up catching it too.
So knowing all that. I can safely say, I find it possible, under my current circumstances (one of privilege) that if I put my mind to it, I can read, write, sculpt, do some wood working, and play my guitar, dance and sing with my kids every day, if only for 5 minutes, because that makes me happy, and life a joy to behold in those moments. When I was working in house for sixty plus hours a week, that was not the case. So there is a continuum or sliding scale. Depending on my work load I may do all of the above in a one hour stretch, because I need to work the rest of the time, but that’s the exceptional busy week that comes and goes as the quarters pass.
I should take this time to mention how much I enjoy working with Apoxie Sculpt. My second run at my Ninja Turtle has been far more enjoyable in epoxy, than the Super Sculpey firm. Which, in these parts at least, comes to your door as a crumbly hard mass that needs to be worked heavily prior to use. I tend to add one firm block to two regular pink blocks to make a pliable medium stiffness in bulk. I always use more than I think I will. Probably not filling out my rough forms with enough tin foil or tape. At $27 a block for sculpey, the $3 tin foil is better used to bulk things out. Live and learn I guess. I look forward to working on the turtle! He is shaping up to be a bit of all right. I won’t put anything like 200 hours into it, but maybe 20-30 hours will do it. I don’t reach that level of polish on any of my sculpts. That level of detail doesn’t tickle my cockles. I’ll leave that to the professionals. When it’s done, if I don’t hate it again, I’ll show you what it looks like. Stay tuned. Ciao Bella!


You must be logged in to post a comment.