Work spaces and their impact on productivity.

The work from home situation.

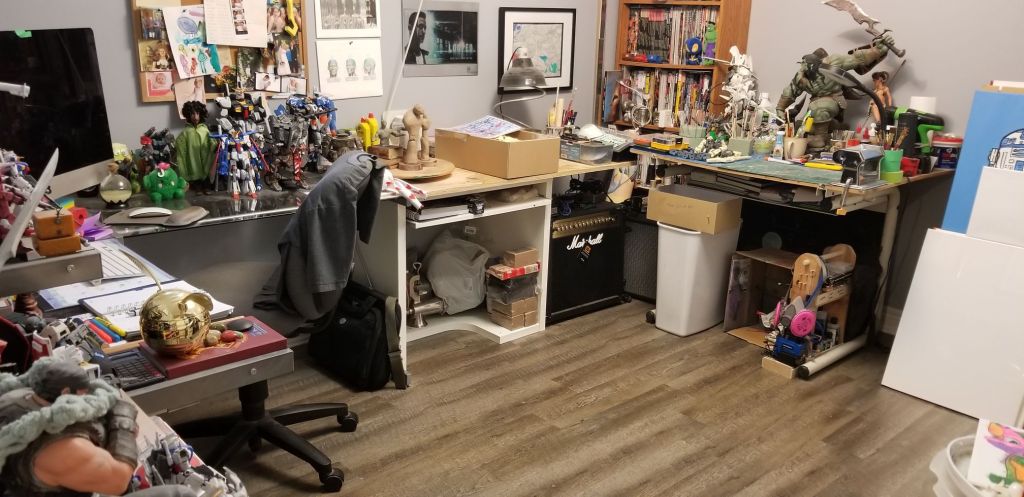
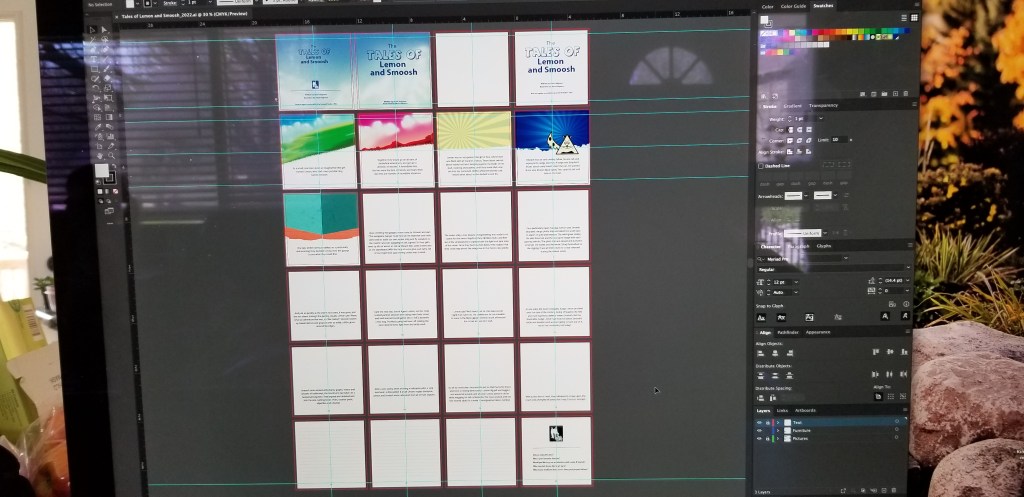
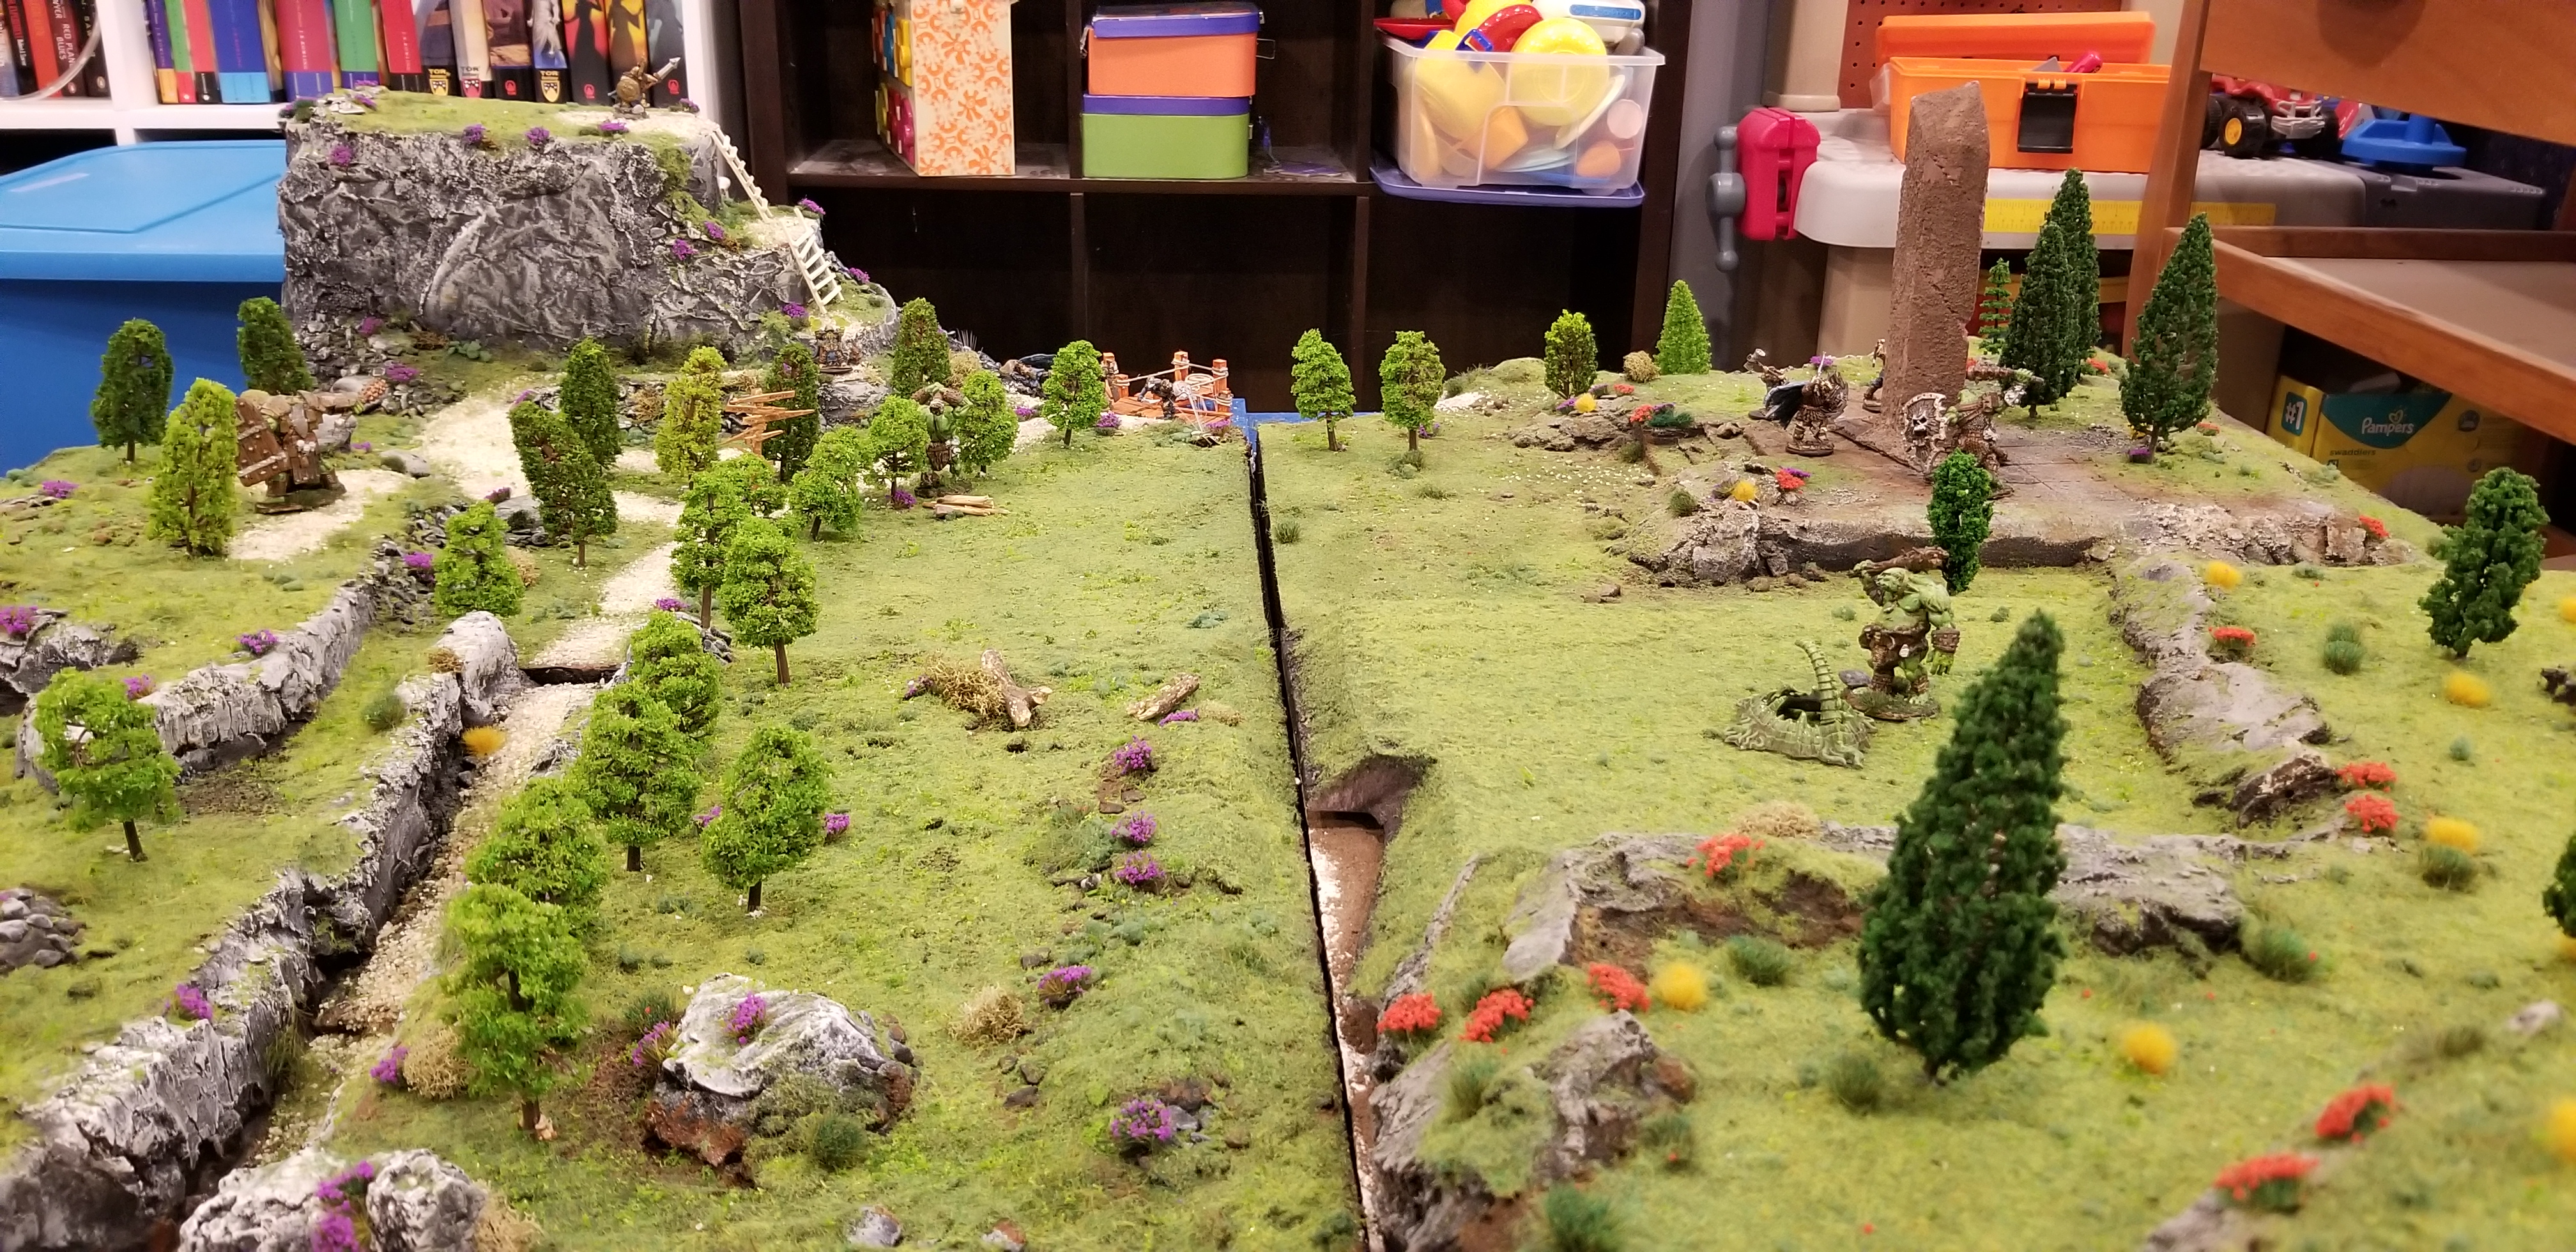
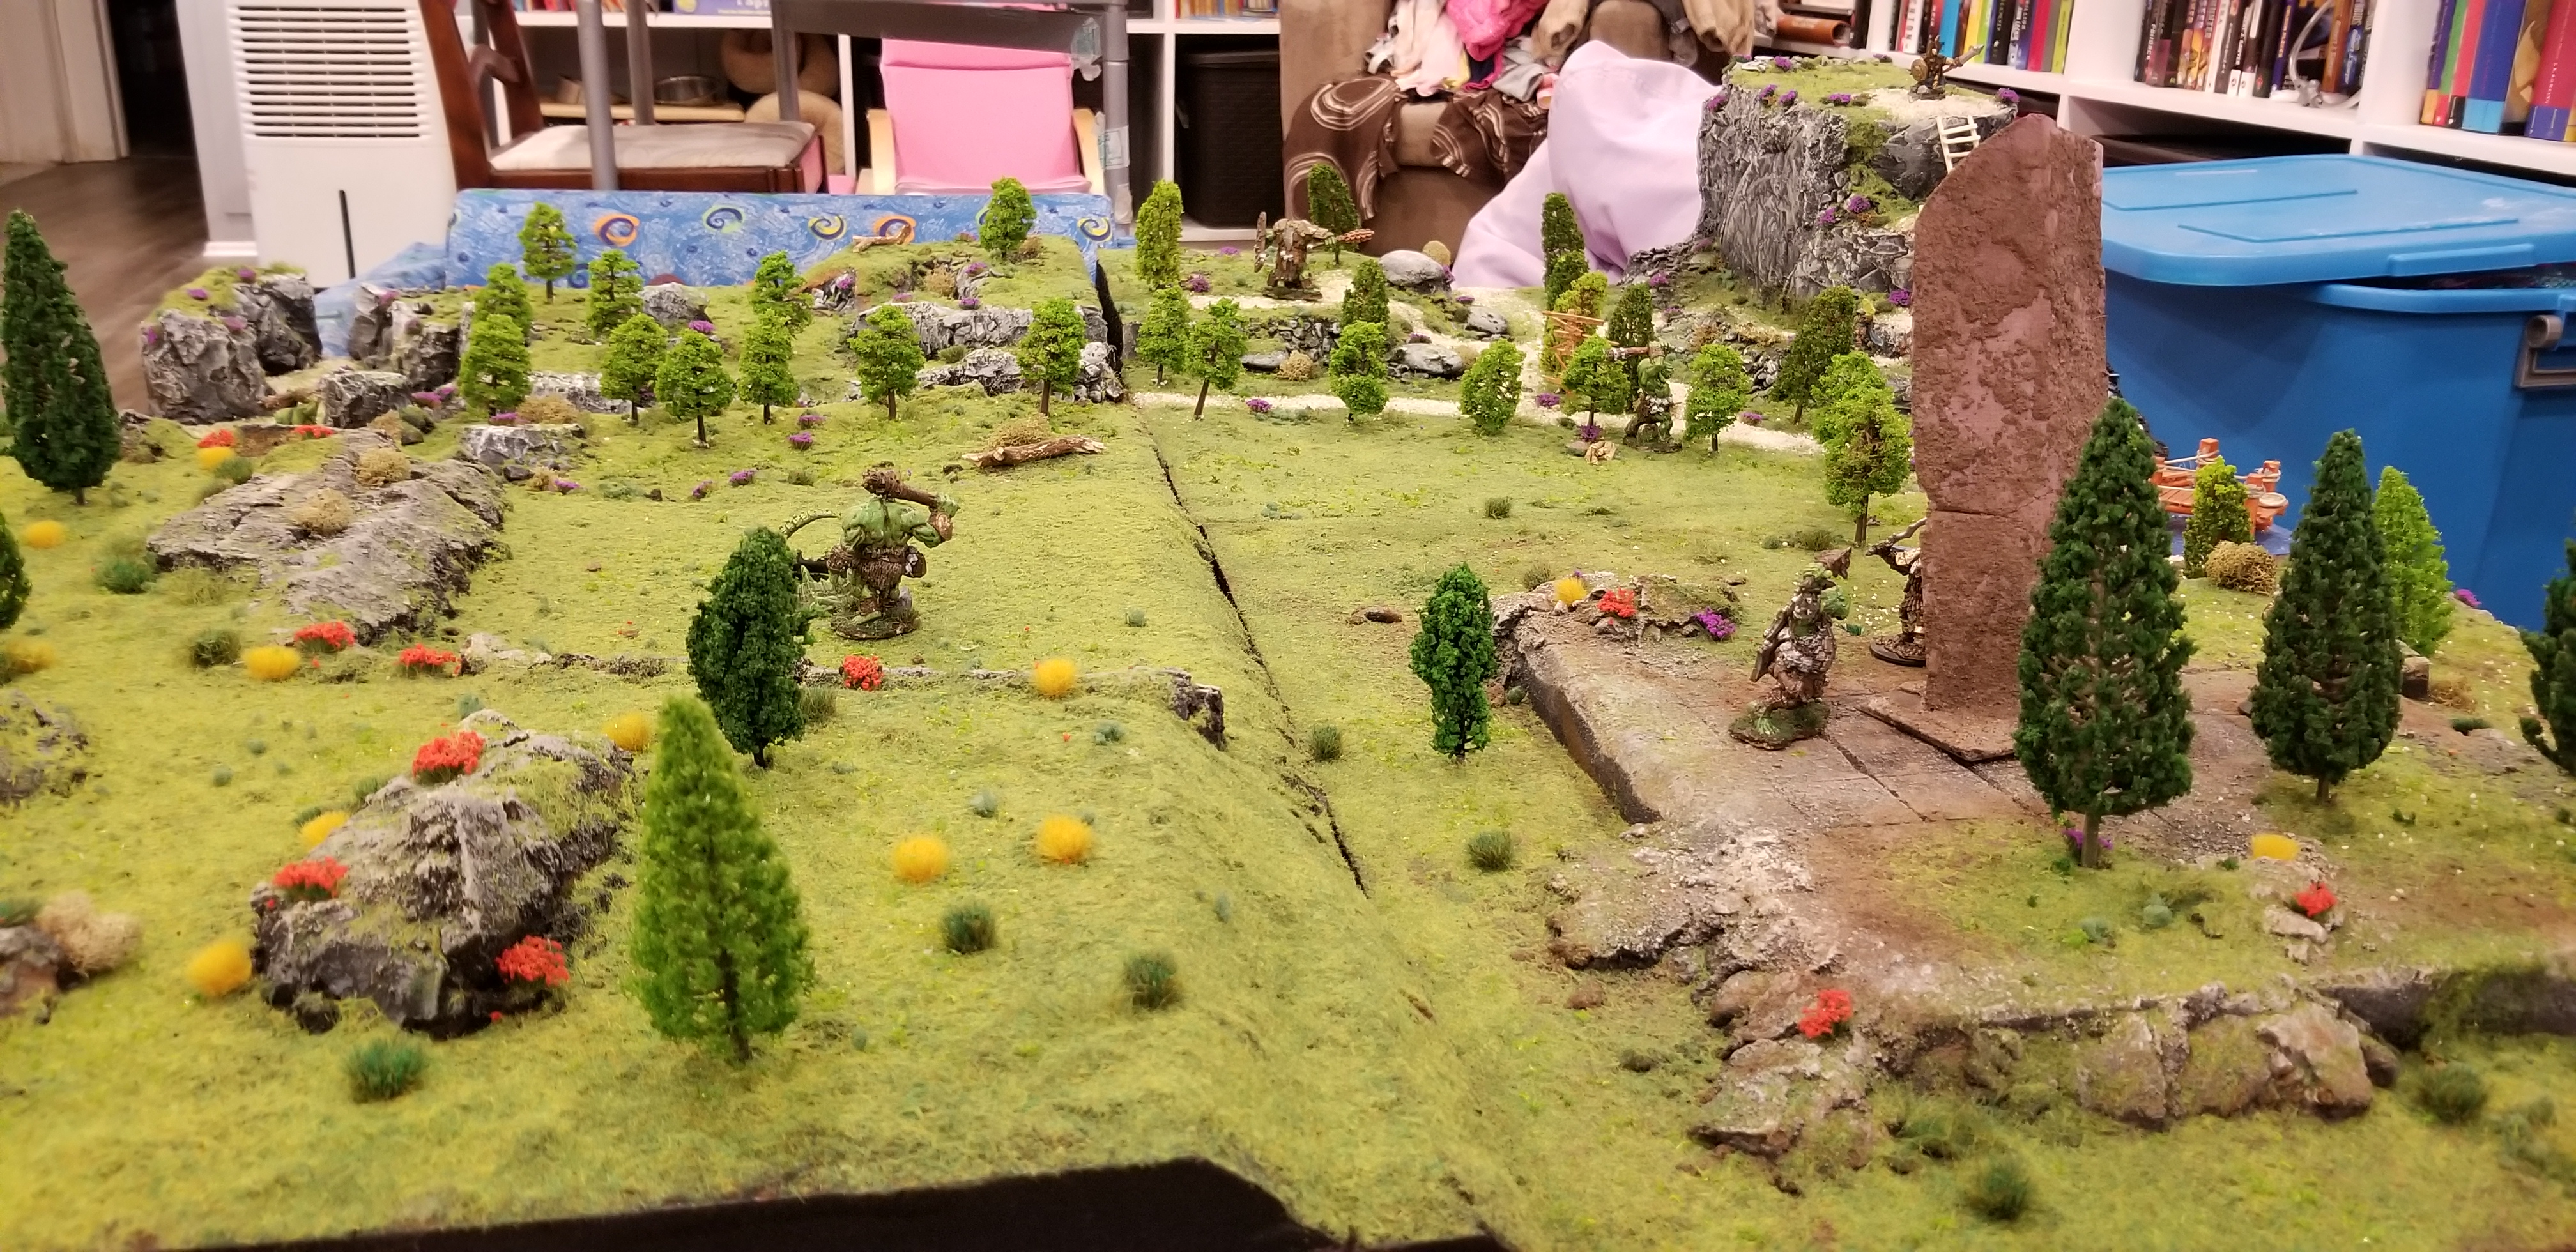
I am currently freelancing from home, from my own office/studio space. A place where I can not only create paid design/production work, but can make music, sculptures, paintings, and models too. It’s a place I enjoy hanging out in. It’s  clean-ish (depending on the needs of the job at hand) and quiet during the day, warm & dry, and the best part is it requires zero commute time to get to. So I don’t mind getting to an item at 6:30am one day, or answering a panicked email at 11:00pm the next day. I can pop laundry in as I walk to the bathroom. I can do a grocery shop over lunch. But best of all I’m here to drop my kids off at school in the morning, and available to pick them up at the end of their day. I don’t have to spend four hours a day, five/six days a week traveling downtown, and then across town, then walking several blocks to a job. I’ve excised that demon.

My topic wasn’t WFH, but the space in which I operate. I’ve worked places with no assigned seating or computers, in an open room on tables, in a bank of cubicles, and in a couple of offices of my own with a door I could shut, an air vent of my own I could manipulate, and my own lighting. Being secluded by myself was always the best for me. Collaboration is great, and loads of fun, but the bulk of my labour required very little of it. As normally my bread & butter item in my workload was production. Retrofitting someone else’s art work to fit new specs. A style guide answers the most basic questions, and it was just a matter of producing enough of the artwork to suit all the different brands, sub brands, and partner brands to stay afloat. I do not miss firing off 115 projects a week, every week, until the new fiscal when planners, and bulk sell sheet orders would come my way, and I’d do double, to nearly triple that. Yikes. My wrist fried out, and my eyes went twitchy, and I was not a very kind person. I don’t miss any of that, except the steady pay cheque.

The cool thing now is that when I have a quiet period, of hours, days, or weeks, I can tackle a DIY project, or build in my wood shop, or paint/sculpt/draw in my office, ready to answer a phone call or email. Some times I can even pick up a guitar and strum along to music for a spell. I’m contract, and freelance so I’m not tied go an eight hour day, with a keyboard counter, or a clock watching supervisor. Thank god!  I’m here and available and you only pay for the hours you use. Works great for all involved.

Hot lunches, and a semi private bathroom, shower and laundry on site. Video games and movies on hand. A gym with weights. What more could a person ask for. Oh yeah – no people though. No external interactions 98% of the time. Ah – PERFECTION!

I tell you what. I could accomplish more at home in 3.5 hrs than I ever did in an office over 8. No walk by’s, no drop ins, no gather rounds or team meetings, no memos or circle the wagon moments. All work, no fluff, and no in office pantomime of walking to talk to all the right people just to be seen, and sound busy. It really is fantastic to drop all of those extra steps and just get to do the work I love. Yes I have to send invoices, and do my own books, and plan around delays in payment or lull periods. But freelancing offers me so much more family time while I have young kids that none of that matters all that much. Glorious. But, I’ve always had a spouse that out earned me by a wide margin, even at my highest paying job, so there is that to consider. It was cheaper in the end for me to take a pay cut, but for us to not have to pay before & after school care costs for two kids, plus sitters for pa days, winter break, and march break, and the whole summer.

How do you have your work space set up? How do you like where you are? What would you change? What are you able to change? Take it easy.

Love what you’re doing, but I have a few notes…

In regards to your performance recently… in that it sucks. When you work, it’s all great, but then you break down, clog, jam, hell we even lost an integral part of you recently in the u bend of a drain (more on that later). So yes, as a no name air brush, you do what it says on the tin, in brief spurts, and do fine work, but ultimately you are a major failing and we don’t want to work with you after you finish all seven parts of this major project. Oh ok? Hmm. Yes, no you can not leave early. We’re under staffed, and you’re the only equipment we have on hand. Budget constraints and all that jazz. Please and thank you. I’ll dock this meeting from your time sheet today. Bye-bye. But don’t leave. You’re not fired – yet. You are fired, but not until all seven items are finished ok? We clear? Great. Uh-huh. Toodles.

So yeah, the no name cheap air brush is solid when it works, but needs to be torn down and cleaned to the Nth degree after every single solitary brief use. The air brush cleaner, and hot water treatment don’t seem to cut it. And all I’m working on right now is priming stuff black. Haven’t done a zenithal high light on anything yet, nor have I laid on any actual colour. So maybe in the new year I will break down and purchase a higher quality air brush.

On the other hand, the caddy works great. The Vallejo ready out the bottle paint primer is fantastic. The iawata air brush cleaner feels like it should work. Smells nice. And my make shift card board box over spray protection booth, while lacklustre is perfectly fine. Can be set up in seconds, and torn down to store under my drafting table just as quickly. I do want to build a better one, but I need to know what I really, desperately need out of it first. Do I need extraction, filters, lights, a turn table or flat static bottom. Do I want to be able to tear it down, or is it a new permanent fixture in my office/studio from here on out. Do I need to build it to fit inside a closet? Or store it under a work table. I don’t know. I do know that eventually a box of more than 100 miniatures will come my way in mid 2023, and I want to hit the ground running when those finally arrive from a kickstarter I backed a while ago. I should have done the Reaper Bones kickstarter, but I opted for a less expensive one, and it might take me for the $100 bucks. Oh well. Nothing I can do about it now.

In other news, the U bend I busted yesterday has been fixed. I went to Schell Lumber and bought a suitable replacement. I put that back in place, and tested the taps. No leaks – as of yet. It threaded properly, and fit the current existing piping. So a win! Yeah. Also I stopped off for groceries and bought a present for the birthday party this weekend, so that’s taken care of too. Came in and worked on some sample labels, and sent them off too. Had a request for some French Language items and got that put together, and am waiting on any additional instructions. So Bully for me. Ciao Bella!

The right tool for the job.

So I recently discovered that our aged, and busted dryer vent cover was not put in place properly the first time. Instead of being held in place with masonry screws due to the brick/concrete combo, it was glued in place with silicone. So now I needed to pull off the broken cover shards, scrape away the silicone, and then mark & drill four proper holes to mount the new cover. Sounds easy enough. Well I don’t have any masonry bits. I don’t have a dedicated hammer drill, I have a combo from Black & Decker that’s seen some hard wear in the last three to five years. No good. So I grabbed a 6 amp hammer drill from Canadian Tire on sale no less, down from regular $129.99 to $59.99!, and the masonry screws I’d need and pow! 90 seconds later and all four holes are drilled to depth. Nice! Worked like a charm. 5/32 bit to set some 3/16th concrete screws. Love it. It feels great when a plan comes together.

But here’s the kicker, in between finding the 1/4 inch socket from the set, putting it on my impact driver via adapter, and walking from the garage to the yard I lost the gods be damned socket. I heard no clatter. It’s a tiny 1/4 socket so it wouldn’t clang very loudly if at all, more like a ‘ting’ sounds if that. So boo. My 1/4 socket has disappeared into the shrubs, the grass or flipped into an alternate dimension. I retrace my steps five/six times, and bubcous. Damn! But the drill came with some assorted bits, one of which is a 1/4 inch so I plugged that into my driver and away I went. Another 90 seconds and all four concrete screwbolts are locked in nicely. Spend more time looking for the damn socket than actually fixing my dryer vent issue. I’m happy and annoyed. Strike one more item from the list of things to-do, but lost a socket I’ve never used before, and may never use again. At least it wasn’t my 10mm. Ha!

Looks as though the plan is working.

Every single day, for an undetermined amount of time I put some work into my childrens book, and thus far it seems to be paying off. I have the whole layout done. The type is set in place, the cover & Title design is done, and I have started to produce artwork for the internal pages.

This is way more work than just writing stuff. I knew it would be, but sweet cheese. I still have a lot to do. The bonus is, that I am making headway after more than a year of putting it off. Much like my short story series I don’t believe this will bring me any sort of fame or fortune. I just wanted to do it, so I am. In my own way. No need to be hood at it, just trying things out, striking items off of the bucket list. It’s actually fairly rewarding in an internalized, intrinsic way. Good enough for me.

My thinking for the books interior pages is this, I will build out all of the colorful backgrounds first, as I’m enjoying the painting process in Photoshop right now. Though I wish my tablet was still supported, but it crashes everything when I plug it in, so mouse painting it is for now. Then I’ll have to settle on the design for my two lead characters, and some peripheral materials. But that’s a decision for future me to wrangle with, not present time me.

Slowly filling in the background of the illustrations. Some I like & will keep, while others are a starting point to be improved upon.

Still working out every single day. I used one skip it day, when my back was really jammed up, so I’ll take that 24 hours of no weights, or body weight exercises as a small win. As I came right back too it, instead of three months from now. I might even ride my bike today. Or I’ll shape up the hedge rows in the yard. Or continue to line the curbs. Cutting away all of the over hanging mess along the far side of the property.

Trying to stay busy, and focused on getting things done around here while I can. More outdoor birthday parties coming up, so saving things for the weekend weather gets harder to do, when I loose prime sunny working hours. No matter. All good here. Stay strong, we’re all ready at Thursday! Yay!

123 – easy as do ra me, simple as ABC…

What a funny looking number. Looks fake to me. Or oddly staged, as though someone were trying to find a random number. But here we are on day 123 of writing every single day. Yesterday I sort of completed my story arc, and now I’m trying to decide if I need to add an epilogue to fill it out a bit, or just leave it be. I could easily fill book three with the whole thing in greater detail, but I’m not sure at this point if I want to. Feels a bit rushed, but that’s the thing, building up to nothing is how life tends to feel. Blink, breath or loose focus for an instant and it’s all over and done with. Like studying your whole life for an event, having a sneezing fit that obscures the brief pinnacle moment and you’re left wanting at the end. Tragic, I suppose. Inevitable? Not sure. But that’s how I write. The fiction in my writing is that nobody gets off scott free, they all die in the end. Not so true here, is it. Awful, horrible people shrouded by money, privilege and power can do as they please and languish in luxury until their natural deaths. Fuck that, I say. Treat them as you would any, and every throw away character. Boring, work a day deaths for all involved, hero or not. A stubbed toe that gets infected, and they die of blood poisoning even though they were set to ascend the power structure or live forever after one more minor detail was completed. Nope, not on my story arc, fuck face. You die, no pomp, no circumstance, no banners or lying in state for you. Left to rot and decay in a random unlisted room someplace. Maybe the janitors turned off the environmental controls after cleaning, and didn’t realize you had a panic room back there, but were so cheap you used Company environmental facilities instead of paying for your own separate supply, and it’s constant maintenance. Ha. Eat shit.

I’m thinking that as the weather gets better, I want to focus more attention outside at the house. Windows, tree pruning, the lawn, the gutter blockage, driveway, vehicles. I’d like to start the screen door or coffee table build soon. I’m thinking about sculpting more again too. Playing the guitar and/or piano is somewhere I’d like to focus my attention as well. Same with teaching the kids about baseball, soccer and bicycling. We got out yesterday morning and played some ball hockey which was a lot of fun. So much to do, and try to focus on. Easy to get paralyzed by it all and wind up doing nothing at all. Except write. I’m pretty good of late about doing some of that every day.

Oh-oh, Spiderman No Way Home arrived this week and I got to watch that with my wife one evening for a date night. I ended up having to work for forty minutes in the middle and missed a chunk, but I liked what I saw the first time around. Watched the middle portion the next day, and liked it even more! Was pleasantly surprised by it all. Made me tear up in a few spots too. Not that that is particularly difficult as I get older. I’m sad that some major plot points were spoiled for me on Twitter, but I still enjoyed the whole movie anyway.

Hope you enjoyed all (41) forty one parts of book two, The Ghost of the Dirty Starling, as much as I did writing them. It started out heading one way, and moved around a bit, and was ultimately a fun little novella to write. Maybe now that it’s off my shoulders I will write some one off’s about my dad life experiences. Or not.

Something unexpected that I was proud of in 2021.

Earlier this year I built a series of four terrain panels, each measuring two feet by two feet, and almost ten inches tall on the highest elevation. I was originally going to build just one, but I had such a good time making the first that I decided to go ahead and all three more to it to make a larger gaming table for D&D or war gaming. It’s not something I have done before, but it sure was a lot of fun. I can see why people get addicted to terrain building and 3d printing and such. It was a wonderful creative outlet, and I wish I had the room to use and store an eight foot gaming table with modular mix and match panels. I would love to build a proper wharf, a seaside fishing town, a mountain pass, ancient ruins, a meandering river bed, a proper cliff face and waterfall, try water effects, real rock moulds with plaster of paris etc… a hot wire cutter, a grass applicator and those uber swanky high class model train trees too. There are just so many things you could do with the time and resources to tackle them. My only hope is to help my kids build dioramas for elementary school projects! Or try to build a bunch of much smaller and more compact elements, like castle walls, or ruins or individual hovels & town houses. I’d love to see any of your work if you have images handy!.

The Table Refinishing Project of late 2021

Some of you might know that in late summer through until late fall I had attempted to build a screen door for the back of my house, which I started far too late, and missed open window / wide open door season by several weeks. So that lead me to putting that project on the back burner until Spring time when I feel as though I can devote time to it, and the weather will warrant my doing so. So, after putting that on hold I wanted another project to do in my down time between paid graphic design work. The table was delivered in several pieces on November 2nd, as I recall, and was in a state of disrepair.

It had cracked and crumbling paint, water stains, mould, flaking lacquer finish on the top, and smelled a bit funky to boot. It didn’t have any middle leaves, and the leg attachment points were worn out or missing or entirely broken. So it required me to strip it all down to bare wood, cut new hardwood braces for the legs, glue/ screw / pin nail portions together and then to be refinished with stain & paint and possibly if the weather holds out a clear coat on top of Varathane’s Diamond Wood Finish.

Follow along on my mini wood refinishing project from November / December of 2021

As I stated earlier, the table arrived in pieces, and I needed to break them down into smaller parts for cleaning and sanding, and looking for any major cracks, weakness or damages. This didn’t take me more than about thirty minutes for the whole table. I knew the leg braces were either missing or broken, and that the lower portion of the table legs would need some putty work. No big deal there. I opted not to use any chemical strippers on the table as I don’t have an exhaust fan at the moment, and smells from the garage make their way into the basement (which isn’t ideal). So I used sanding, a whole shit load of sanding. I went from 40 to 60 to 80 to 100 to 120 to 220 grits on all of the parts. The table top I went an extra step and went up to 320 grit, because I had it, and it gets so smooth, it feels like glass. My work flow was to do every piece using the same grit, so that I always knew where I was with my sanding schedule. It helps that this old workers table was put together with a lot of screws, so I could disassemble it easily to get to all of the nooks and crannies. Also made putting the sections back together a breeze.

The legs were by far the most difficult portion to work on. I had originally thought I would chuck each leg into my lathe, turn the speed right down and sanding them with little to no physical demands on my body, but my four jaw chuck choose this moment to crap out on me, and replacing it was too expensive at this point in time. So the forty dollar heat gun makes an appearance and storms the barn! It was great. I could get through one leg in about 1 hr. After I had the heat gun and putty knife put away, I turned to a curved card scraper to really get in there and get those layers of nasty chipped old paint off of the legs. Leaves a nice finish that is easy to sand – relatively. Then it was about four hours of hand turning the legs with one hand, and sanding vigorously with the other. My forearms and hands did not appreciate this at all. Once I got up to 150 grit, I used an air compressor to blow off the dust that gathered in the crevices. I used the bolts to hang them up along my garage door, and then used a rattle can of white paint/primer 2X to paint them a bright white again. Originally I wanted to go with a softer off white, borderline yellow – feel more french with the walnut top, but I couldn’t find any, and I wasn’t going to drive all over town just to not find it. I let those hang dry, and then I artificially antiqued them with some 220 grit sand paper, and they were done.

If it weren’t so close to zero degrees celsius here in Ontario I would venture to add the spray on clear coat of Varathane Diamond Wood Finish, but I don’t want it to get chunky or spit out blobs that you can feel under your hand. So all in all it took me about twenty hours over six weeks to get this project done, and I enjoyed just about every minute of it, except those spindle legs! Straight blocky chunky legs only next time!

Two years ago I refinished a rocking chair, but I can’t find any of those images. Next year I hope to tackle either another table or perhaps a chest of drawers or an old hutch of some kind. Hope you have a great Holiday Season, Merry Christmas, and Happy New Year! May your wood working DIY projects go smoothly or at least teach you a valuable lesson. ~M

The last big ticket project of 2021

Well, that is unless I decide to trim out the basement bathroom, but that’s another matter. This project that I picked up again today is the screen door for the back of the house. Now I originally started this last year, or possible the year before that. I know the Ash took forever to flatten on my Busybee planer, and it pushed my Ryobi table saw to the near limit. Since my project is just shy of 2 inches thick, and i had to cut all the pieces down to just under four inches wide. The snipe on such heavy pieces was a real nasty pain to have to deal with, but I went longer than needed to try and limit that to the outer most edges that I could cut off, which kind of worked, but not as well as you might have expected. Plus my garage is tiny, and building an eighty inch long door, that’s about forty inches wide is harder than you might have guessed. But I took a day or two’s worth of time and milled it all up, and jointed the edges and then left it to sit in my garage for a year or so. Now, after all this time, I am once again, back at it. Today’s foray into wood working saw me using a SKIL® circular saw to cut the beginnings of my tenons on the long pieces of the door body. Took some getting used to holding the saw 90 degrees to the floor, but I see it done regularly by Youtube® peeps like the Samurai Carpenter, and his stuff always looks clean AF (Never mind he’s been at that sort of thing for a decade or two!). So after getting my heart rate back down to normal, I put on my head phones and goggles and I fired up the saw and took to making all eight of my cuts. At least, that was the plan initially. Then I quickly stopped after only four, because I’m shit with the circular saw, and want to see how I progress with a hammer and chisel to take out the meat of my mortise. If that proved to be a less dangerous affair then I would cut those out now, and get my nerves back for more circular saw cuts later on. One hour of hammering, shaving, peeling and general buffoonery with hand tools later, I had my first full through cut mortise completed. And she’s a dogs breakfast if ever I saw one. But I got it done, and I think I know how to improve for when I go back for numbers two through four. The tenons will be done on my radial arm saw, because that I’ve done before and I’m more confident there. I also need to leave more wood on the tenons so I can make a snug pressure/friction fit due to my shaky saw work previously. If I don’t manage to get the door together and up by November first, then it’ll be a May 2022 project for sure. Don’t aim for perfect, aim for done!