What’cha gonna do?

What’cha gonna do when they come for you… there, have that ear worm rattling around your brain for a bit now. Misery loves company, and my parents taught me how to share. My gift to you. You’re welcome.

Saturday we are in you! Suns up, snow has settled, wind has died down, and the kids are up & fighting. Hard to believe that March Break is here already. Still feels like we should be closing out January, and not be nearing the middle of the month of March. Time is moving along at a great clip. Too fast some days for my liking. But that may just be because I have been busier than usual since January.

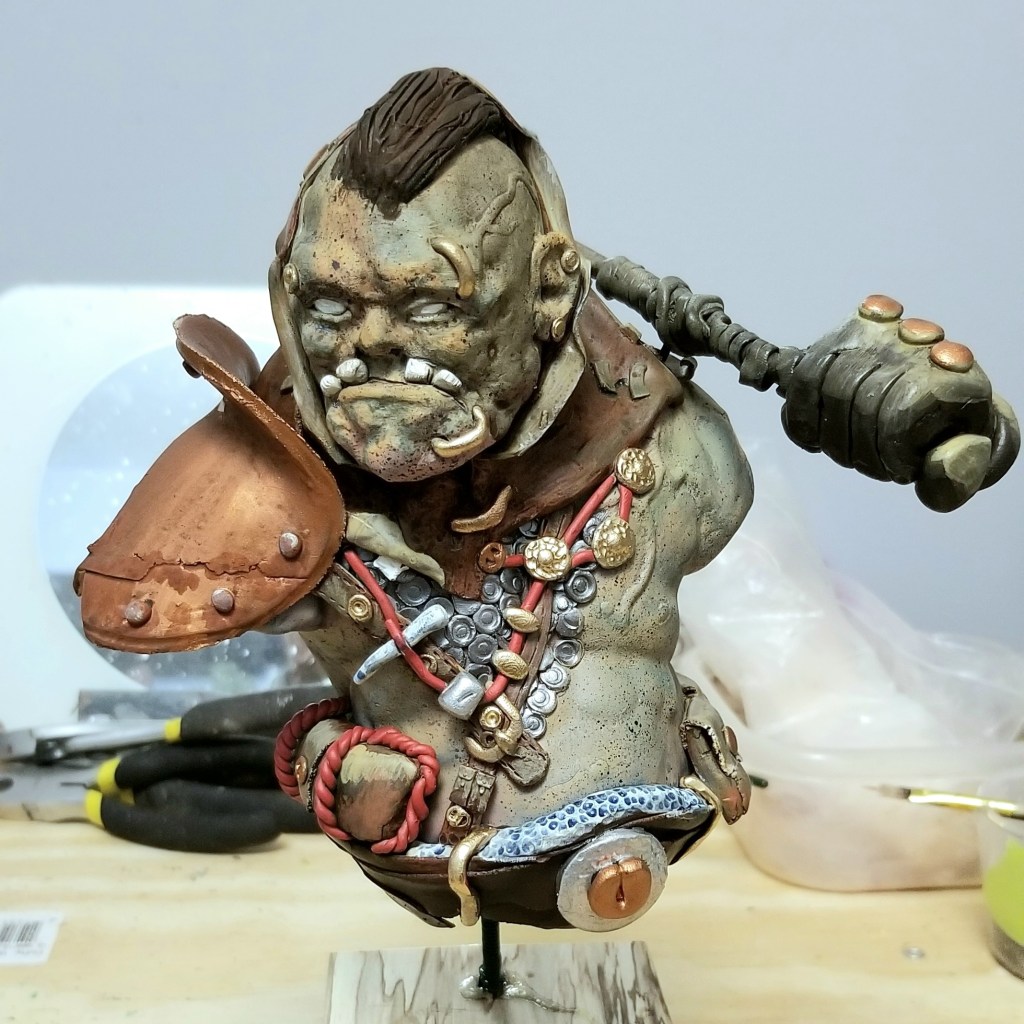
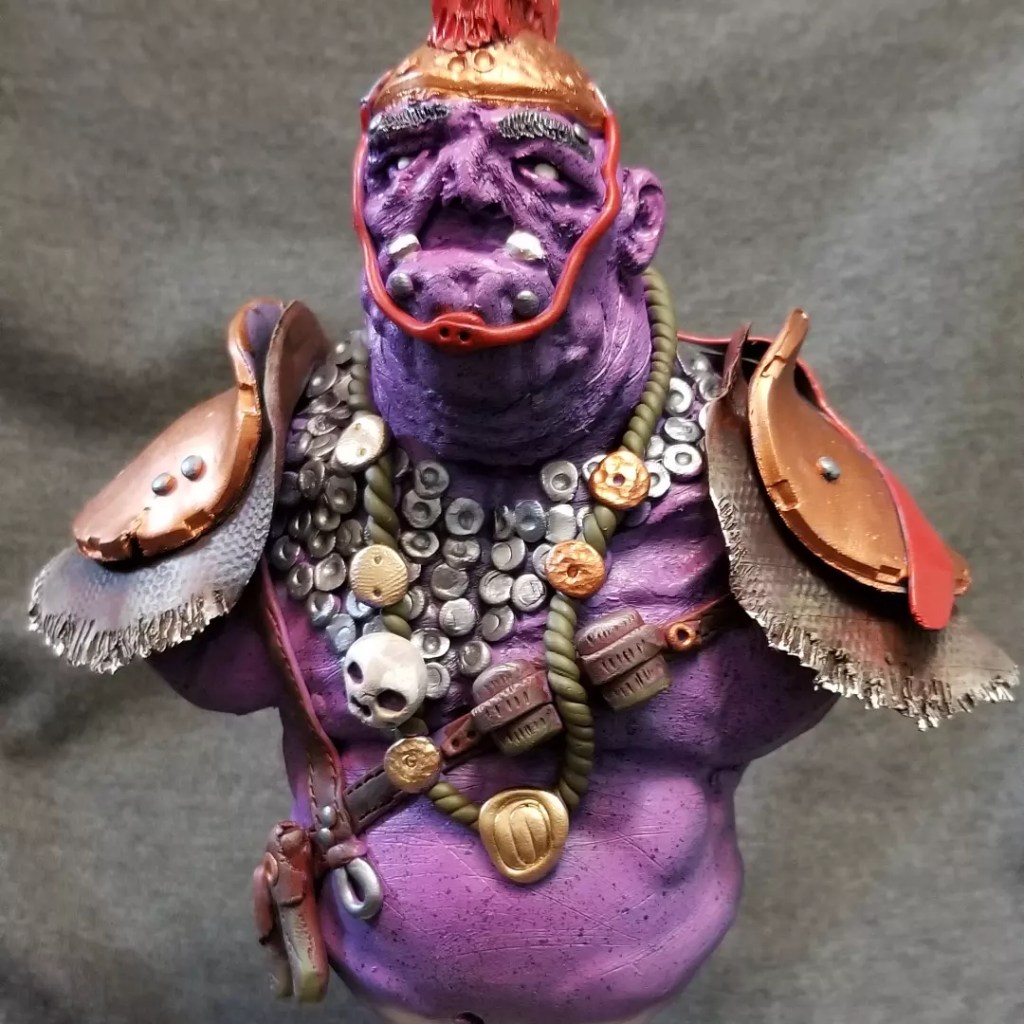
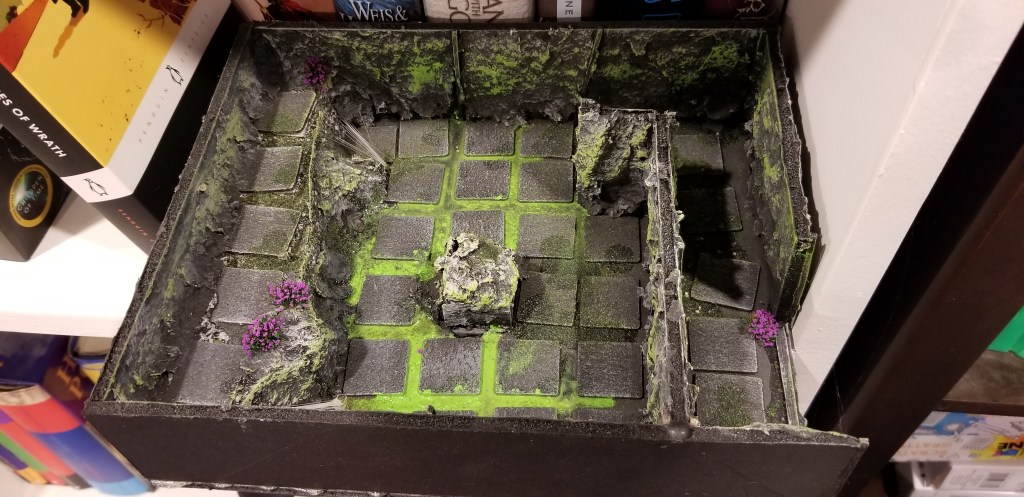
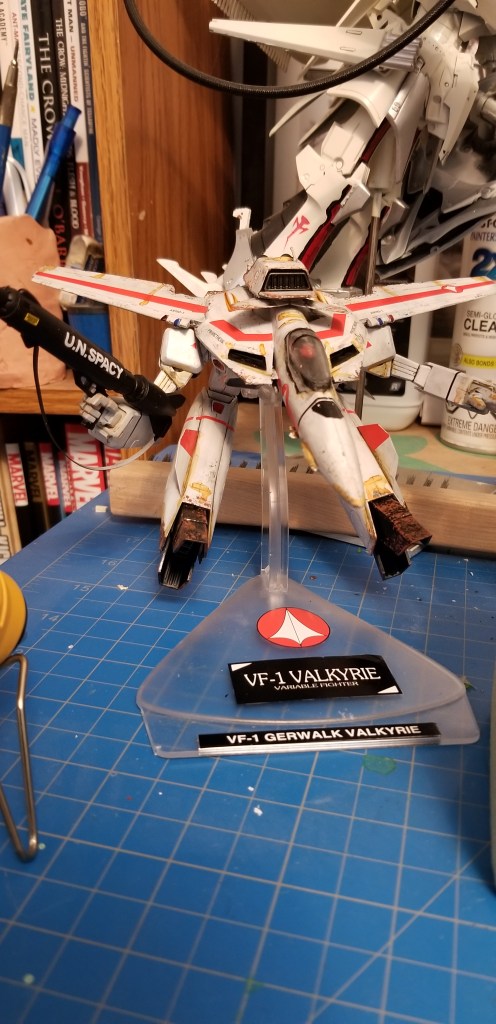
Yesterday I broke out my airbrush to prime & get some gradient paint layers on some board game minis I have. It’s the Nemesis expansion pack with Voidseeders. They were primed black. Base coated purple and then over sprayed with magenta. I dry brushed the bases with gun metal, and that’s as far as I got before I had any work related emails to content with. I want to do some edge highlighting around their squid like faces, and then pack them back up into their box. Prior to Christmas I painted the original Alien figures a pale blue grey, with blood splatter accents. It was fairly bare bones. I just wanted some colour, and not a *box art* look. I don’t believe i could achieve that anyway, given how sloppy of a painter i am. My bust sculpts prove that point. My latest Macross build will second that sentiment.

Voidseeders prior to highlighting and dry brushing, and washes.
Macross builds.
Macross VF-1 S Valkyrie.
Ogre Rogue painted by me. Skin tones gone awry.
Ogre Royal Guard. A pretty pink/purple gradient for skin tones.
Warrior bust.
Elf Rogue hybrid.
Stroke victim Hellboy.

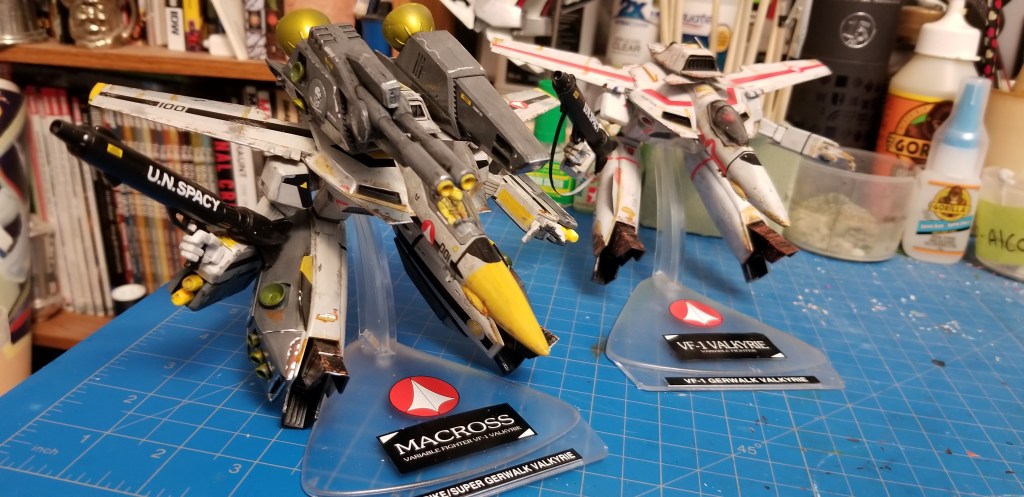
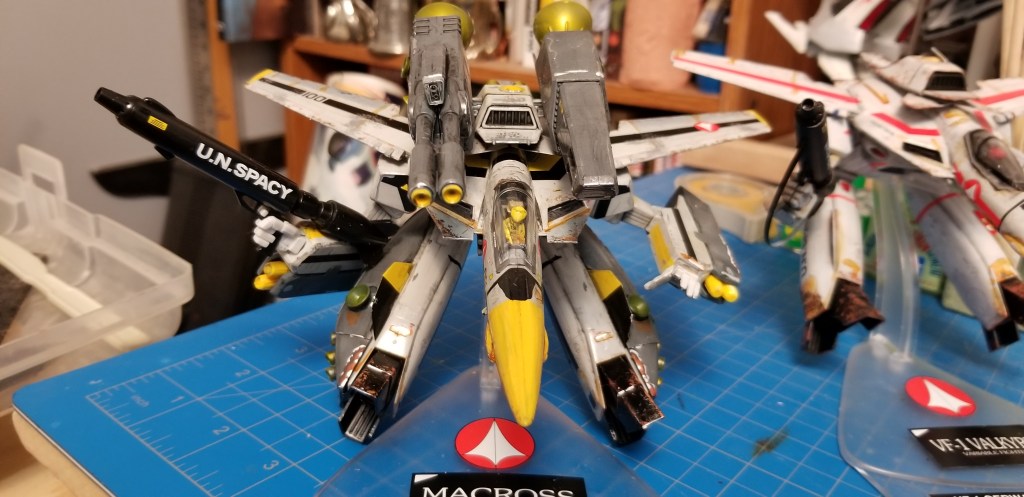
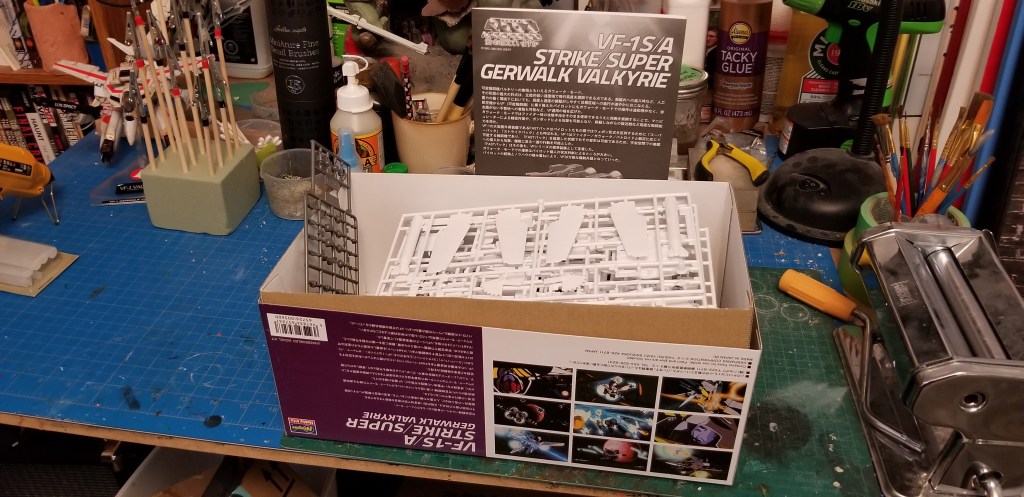
I like to paint, I’m just not that good at it, as of yet. I certainly improved over the course of my two Macross build ups. So that is good to see. My masking was a bit better with the thinner low tack tape. Though, I will say this, it still pulled some paint off ruining hours of layered painting. Which I was not happy about. But I got it all sorted out. More of a time suck, than a project ruiner. Glad I wasn’t doing gradients, as that would require an entire repaint of the whole part. I have fun painting, namely because it isn’t my job, and I don’t really need to stress about it. I try to do a good job, but it’s not a big deal – to anyone else – if I cock it up. That’s on me. I have a box of more than 100+ minis coming my way in the next year or so, that I ordered off of Kickstarter. So I’m trying to figure out an easy way to achieve decent results without having to devote an hour or more to each individual figure. Base coat black primer, and zenithal grey highlight, with a white dry brush does much of the heavy lifting for me at this point. So that might be as good as it gets for a while. I don’t see myself dropping other hobbies just to be painting miniatures as well as their box art. I like to see others doing so. But not for me, thanks. Good on the table from 2 or 3ft away is my objective.

My oldest would like to start painting minis with me some time soonish. So I’ll need to figure out a good way to show her the process I follow to prepare each item for the real paint job. I’m not sure if she will want to be a part of the priming, zenithal high lighting, and white dry brushing process. Or if she wants to slap colours on, and do edge high lights and detail work. Maybe I’ll wind up doing the prep and she will excel at the colour/detail portion. Tag team duo! Tackling monsters, space aliens and soldiers alike! Deftly and with aplomb. A dad can dream. Ciao Bella!

What to build next…

I know I have a model kit on my work bench at the moment but I’m starting to think about building a small self contained terrain piece. Like a specific set of ruins for a church or temple. I have a couple of good chunks of foam board left, and a whole bunch of air dry clay that I recently recieved. I guess if I can find a brick pattern stamp I could do the flooring aswell inside the terrain piece. Then using industrial adhesive, super glue, and a hot glue gun, I could put it all together pretty quickly. Give me the chance to try properly ruined architecture.

I don’t have any more trees on hand, but I do have grasses, scrub brush, and a few shrubs and flowers. So it’s not like it’ll end up barren looking. I have sand, stone and grout too. I could do something from a desert climate. This is when I wish I had a closet full of rock moulds, plaster, trees, and static grasses & an applicator. Damn!

Half full bags of materials.

I don’t have a whole lot of room left to store stuff, so it’ll need to be shoe box size or smaller. My shelves aren’t that tall, so I can’t make the whole temple or church ruin. I guess it would be more of a diorama piece. Damn. Now I’m excited about it. It’s going to stay on my mind for ages now. But I already bought a new paint series of eight colours for my VF-1 Valkyrie model. I should really complete that first. I should… but.

Box of parts that need to be cut off sprues, and partially assembled before I can prime & paint them.
Shoe box sized self contained dungeon.

The other day I had an idea for a new sculpted bust too. So I’m going to need to make a bunch of new bases on the lathe. That takes a day or two as I have to glue up a bunch of Walnut pieces, or find a suitable maple log portion to be turned into fancy rounds. That’s a good way to get my wood working fix in without having to touch a hundred icy cold hand tools. If I use a long enough chunk of wood I can get at least four or five bases out of it. Plus sanding and slicing it up, more sanding and finish. That will satiate a bunch of create pangs I’ve been having.

I think I am slightly more interested in painting my model kit, than the initial (and very important) build up. I need to be more slow and methodical, so that it looks better generally than the last one I constructed a few years ago, and only recently painted. I can see several rough spot where I didn’t cut all of the tabs away. And my build was sloppy. Forgotten pieces, and glued on elements that shifted or fell over entirely. My decal application left much to be desired as well. Yikes.

Previous build up, with recent amateur paint job.

Plus a new larger paid project came in so I can’t jump on any of this stuff right away until the majority of my day job projects are well under way. Glad for the work though. So now I just have more time to day dream about my hobbies before I actually start any side projects. Not to worry. Once I’m in a comfortable spot with my open design jobs, I can pick up a brush, nippers, or a file and chip away at all of this stuff. Plus somewhere in the middle I will find the time to play guitar/bass and the keyboard songs I know. Sometimes I think I have too many hobbies, but they really do add a dash of something extra to my daily life. So not all bad then eh? Right.

Building war gaming terrain.

If I had the money and ample storage space I would spend so much time building war gaming terrain, that it isn’t funny. There is just something about it that is very therapeutic, and satisfying. Turning blocks of foam, paper and paint into a vivid playable landscape is really a tonne of fun. I’d make waterfalls, river beds, canyons, open plains, castles and mountains, as well as dungeons. Hand built houses, and guard shacks, sheds and windmills, the types and styles of out building to create is nearly infinite. Oh the possibilities are endless. Alas, the flocking, static grass, miniature trees and supplies are neither free to a good home nor cheap. Those awesome tufts, and miniature flowers all come from Europe with a hearty shipping cost per item. A static grass applicator or any provenance will set you back nearly $200 bones after shipping and import fees. Plaster of paris, rock moulds, sculpt a mould, paper mache, glue, it all costs money to keep, and space to store it all. I do love it though. And therein lies the rub. I do love to build things, of all sorts, but our house is small, so where on earth do you keep it all? Plus all of the additional tools of the trade for scratch builds, and modifications to store bought materials. Paints enough to fill racks, boxes of moulds, and cartons of flocking. No wonder the Youtubers work out of warehouse spaces. Not to mention the fumes from cutting styrofoam with a hot knife. Phew! Stinky. Not good for you either. But still, isn’t building terrain awesome!

Keep in mind that I am no expert, I turn to Youtubers like Geek Gaming Scenics and Real Terrain Hobbies, or Squidmar Miniatures for all sorts of helpful insights. Those folks all get paid to build amazing terrain, dioramas and such. I have to imagine, that just like any hobby, once you start to get paid for it and have client demands it loses some luster and gains added layers of stress. Things I don’t want. I just want to build it. Loud music, imagination, and testing the boundaries of what I am capable of bringing to life. I hope my kids need to build dioramas for school someday, so that we can kick ass and go for broke!

I haven’t made anything new, terrain wise in more than a year, perhaps more. I moved into furniture to satisfy that bug. But here’s a gallery of some miniatures, pre built purchased sets that I painted, and my hand crafted terrain tiles, that are a uniform 2ft by 2ft square.

Now I do apologize if the following video I took makes anyone **motion sick. You’ve been warned.

Fly over of my terrain board.

As always thanks for looking. Ciao Bella!

Something unexpected that I was proud of in 2021.

Earlier this year I built a series of four terrain panels, each measuring two feet by two feet, and almost ten inches tall on the highest elevation. I was originally going to build just one, but I had such a good time making the first that I decided to go ahead and all three more to it to make a larger gaming table for D&D or war gaming. It’s not something I have done before, but it sure was a lot of fun. I can see why people get addicted to terrain building and 3d printing and such. It was a wonderful creative outlet, and I wish I had the room to use and store an eight foot gaming table with modular mix and match panels. I would love to build a proper wharf, a seaside fishing town, a mountain pass, ancient ruins, a meandering river bed, a proper cliff face and waterfall, try water effects, real rock moulds with plaster of paris etc… a hot wire cutter, a grass applicator and those uber swanky high class model train trees too. There are just so many things you could do with the time and resources to tackle them. My only hope is to help my kids build dioramas for elementary school projects! Or try to build a bunch of much smaller and more compact elements, like castle walls, or ruins or individual hovels & town houses. I’d love to see any of your work if you have images handy!.

Well, I’ve gone and done it again. Terrain build #3.

I’ve always wanted to have an interconnected series of gaming terain boards and now I’m on a mission to complete all four 2ft by 2ft boards.

The third installment sees us come up against some steep shoreline, more water, cliffs, and a ruined temple upon a plateau with trees growing out of its discarded rubble. I also tried something new with this build in terms of materials: namely tile grout that hardens to stone with the liberal application of just plain water. Choosing the right colour was/is an ongoing challenge unless you can store multiple sacks and/or boxes of the stuff.

Here are the build images in progression.

Cut out the foam, add the wooden rocks, add some tile grout/stones/sand for texture. Block it all into place with papier mache.
After the grout has dried.
Primered in black for a uniform colour.
Dry brush grey.
Dry brush beige.
Dry brush titanium white on the top most portions of the rocks and rubble.
Slather on watered down mixture of earthy brown paint.
Block in my water.
After adding the various colours of flocking, tufts, trees and more tile grout. Also added some clear gloss varnish to the water.
How the current three tiles fit together. Waiting on ideas for completing the fourth. Will either be a rolling hill, or a two tiered piece with a surprise.

If you looked this far, and read that, thanks for following along. One more build to go and then I’ll have to move on to my woodshop projects. Almost finished the Harry Potter trunk I’m building for my daughters book collection, wand, robes, tie, glasses and D&D dice. All I need to finish it is the burgundy felt I ordered to line the inside in Gryffindor colours. Catch you around.

War gaming board build number two.

So the crafting terrain building bug has hit. And it hits hard. Like a sledgehammer to the skull, when things go right anyway. Shortly after completing the first board with a mountain and some water and hills, I found a second 2ft by 2ft board and started another portion. They go together to make one longer playable table or can be used separately. I ordered some new parts for it, but I had enough to finish it with what I had laying around. Could put some extra bits on later, but I don’t have to.

Same process as before. Glue on foam to the board. Cut thicknesses to make obstacles and elevations and landmarks. Glue on thick bark chunks to make rock walls (this part was new, last time I just used paper mache and a tin foil mould). Bark was simple and cheap. Found lots in the yard. Washed and dried it, then glued them on. Add pebbles, rocks and sand. Added paper mache in a thin layer to cover the foam and block in the bark to make the transitions seamless. Let dry in front of a fan over night. Spray paint with black primer. Let that dry over night. Dry brush my grey/beige/white layers on the rocks. Add watered down brown to my ground portions of the terrain. Flock and decorate. Done like dinner.

Let me just sneak this in here, I also wrote a whole slew of short stories, some take place in space. Check them out. An interconnected series of short stories set in space. Cheers! -M