The Big Reveal Day.

We managed to get a substantial coat of wax on the shelf unit yesterday, and we’ve given it twenty four hours to dry, and now I’m going to bring the shelf unit inside and begin to tidy up the living room and all of the loose toys. We have canvas bins that will fit nicely, so I’ll bung loads of gear into those, and leave the top for dioramas and play sets to get left in situ.

So far so good the wax is dry, and the unit fits in the space. Though I seem to have misjudged the thickness of the baseboard. Most likely due to the quarter round against the floor, which I failed to notice. Oh well. It fits in between the fire place and the front windows, and tucks under the windowsill of the fireplace wall. Fits over top of the fireplace kick out, and does not cover the wall socket/plugs/outlet. I am mostly happy.

Fits in the space, given all of the restrictions. Just not as snuggly against the wall as I was aiming for.

Next steps. Clean and sort toys on the floor into bins and cubby holes, and then sigh a breath of relief that it all works mostly as intended. I may still need to cut a 2″ hole in the top for power cords to more easily access the wall sockets/outlet, but we’ll see.

Looks as though I can get a vacuum underneath it fairly easily, which is a plus with my messy family. Updates to follow, as I get through the last leg of this project. Looks as though with the help of the toy box, and a couple canvas bins I have been able to leave as much playable surface as possible for the kids, and can still access both windows, and not interfere with the floor vent or fireplace. I’ll call that a win!

Floor is now empty of toys – for the minute the kids aren’t here that is!

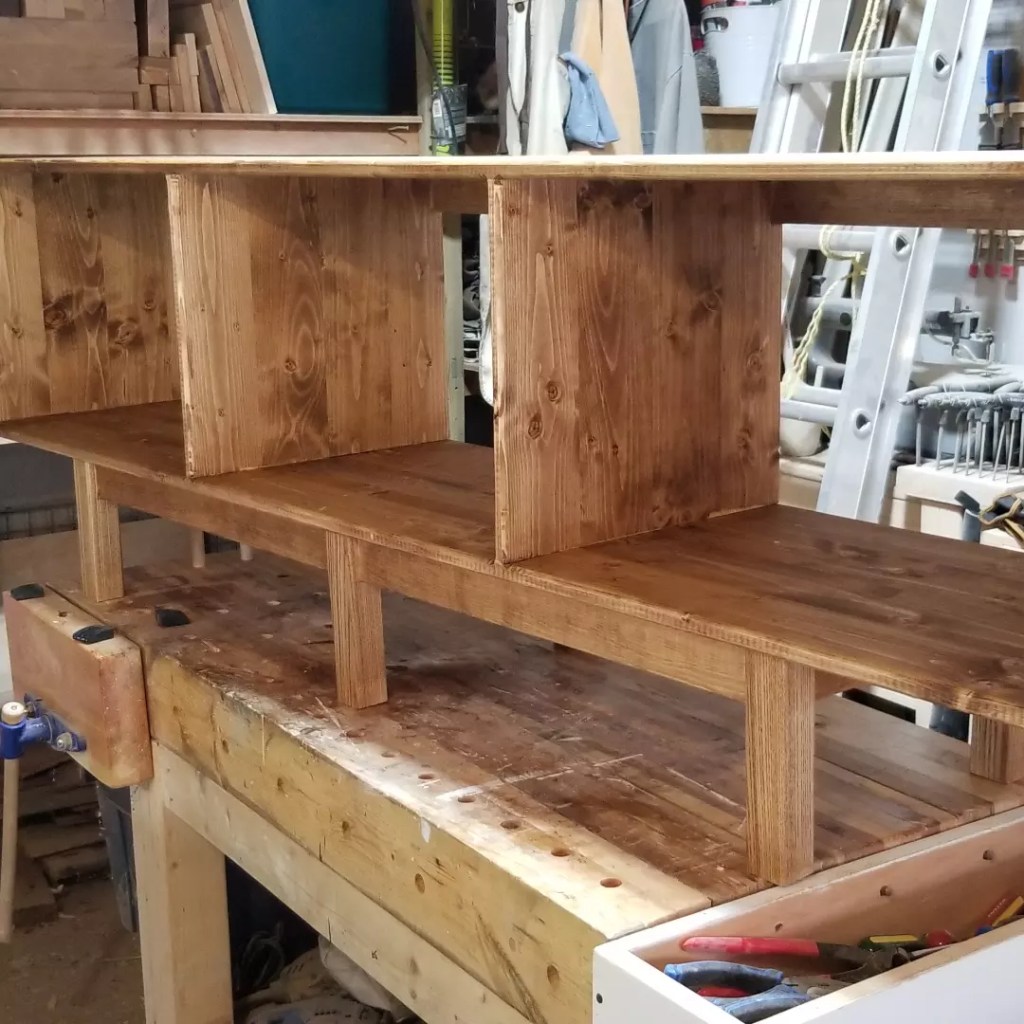
My only qualm about it now that I’m done, well – beyond one corner not being 90° against the fireplace so the error is very easy to see. Is that I should have put in a second tier to one of the cubbies. Most likely the one with the wall socket contained within. Then I could have used that shelf to store the kids chrome book and have a dedicated charging spot that won’t get bumped or knocked. The shelves are 16 inches deep, so you really have to try to get at something pushed all the way to the back. But whatever. I can build an insert out of plywood for that, if it becomes absolutely necessary.  And to think I sat on this idea and ruminated over it for weeks before I got started. How did I miss a dedicated charging shelf? Idiot. No matter. It’s done, it works, and I’m happy with it. Mostly. For now. To think if I had of made it from Walnut that would have been a $1500.00 job, easily. Just in materials, not even time and effort. It would also weigh about 200lbs if done in Walnut. Using pine cut both costs and overall weight, by an awful lot.

How I see it when seated to watch tv when I’m at home alone. Looks reasonable to me. Yes, I wear crocs, how suave of me.

The Shelf Unit Episode: A Tale Told in 275 parts.

The unit is finally taking shape after a few weeks of lingering on the bench, languishing in stoppage after stoppage. I still have quite a ways to go on it, but progress has been made over the last week.

I hand cut all twelve mortises. Well two of which, the through and throughs, were done on the table saw once I had build a quick & nasty jig to clamp the legs to so as to not put my hands near the blades. But all of the .25″ deep mortises were chiseled out by hand over two or three days. I am currently busy with paid design work. So I’m slow moving with home infrastructure projects.

Hand cut chisel mortises.

Then I completed a dry test fit which lead me to do some last minute rasp work for better fitment. Nothing major. I put the whole base together to test things out which was tricky to do single handed, as my pressure fit mortises are shallow, and I knocked it down a half dozen times tugging on corners that weren’t square. But I got it to stand freely of it’s own accord.

Test fit of first two hand chiseled mortises.
After considerable wrangling I did manage to get the whole base dry fitted together and it stood by itself for 24 hrs without collapsing. A good sign!
You can see here how shallow I cut those mortises. Just a tiny pocket to rest in. So delicate.

Then as of yesterday I began to glue up the cross braces for the base, three pairs of them. Glued and clamped for assembly. No real hassles here. I glue up on my bench over blue plastic garbage bags. Only need to glue a vital piece to your wooden bench once to know never to do it again.

The braces in glue up. One tricky leg needed a set square clamped in place in order to remain 90 degrees. Probably should have done them all like that. Next time!

The top box was formed several weeks ago. Measured, cut, built using a dowel construction method, sanded, glued up, and sanded again. Still needs more sanding and then I can stain both it and the base portion together. Then I will use dowel to connect the two pieces, apply finish and bring it inside.

Fixing a dowel burst on the display surface. Peeled back a strip of pine, chopped out over long dowel, glued and clamped pine strip. Seamless.
In need of about two more hours of focused sanding. Then it’ll be ready for stain & finishing.

I’m excited to see it all come together. I used three 72″L x 16″ W x .75″ H pine laminated boards for the top box. Plus 1.5 72″ x 5″ x .75″ pine boards that I cut down into 2.25″ H strips for stretchers and braces and used along the back of my box to strengthen it against any possible racking. The six legs are made of Ash, and are 1.75″ x 1.75″ x 8″h. That I had laying around from a new set of stairs that got put in at the cottage two years ago. I’ll post a photo once I get it all completed and set in it’s final resting place in our living room.

**UPDATE** I managed to get Walnut tinted Danish Oil stain on the base and shelf portion, as well as put in the dowels to join the top & bottom together. Waiting on the glue to dry as we speak. Last item is a 400 grit scuff followed by some Osmo poly clear wax to pick up the shine/gloss. So excited!

Walnut tinted Danish Oil on the base.
Walnut tinted Danish Oil applied to all of the shelf unit.
Test fit for base placement prior to drilling out and fitting the dowels to join the two pieces. Almost finished. Can see the finish line from here!