The Table Project: Told in Six Parts, over the next three months… or not.

Had two hours empty yesterday before I needed to pick up the kids from school so I eagerly jumped into the garage wood shop to begin sanding the old scratched finish off of the table. All three portions are slightly different colours due to sun exposure, or lack thereof. The middle leaf being the darkest and most lustrous due to never having been used. So I took up my brand new belt sander, which immediately started to blow scorching hot air out the back, melted the finish I was trying to sand off, directly into the very fibers of the sandpaper belt, and I had to switch back to my trusted Milwaukee orbital sander. Ugh! I honestly wanted the belt sander to work so that I could cover more square inches faster. Maybe I’ll need to save the belt sander for higher grits that take less pressure to remove. The heat bothers me, as the sander is brand new, and never used before. So not too sure about that.

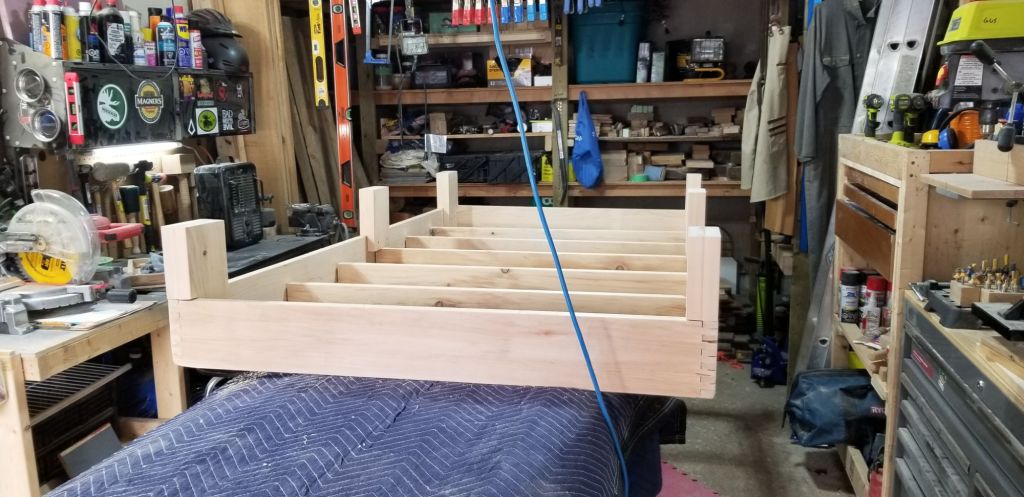
But plan was/is : remove old stain and finish on top surface, and around the sides. Sznd through the grits (60, 80, 100, 120, 150, 220) blowing off the dust inbetween. Spritz with water and sand again at 220 grit. Round over the outside edges, as the table is a wee bit sharp as is. Sand as needed. Apply Danish Oil with a darker Walnut stain in it. Wipe off excess. Lightly sand with 300/400 grit sand paper. Reapply Danish Oil. Let dry. Buff with 400 grit sand paper. Apply wipe on poly finish. Then set the table top aside, and begin cutting my Walnut legs, gluing them up, drying, trying up the faces, chopping to length, rounding over edges, and then building captive boxes specific to each leg, in all four corners of the table. Drilling out the fixture holes. Screwing in the inserts. Then wiping on my poly finish to the legs. Disassemble, and bring down stairs into the basement to replace crappy old folding table where the kids play legos, and do puzzles.

I could be done in three/four days, or it will take me until December to complete. Hardly any inbetween around this type of thing. Life/work gets in the way. So there is that to look forward to. I didn’t take any pictures yet. May only do so once I finish the whole project and set it up down stairs. So stay tuned for updates on this potential catastrophe. Should be a fun time had by all.

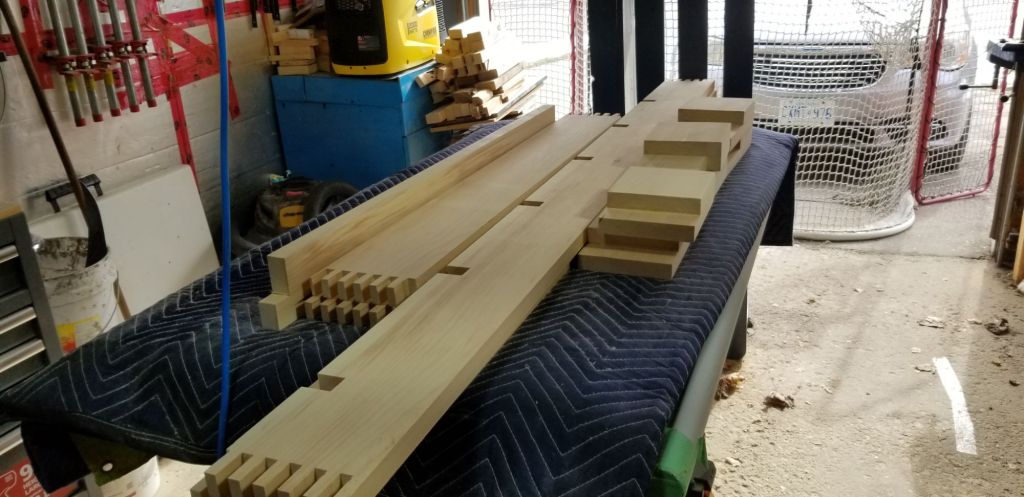
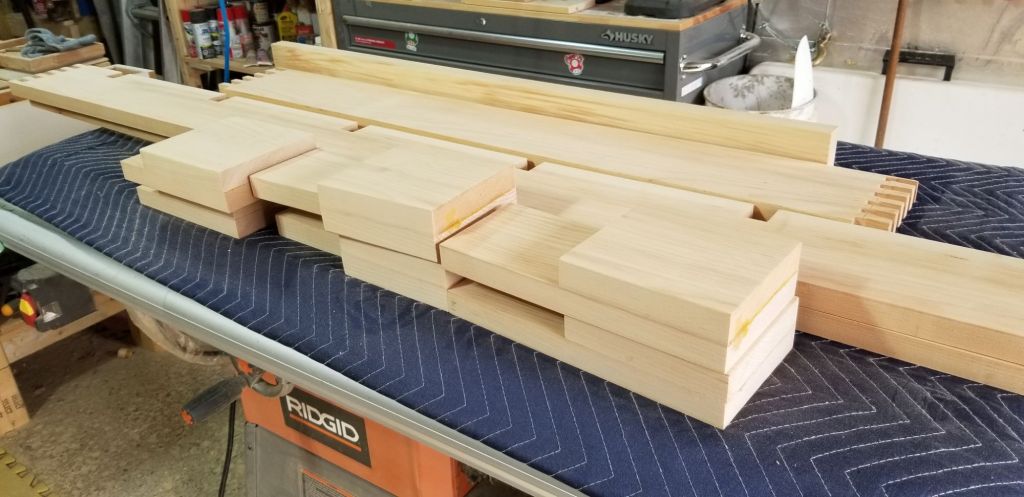
***Editor’s note: Turns out the fancy shmancy mahogany hard wood table is actually Poplar with thin veneer on it. Which I sanded through in spots die to how bad the gouging, scraping, and scratching was. So, change of plans. Sanding to 220 only. No roundover on top surface. Danish oil, with no poly top coat. And I’m going to make Ash legs, and not waste my Walnut on this cut rate table. So I’ve spent some time cutting, and milling an Ash board to make four sturdy legs with no glue ups required. Still need to make four captured ends to lock them to the table though. Will still round over the legs. But now they’re going to be more square in profile than rectangular. No big deal. I’ve jointed one face, and one perpendicular edge. Now I can run them through the planer. Cut the two bits into four matching legs, and finish those up without any need for glue. One fewer piece of Ash to get in my way. Also – saving my Walnut for another project, SCORE!

Upon sanding out the gouges I’ve learned that this is a veneered Poplar table.
Danish Oil Walnut Stain will not cover the veneer wear through. So a new line of attack is required. Now, it’s just a refurbished crafting/homework table, rather than being entirely “restored”. I don’t wish to redo the veneer. I don’t have the patience, tools or know-how for that. No desire either, at this point.

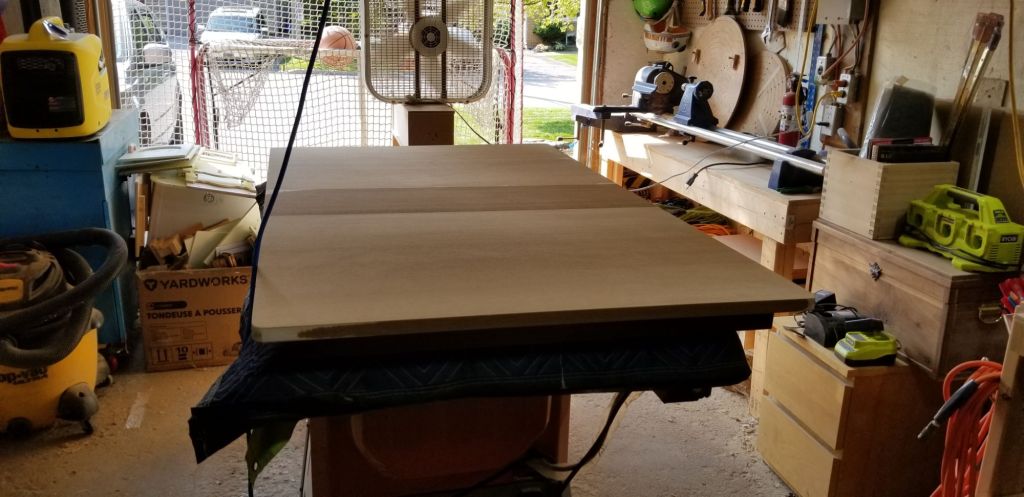
As you can see, even after removing the original fi ish (image not shown) the middle leaf is still an entirely different colour from the rest of the table. I’m going to lean into that mottled look by using Ash legs, stained in a Walnut oil. Sturdy, but not an heirloom piece to be coveted by children, and extended family alike.

Slapping some stain on the old girl.

It was sunny and plus thirteen for about 90 minutes earlier today, so I popped out to the wood shop and dashed some Walnut coloured Danish Oil Stain onto my youngest daughters new single bed frame for the cottage.

I started by spot sanding a few bits that didn’t get all the love they needed the first couple of go rounds, and then spent a few minutes dusting it off with the air compressor. Then I splish-splashed the Danish Oil rub on it with a very wet foam brush, and ran through a few clean rags wiping it off. I think I managed to avoid runs in the finish, but I’m sure there’s one someplace very visible that I couldn’t see while I was bustling away this AM.

Good thing it’s so light weight, I didn’t need to call for help to move the whole thing around while I worked. Rests on my bench easily enough. It’s times like these that I am thankful for all the space saving theatrics I’ve had to undertake recently. My old layout would never have been wide or clear enough for both the frame and me. No chance I could have freely walked all 360 degrees around it before. I could still do with the whole shop being a good 36 inches wider, but that’s a very expensive construction matter. Also not going to happen. No way I tear down walls, and add roof for just three feet. Plus the property line is right there and no municipal office would ever grant me permits to get closer than eight feet to the line. So I’ll do what I can with what I’ve got.

Side bar: I am toying with the idea of taking down the pre-built racking that looks kinda shifty, in favour of metal racks, and reclaiming higher up wall space, but I need to get rid of several stored doors, and car seats, strollers, and household junk before I do that. It needs careful planning. I could benefit a great deal from doing so, but it’ll cost me both time & money, and a fair bit of aggravation to boot. I’m thinking it over. But I digress.

The Pine bed frame is one inch thick, with box joints, and a slatted cross member design. The feet all screw on, and the slats screw down into their mortises for extra peace of mind. It’s light weight, and has been stained to a Walnut brownish tone. One single pass. I’m told with Danish Oil I could do multiples, but I find one wetly soaked coat works fine for me. It ain’t no heirloom quality piece but it should last a few years. I hope.

(Fig 1.) Pieces break down. 6 feet / 6 slats / 2 rails & 2 ends.
(Fig 2.) Hand scraped finish, but sanded to 100 grit. Very rustic appearance.
(Fig 3.) Assembled upside down. Original Pine colour showing.
(Fig 4.) Starting to Stain with it still upside down. Notice how much room I now have to get all the way around it! Ohh- Aah.
(Fig 5.) All stained up, drying & off gassing that nose prickling oil finish smell. Could stay in here for a few days getting that smell to dissipate.

Finishing isn’t exactly my favourite thing to do. It’s sticky, and smelly, and finicky too. My shop doesn’t have an air cleaner, nor do I use anything better than a shop vac to control the dust I make. Not good for high end, ultra high quality finishing. But I get it done regardless. Although now the temperature has plummeted down to minus one, and will go even lower and bring in some snow too. So I don’t know how anybody can plan around this type of thing. Well… a temperature controlled working space would alleviate those stressors, but I ain’t got that kinda dough just lying around for a quirk of mine.

So maybe a single spray on layer of Diamond Coat will go on next, or not. This piece may not be worth the additional effort. It will get scratched & marred. I’m none too concerned about that. If I can get a shot of it in situ up north I’ll update about the bed frame one last time. Take care out there. Ciao Bella.