The Resin Build: Partial hiatus interrupted.

I did not intend to work on this item much while the sun was out, the temperatures warm, and my kids were home this summer. And for the most part, I did not. However I did pick away at one piece or another during the few short periods we were home and not busy with other people or things (such as the fridge or water softener).

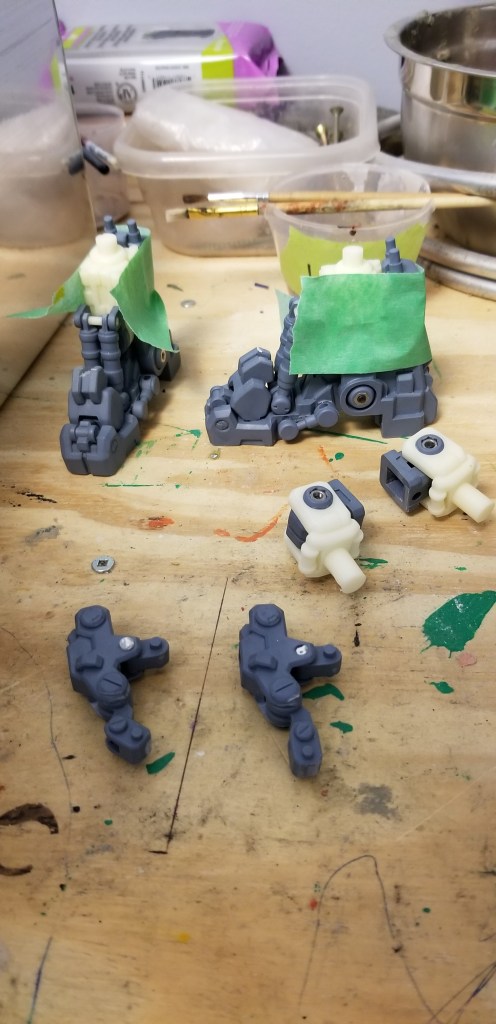
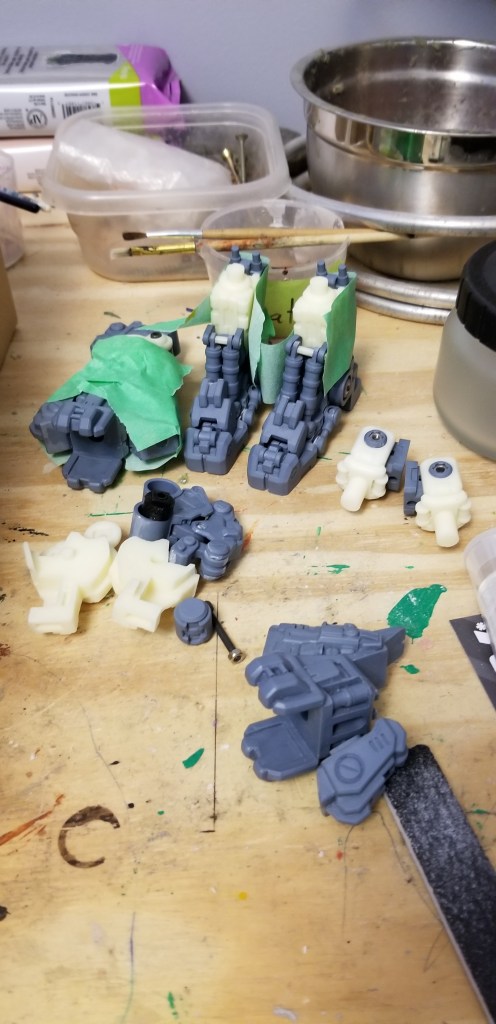
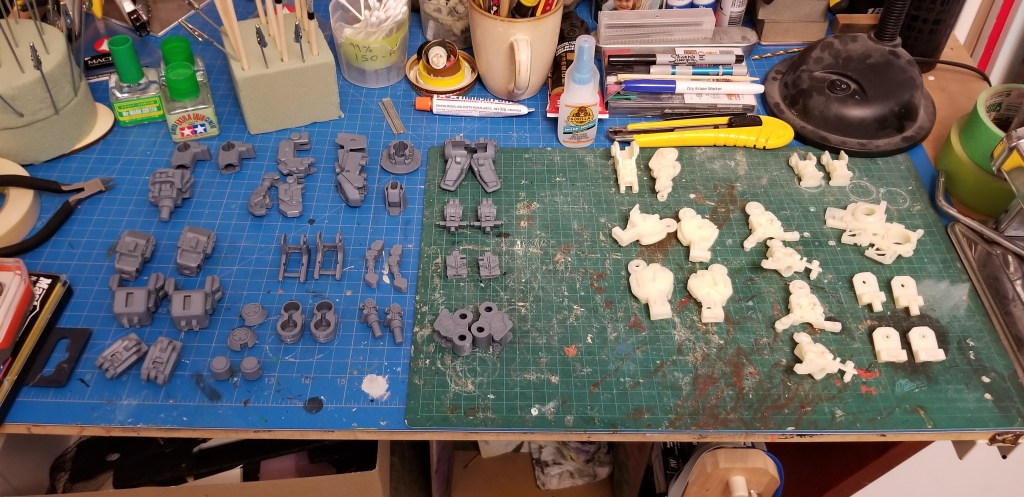
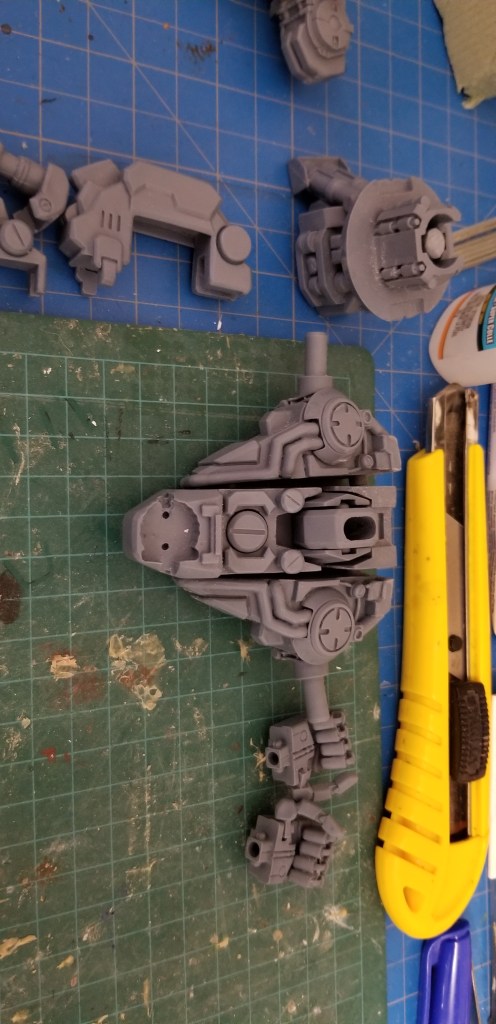
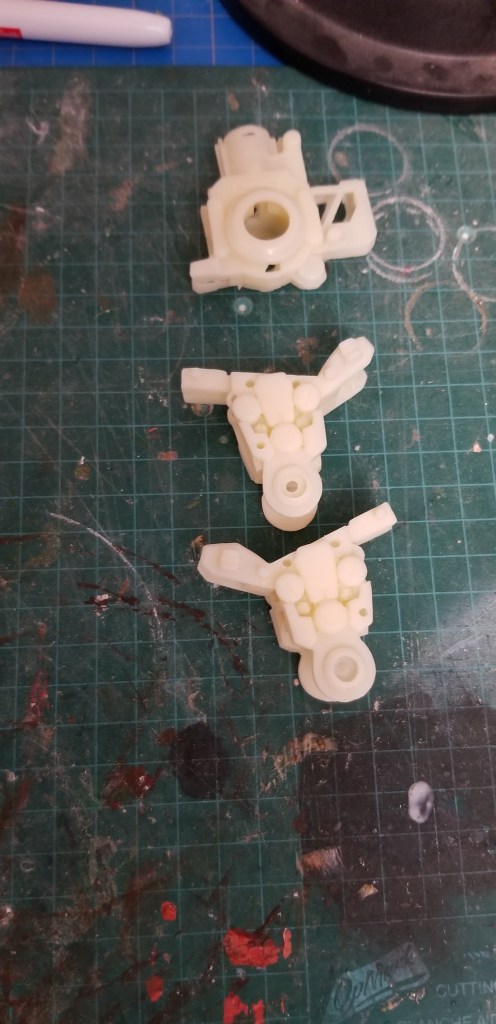
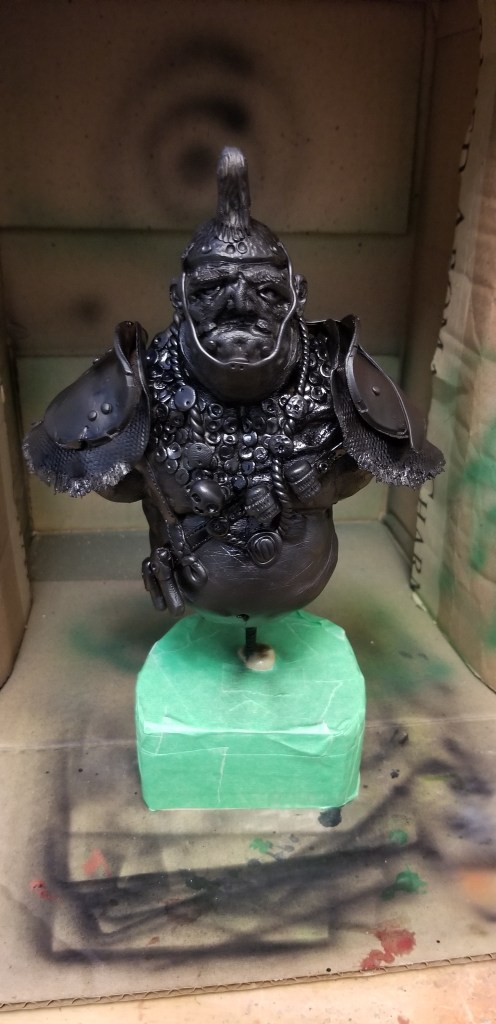
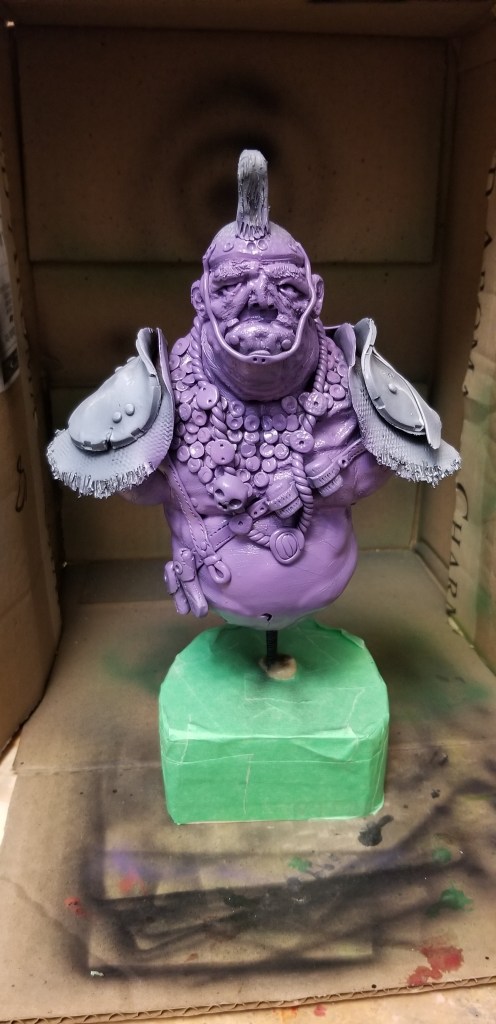
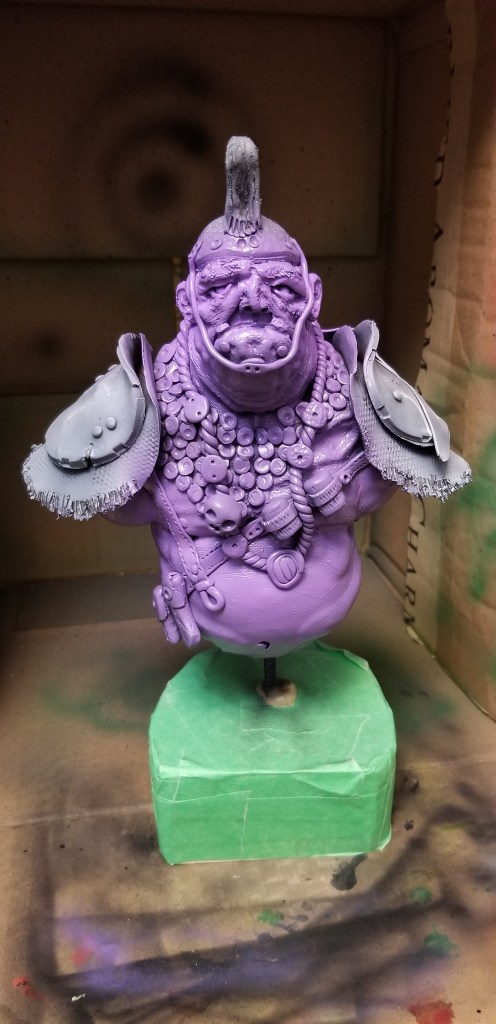
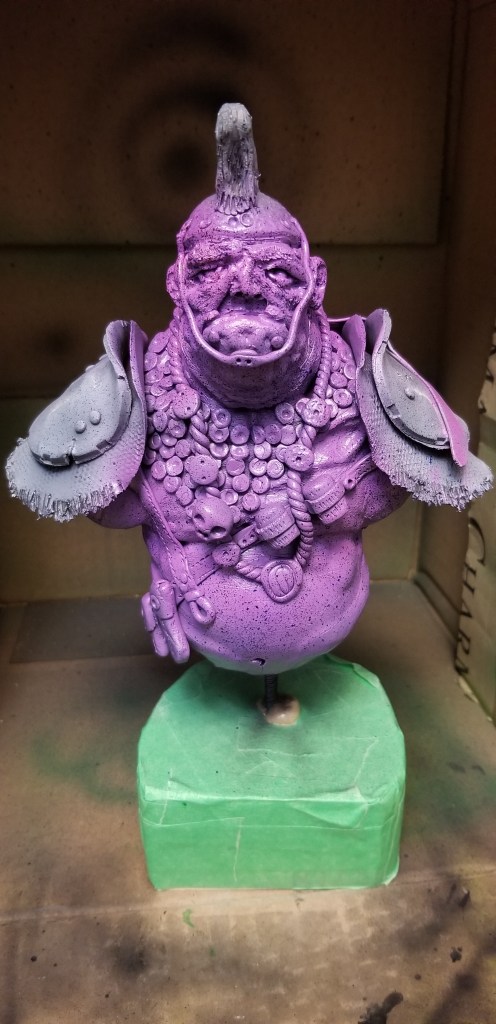
However, new season, new me, sort of deal here. Kids are in school, and September has been quiet on the work front. Until now. Now I have two of the six confirmed paid projects lined up and ready to roll. But inbetween these quiet days I started to pick away at the resin kit again, and now all that is left to prep are the arms and shoulder flaps. So I’m considerably further along than in June when I stopped working on it. I will still have lots of putty work for holes, bubbles and seam lines, but otherwise I am nearly ready to primer the whole lot, then do the actual paint job, and final assembly with the metal parts. It will require extensive panel lining, and the decals are many! Will be a while yet before this thing is done. But forward progress is being made!

So that is where this resin model kit sits. I need to wire up the chest. Pin the chest together too. Lots to figure out still.

Not to mention I got started on my youngest daughters pine bed for the cottage too. Of course once I got stuck in I now have proper paid assignments to finish, but that’s freelancing for you! Gotta fill your time, and then do your hobby around the real work that actually pays the bills.

Bed frame project is moving along too. Milled up the rough cut pine lumber. Cut my finger joints. Cut up, glued, and hand planed my individual legs. I need to test fit the frame together, and then I can start on the cross beams/slats that will hold up the box spring and/or mattress and then stain it all up, drill holes to pin the legs in place, and get it to the cottage. Potentially I may card scrape, light sand some outer sections, and round over some straight edges to make it less of a toe chopping weapon of a bed. But that will be done later. Like mid October later. I’ve got lots to do right now, with the fair, Thanksgiving, Halloween Haunt, Halloween itself, the damn fridge being stupid. Lots to get through before I can put any sort of significant brain power into my hobbies. Happy Domestic Duties Monday! Ciao Bella!

The Urn Build : Finale Episode… sort of.

I have finally managed to get all three pieces built, sanded up to 800 grit, and now it has one coat of clear coat on it that has been buffed to a higher than usual (for me) sheen. I have it drying in the garage, where it can spend the next 36 hours off gassing before I hand it off. All that is left to add are the tiny rubber feet for the bottom, so as not to scuff the surface where it will reside.

I added one tiny step, by using a blow torch to add some colour, and visual texture to the central column. I am glad I did a test burn on some scrap red Oak, so that I could change my plan up a bit mid stream to work on the central column and not the cap/case topper. A darker base makes it feel more grounded, and less visually monotone. The grain pops with the Osmo finish I used, so it looks pretty sharp. I do like how the blue felt looks against the red/tan tones of the red oak. I could have gone a bit more fancy, by using dove tails or a box joint for the central column, but the butt joints are sturdy. So C’est la vie.

I will need to blow off the felt with my compressor to get rid of the dust, and add four feet, then it’s off to the future resident. Tick that one off the to-do list!

No finish, but assembled.
Lid off central column with tray still inside.
Lid, central column and removable tray.
All three pieces with clear coat finish applied.

Needs a touch more clean up, and out the door it goes! Happy Easter weekend everybody!

RESIN: The journey begins. Part 1 of 20.

I took my second tentative stab at working 9n my resin project yesterday. I’m not sure how much I should count the first attempt from several years ago. I guess since I started to clip off the resin pour gates it should count for something, I suppose. Yesterday I put some time & effort into sanding, gluing, and assembly of the inner structure. After the few hours I put in to the feet, calves, and shin portions, I think this is going to take me several weeks to complete. And that may not even include priming, painting, and the final metal detail bits, nor the massive water slide decal sheets. But, I have started and made considerable progress! Yahoo!

The other thing I have come to realize is I must have bought a recasting, mainly because the box doesn’t have the hologram  stickers on it, and the multi colour cast resin, is not the appropriate red, yellow, grey, and white as mentioned in the instructions, but 90% beige, and 10% grey. Plus the castings aren’t very crisp, and lots of the holes are plugged and need to be drilled out. But! He says, but… I’m only working through the internal structure right now, and I don’t intend to make the armor removable, so I think, with a high chance of certainty, that much of the blemishes and such will be covered up by the big chunky armor plates. Now if those suffer from the same quality issues, I might have a problem. But battle damage, and weathering could potentially cover that up if need be. I probably shouldn’t have been so worried about building it, as it has some quality issues that I can’t do much about, besides work around it all. Although truth be told, I am glad I did those two Macross Valkyrie VF-1’s recently, that has given me more confidence to tackle what looks to be a 16 inch tall model, possibly taller with antennas, and metal spiky bits. I’d love to use my USAF colour scheme on this item too. I really like the cool blue greys I used on my latest Macross Gerwalk model. I will need to source a high quality yellow paint, as the yellow ink doesn’t cut it. To Amazon then! Or I’ll find a very light brown that I can tint with the yellow ink. We’ll see what the budget is like after tax time.

It all started with the hips. Then putting the gigantic feet together.
The calves enter the conversation.
Parts break down for removal of gates, pour spouts, and some rough sanding.
Dry fit parts for subsections of the build. Shoulders, forearms, elbow joints, chest, waist etc etc…
The chest in its chunky glory.
Upper thighs and groin (which has a tonne of flashing, and miss moulded parts).
The box with all the other parts still bagged up waiting for my attention. Hours, days, weeks worth of work without any painting included.

So that’s where I am right now. I will soon get the second leg as far along as the first one, then I’ll tackle the arms and torso. Wish me luck!

Are you an over the knees or around the ankles kind of a person…

Well now, that’s a deeply circumstantial – and awfully personal question. And the answer is, it depends. Am I home, away, early in the am, very late at night, inebriated, hung over, under gastrointestinal distress? Everything factors in to the answer. No way would I let fabric touch a public men’s room floor. Nu-uh! No way. Never. But if fighting for my life on the seat, may strip down entirely (when at home). Who needs clothes on when it feels as though your entire life is draining into the porcelain. Unwanted firehose spray back is a powerful deterrent. Like I said, that is deeply personal, and I thank you for respecting my privacy at this time.

Tuesday – forgot it was recycling day today. Saw the neighbours gear out front and twigged to it, luckily before the green trucks came through. I didn’t even register it was going to be Tuesday while prepping for gymnastics last night. Usually I pull the bins out of the guard box on Sunday or Monday to load them up, and be ready to spring into action anytime after 7:00am should I hear the grumble of the green trucks on our street. But I completely blanked on it. How odd. I have been fairly busy straight through since January 2nd this year, which is – really, really rare for me. No major breaks as of yet. Oh I know they’re coming. Highly unlikely I’ll be this busy all year long.

I had to put the Urn build on hold due to the cold, and volume of work I had on tap. Glue doesn’t set properly in deeply cold weather. And as mentioned before, no major heat source out there right now. I have it partially insulated, but I have a long way to go before the temperature would stabilize enough to work comfortably between December and Mid March. The base is done, the exterior chamber is done. I have the pieces for the interior cut and ready to glue in place. I have the top of the cover ready, and can build the tray and cover fairly quickly. Then it’ll just be a matter of scraping, sanding and then a highly polished finish to make it shine! I’m ok if they decide to not want it. I’ll put it in my office closet up out of the way, and can hold on to it for myself.

Started a Richard Morgan book I’ve had in my possession since 2007. I remember how much I loved the Altered Carbon book series. This is in that universe, but not directly related. I have a fantasy novel he wrote from 2008 in my to read pile too. I usually tend to buy more books than I can read in a year, so I’m happy to oblige historical me, by actually getting around to reading books that have sat on a shelf for ten-fifteen years or so. I know I have a Mo Hayder book I haven’t read yet too. I’m usually not into horror / murder books, but she writes great, creepy, gripping stuff. The current Richard Morgan book I’m reading is “Black Man”. Longest book I’ve read in quite some years. Over sized paper back with tiny type. So I feel like it would be a much longer trade paperback than the page count it currently has. I’m two fifths of the way in. Lots of action, lots of science fictiony hand waving tech jabber, and lots of mystery/suspense. For some reason I thought I had read this when I kept seeing it on the shelf, but it’s not ringing any bells no matter how far I get into it. Which is great. I hate when I forget I’ve read something before. Invest all that time to read it, and then PING! oh! I know how this ends, oh I’ve read this before! Damn it! On to the next book.

I haven’t put any time into sculpting yet this year. I know I will at some point. Just not right this minute. I haven’t put much thought into finishing up the illustrations for my childrens book either, come to think of it. I really should get that stuff squared away. Not that my writing career will ever go much beyond this space, and self publishing. Sometimes I just gotta get a story out of my head. Doesn’t have to mean anything more than that. I share it, if anyone besides me reads it, or enjoys it, all the better. Hope I made you smile, or wince, or chuckle, or cringe. Better than straight up apathy. You know what I think? I think that many of you out there have a story you want to tell. I think you should put pen to paper and get it out. Just let it fall out of you. Don’t worry about style, voice, the hook, or any of that. That’s for the editing stage. Right now, go jot down some points, and just plop it out on the page. The good, the bad & and the ugly. You’ll feel better when you do. Way easier to tweak and refine what you have in your hands than wish you wrote the perfect thing in one go. But what do I know. I’m just some dude talking on the internet to the three folks that read me off and on. Hey guys! Hope you are well. Ciao Bella!

The plan, the plan. What!?! Is the plan…

I think I’m going to aim for 400 days of blogging, creative writing, and a general sense of nonsense and then reassess. I didn’t really have a plan beyond wanting to do a little writing every day for a year, and well…. now I am beyond that by a slight margin. I don’t have any goals for writing beyond the mere act of doing it. I try to get more concise. To limit run on sentences. To be more coherent in general. I’d actually need to reread a portion of last years posts to see if I managed to achieve any of those things. So, I’ll go out on a limb and I will say, sorta, kinda, maybe?

I do use this medium to moan, and lament about daily struggles and annoyances. But believe you me, I don’t have it too bad. I’m doing just fine. I could do with slightly better gut health, but otherwise, we’re all good. I just love to narrate a good gripe, every now and again. For those at home keeping score, I have Domestic Duties Monday’s, which sometimes gets bumped to Tuesday. I occasionally do movie reviews. Mostly if they are awful, or evoke some type of emotional response from me. Rage being a perfectly reasonable response to write about.

Rarely, I will cover retro gaming with my kids. As I have access to a Sega Master System, PS1, Nintendo 64, Super NES, Atari game system, Xbox , and an Xbox 360. So for older games we got you covered! I had kids so the PS4 & PS5 sailed right by me without waving. So nothing more recent than late stage 360 games get reviewed here.

I sometimes cover wood working projects, home DIY items, and my own spin on sculpting monster/creature busts and figures. I don’t recall ever discussing my music tastes, or instruments, but I can if I felt like it. I have taken to assembling an instrument stock pile, so that my kids have access should the mood take them. Key board, guitars, possibly drums, a violin, and a clarinet. Maybe we’ll form a family band just for kicks to keep ourselves occupied in the future. Who knows.

I just feel like I want to quit dreaming about things, and just go do them, regardless of being an awful noob and all. I don’t need to be any good, I just want to do the things, and experience them first hand, instead of watching others do the thing on YouTube. Perhaps building a new skill, or just preparing the way for my kids to learn, and do new things too. No point being miserable doing only what others expect of you. That way lies madness, depression and misery.

So in short, I don’t know how much longer I plan to keep going on a daily basis, but whatever I do, it’ll be more of the same. With the caveat that I might stumble upon a good short story theme or character, and then light up this phone with new installments. Fingers crossed. Ciao Bella!

Did I Manage to Salvage the Ogre Rogue… You Tell Me. The Painting Episode: Take Two.

So in our last painting episode I attempted something which I had not done before, a realistic human skin tone. I had the appropriate paints, I was following along step by step, and I even added flecks of mahogany, green, blue and red for that authentic splotchy skin we all have. And then I got real heavy handed with the last two layers of high lights, and washed it all away. But not before I added the blue glaze to add some of that Ogre ‘otherness‘ to his look, and it all went to dog shit.

I had some thoughts regarding going right back to primer, and trying again from the start. I was all ready nearly three hours deep on the paint job at this point, so I instead opted for a quicker fix. It wouldn’t help with my over sprayed shading issue, being that I had mostly erased all of my layered shadows. But I pressed on. Adding a new round of flecked speckles. At this point I was happy enough (I guess?), and dug in to painting the rest of him. Chainmail, cowl, hair, teeth, eyes, belt, furs and trinkets. I tried to get a rusty feel to the pauldron, but as I started with a Copper look, a blue/green patina would have worked better, in retrospect. No matter. I put his crows beak/war hammer back on, and painted that a little. In all honesty the weapon requires a lot more work at this point, but I’m over it for now.

I had some EU labels come in, and the spectre of another report or three looming, and I don’t want to invest more time on the weapon right now, as the paid work can come in at any second. Gotta stay nimble as a freelancer. Hurry up & wait is real common round these parts.

Anyway, here he is, and here is how it’ll stay for a while longer. Perhaps come January, in my down period I’ll pick him back up and polish some edges. Behold, the thing I have made.

95% complete Ogre Rogue bust I sculpted this year (2022).

It looks like a thing, so I have that going for me, which is nice. Otherwise all I have left is the no name brand Ninja Turtle character I have left to paint. Could just leave it as plain Apoxie sculpt though. That’s a thing that people do these days, just leave it in it’s original colour. I can get behind that I think.

The Rogues Gallery of 2022 sculpted items, and their paint jobs.

The SlapDash Painting Episode, No° 108.

I have recently been revisiting my old no name air brush. I picked up a wide variety of Vallejo paints, primers, thinners, and washes so that I could paint my latest round of bust sculpts. It has been a trying time, to say the least. But as I progress through my eight recent builds I am finding a stable, and repeatable method to getting half way decent results.

I am working off of the following methodology. A flat black primer over the whole bust, followed by a grey primer that I spray top down for stark contrast high lights. Then I use a mid tone, straight from the bottle to cover the whole sculpture. I use a darker colour to then paint from the underside only. Then I use a 50/50 mix of mid tone to first highlight, spraying top down all over. Then the high light colour at 100%, top down only. Focus primarily on head shoulders, and ear tips, and maybe belly if my character is fat/barrel chested.

At this point I pick up a tooth brush and then fleck a deep red, blue and green paint all over the bust, avoiding armor if at all possible. Once dried, I go to my last 100% colour and knock those flecks back a tad. And then use my final highlight colour to brighten up the face and very tops of the shoulders only.

After this point it’s all brush painting for metallics, leather straps, skulls, and anything else that wasn’t skin tones.

1.) Flat black primer.
2.) Grey primer, top down only spraying
3.) Mid tone all over.
4.) Darker under colour that is sprayed bottom up. 5.) First highlight sprayed top down and all over.
6.) Second highlight colour top down. More focus on head, neck & shoulders.
7.) Flecked red, blue & green paints for skin variations.
8.) Knock down flecks, and add next highlights for face, and shoulders only. 9.) Begin brush work for metallics and all other elements.

I’m not actually finished with my Ogre royal guard yet, so I’ll have to cut it here. I should note I’m using craft paints that I have thinned with a Vallejo acrylic thinner. I wanted something a bit different to my regular green, brown, red or blue palettes. Looks nifty. I think. Still has a long way to go. Catch you around.